• Steel Soldiers now has a few new forums, read more about it at: New Munitions Forums!

  • Microsoft MSN, Live, Hotmail, Outlook email users may not be receiving emails. We are working to resolve this issue. Please add support@steelsoldiers.com to your trusted contacts.


What did you do to your deuce this week?

Valence

Well-known member
Steel Soldiers Supporter
2,131
605
113
Location
Davis County, UT
That install job is looking real clean; nice.

I lost track of the reason for the relocation of the vent off of the axle; what was that?
Thanks, but not as nice as peashooter's ;)

Having it that high would low deeper water fording. Not that I intend that at all. Others will just secure the vent hoses high on the frame. I just really like the look and location of the manifold. The bottom could be plugged then just pipe the top over to the air filter housing, or to a pressure regulator to keep light air pressure in there (to quote what others had posted: 2-4 psi)
 

sigo

Lieutenant Colonel
Steel Soldiers Supporter
1,684
353
83
Location
Leavenworth, KS
I washed it! Looked almost like a new paint job. I should have taken a before picture. It's been parked under a large pine tree so it was all streaked with yellow pollen. It looked horrible.

IMG_2869.jpg
 

Valence

Well-known member
Steel Soldiers Supporter
2,131
605
113
Location
Davis County, UT
I drained and refilled the transmission and transfer case. I used a flexible funnel and filled from inside the cab. Surprisingly slow going. I ended up just filling the funnel and going to do something else and just climb back into the cab from time to time to refill the slow flowing funnel.

image.jpg

While I had the floor panels removed I also put on the shifter boots (I used Mr. Gasket 9649 shifter boot like I read someone else on SS using). My goal was just to cut down some of the cab hot air flow. The boot fit really well over the transmission shifter. However, the transfer case lever rests nearly on the floor when in low range and the boot on it doesn't quite let it go down as far (this did prevent using the fancy metal top like as seen on the transmission). I believe that low range is still fully engaged, but I will need to drive it (especially on a bumpy dirt road) to be sure. I may need to cut that boot. They look real good once painted. Maybe I should have used olive drab instead of the 383 rapco since the inside of my truck is still mostly the original olive drab. *shrug*

image.jpg image.jpg image.jpg image.jpg image.jpg image.jpg image.jpg image.jpg image.jpg
 
Last edited:

Valence

Well-known member
Steel Soldiers Supporter
2,131
605
113
Location
Davis County, UT
Last edited:

rustystud

Well-known member
9,071
2,388
113
Location
Woodinville, Washington
I drained and refilled the transmission and transfer case. I used a flexible funnel and filled from inside the cab. Surprisingly slow going. I ended up just filling the funnel and going to do something else and just climb back into the cab from time to time to refill the slow flowing funnel.

View attachment 557812

While I had the floor panels removed I also put on the shifter boots (I used Mr. Gasket 9649 shifter boot like I read someone else on SS using). My goal was just to cut down some of the cab hot air flow. The boot fit really well over the transmission shifter. However, the transfer case lever rests nearly on the floor when in low range and the boot on it doesn't quite let it go down as far (this did prevent using the fancy metal top like as seen on the transmission). I believe that low range is still fully engaged, but I will need to drive it (especially on a bumpy dirt road) to be sure. I may need to cut that boot. They look real good once painted. Maybe I should have used olive drab instead of the 383 rapco since the inside of my truck is still mostly the original olive drab. *shrug*

View attachment 557859 View attachment 557850 View attachment 557860 View attachment 557852 View attachment 557853 View attachment 557854 View attachment 557855 View attachment 557856 View attachment 557857
I also used these shift boots for mine. The transfer case one is backwards though. If you turn it around it will work just fine. Or you can cut the opening wider to allow the boot to sit lower on the shifter.
 
Last edited:

Valence

Well-known member
Steel Soldiers Supporter
2,131
605
113
Location
Davis County, UT
I also used these shift boots for mine. The transfer case one is backwards though. If you turn it around it will work just fine. Or you can cut the opening wider to allow the boot to sit lower on the shifter.
I tried both directions. Since the shifter slot is closer to one side, turning the boot the other way (180° from where I have it now) put more of the boot material between the lever and floor, which would have been worse. When putting on the floor panel, I assumed the lever linkage could be adjusted if I really wanted to fiddle with it...
 

rustystud

Well-known member
9,071
2,388
113
Location
Woodinville, Washington
I tried both directions. Since the shifter slot is closer to one side, turning the boot the other way (180° from where I have it now) put more of the boot material between the lever and floor, which would have been worse. When putting on the floor panel, I assumed the lever linkage could be adjusted if I really wanted to fiddle with it...
I see your shifter goes closer to the floor then mine does. For me that would be too hard to bend down and shift. I'm actually thinking of going to a air cylinder to shift the lever.
 

Another Ahab

Well-known member
17,825
4,157
113
Location
Alexandria, VA
While I had the floor panels removed I also put on the shifter boots (I used Mr. Gasket 9649 shifter boot like I read someone else on SS using). My goal was just to cut down some of the cab hot air flow. The boot fit really well over the transmission shifter.
How did you manage to bend the flange (to fit the "tunnel" edge), without breaking the paint film on the flange?

Was that any problem at all?


flange.jpg
 

Valence

Well-known member
Steel Soldiers Supporter
2,131
605
113
Location
Davis County, UT
How did you manage to bend the flange (to fit the "tunnel" edge), without breaking the paint film on the flange?

Was that any problem at all?


View attachment 557915
Well, it could be any number of reasons the paint didn't crack - but I'd just be guessing - as I did expect some cracks or even stretch/stress marks. Here's what I did and I'll let you draw your own conclusions:

I first sanded one surface and edge of the shiny chrome with 180 grit, and of course cleaned the dust off. I then used spray paint cans and applied two coats of primer and then 2 coats of 383 green substitute from Rapco. It all dried in direct sunlight at about 80 degrees F the day before, so about 24 hours passed before I worked with it. The metal is thin, and easily bent by hand when the other part was secured via the 6 bolts. Again, I only bent it by hand and the bend is more rounded and was not a hard-point bend line.


I also want to point out the following to the astute observers:

Since the tunnel is tapered the bend points are not square to the base of the boot. I squared the boot off of the transfer case tunnel cover lever slot. The boot's rear-most center screw hole is centered on the slot about 1/8" from the opening. If the boot was mounted any further forward, that bolt hole would not have anything to attach to. You'll also notice that with the lever in, the boot tends to lean to the 'left' or toward the driver's side. That is purely because the lever is not centered in the tunnel slot. I wanted this. I was hoping the boot would help hold the lever slightly to the right as in high-range the lever likes to tap against my right calf and it bugs me.
 
Last edited:

Valence

Well-known member
Steel Soldiers Supporter
2,131
605
113
Location
Davis County, UT

Valence

Well-known member
Steel Soldiers Supporter
2,131
605
113
Location
Davis County, UT
Not the prettiest setup in the world (required a number of adapters) but I installed a bypass coolant filter on my Deuce.

For those who might not know, what this means is that the coolant is not required to flow through the filter to get to its destination. Yes, this means it will be much slower at filtering but will also not cause any problems if the filter gets plugged.

Seen below are the addition of the tees before the heater shutoffs - which are the inlet and return lines for the cab heater. I wanted the filter to still be able to do its job even if flow has been shutoff to the heater during the summer months. I've also plumed dual inlet/outlet shutoff ball valves on the filter base itself for less spill/mess when replacing the filter (that's the parts with the red handles).


1.jpg

Kind of a knotted mess of hoses here, but this was the result of balancing several of my goals/desires at once:


  1. The filter needed to be vertical - and it nearly is. However I needed clearance for the topmost (outlet) ball valve handle, which sticks straight up when open.
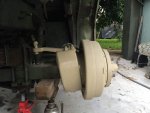
  2. I needed clearance above the headlight to change the filter.
  3. I did not want to trim the original hoses going to the heater so that my modification can actually be undone if desired/needed without replacing good hoses.
  4. The new hose I bought to run to the filter was not as rigid as the stock deuce hose and thus tended to collapse if routed too tightly. This meant larger bends and longer hose.
  5. The deuce engine vibrates a lot when running and I didn't want the new or old hoses rubbing on each other, the hood cross member supports, or anything else.
  6. The hoses couldn't be in the way of the red handled ball valves.

2.jpg

Before I did all this, I (of course) needed to drain much of the coolant. A 5 gallon bucket was the easiest container I had to drain into. But it's *mighty* difficult to fill a radiator from a five gallon bucket.

Solution1 : Fill the radiator 1 gallon at a time from a much more manageable container. But how to fill said smaller container from the 5 gallon bucket?

Solution 2: Use a funnel! But how to pour into the funnel without it tipping over or spilling when both hands are needed to handle the 5-gallon bucket?

Solution 3: Get someone to hold funnel! No one around.

Solution 3.5: Clamp funnel to handle of garbage can. 1-gallon jug is filled without spilling everywhere and funnel won't tip over. Also, when removing the 1-gallon jug, the funnel end can just be placed into the 5-gallon bucket so it doesn't drip everywhere, thus, preventing more mess.

3.jpg
 

frank8003

In Memorial
In Memorial
6,426
4,976
113
Location
Ft. Lauderdale, Florida
Installed a new coolant filter, cut open old one to find very little of anything got trapped but
that is only a few hours running time.
Put a new dust boot on left side.
A 11/32 nut driver and my favorite "soldier B" vise grips is the tools to use. Those and my clamps allowed me to get it done.
CCW use oil filter + head.jpg

IMG_5382.jpgIMG_5377.jpgIMG_5411.jpgIMG_5405.jpgIMG_5407.jpgIMG_5410.jpg
 

Attachments

Another Ahab

Well-known member
17,825
4,157
113
Location
Alexandria, VA
I have been meaning to post this one for a while now. I purchased a 3rd "Bucket Boss" cable bag to cleanly store the nylon web strap I purchased from Mr. Suprman. The bag has saved me from insanity on the tangled mess of jumper cables, air hose and now the strap!

View attachment 558203
Not the prettiest setup in the world (required a number of adapters) but I installed a bypass coolant filter on my Deuce.


View attachment 558205

Solution 3.5: Clamp funnel to handle of garbage can. 1-gallon jug is filled without spilling everywhere and funnel won't tip over. Also, when removing the 1-gallon jug, the funnel end can just be placed into the 5-gallon bucket so it doesn't drip everywhere, thus, preventing more mess.

View attachment 558207
A series of pure ingenuity; great stuff.
 

Merc1973

Active member
308
38
28
Location
Sykesville, MD
The Brown truck delivered my supplies for the DIY Primary Fuel spin-on filter mod as well as a new Donaldson air filter and some Baldwin secondary/Final filters.
 
Top
AdBlock Detected

We get it, advertisements are annoying!

Sure, ad-blocking software does a great job at blocking ads, but it also blocks useful features of our website like our supporting vendors. Their ads help keep Steel Soldiers going. Please consider disabling your ad blockers for the site. Thanks!

I've Disabled AdBlock
No Thanks