• Steel Soldiers now has a few new forums, read more about it at: New Munitions Forums!

  • Microsoft MSN, Live, Hotmail, Outlook email users may not be receiving emails. We are working to resolve this issue. Please add support@steelsoldiers.com to your trusted contacts.


instrument panel lights, part 2

Monster Man

New member
884
1
0
so I read all the suggestions in making the instruments easier to see at night and have some observations/questions.

One is, make certain your gauge faces are clean, that was causing some major distortion at night and helped at least 25% in visibility
Second, try screwing your little bulb covers out partway. It provides extra light onto the face of the gauge, and also provides a nice dome light so you can see what you dropped on the floor <img src="emoticons/icon_smile_approve.gif" alt="Approve">

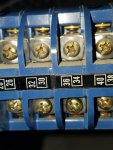
now, I felt around the back of the dash panel (I didn't feel it UP though, she's not that kind of girl <img src="emoticons/icon_smile_big.gif" alt="Big Smile">) and there seems to be no reason why they couldn't have put that thrid bulb between the speedo and tach, rather than to the lower left. Here's what I want to do- move that third light to the middle, then fill in the big hole it will leave with a power adapter (PC term for "cigarette lighter". But, I don't want to drill any holes, so I may just find a way to secure it between the two gauges, and not have a lens over it, it will just shine back there but no light will go anywhere but the gauges. What do you think? Is there a reason uncle sam didn't put the third light there to begin with? (by the way, my bulb was burned out in that one so I never even realized it too was a light)
 

Loose Deuce

New member
470
0
0
Location
South MS.
Sounds like a good idea, I thought about the same thing myself. I'm working on mine now, changed out with all new gauges, tack & spedo.

I know why Uncle Sam did it, Because he likes giving the GI the Green Weeney.<img src="emoticons/icon_smile_approve.gif" alt="Approve"><img src="emoticons/icon_smile_approve.gif" alt="Approve"><img src="emoticons/icon_smile_approve.gif" alt="Approve">
 

Recovry4x4

LLM/Member 785
Super Moderator
Steel Soldiers Supporter
34,014
1,814
113
Location
GA Mountains
There exists a template for putting a light right there. Its part of the low air warning light kit and it puts the low air warning light in that location. I have an extra dash panel and have thought about moving my bright indicator to that location and using a greenlee punch to add another gauge hole where the bright indicator originally was. Also, try this. Pull the lense/filter and drill some 1/16 holes through the filter to allow direct light to flow towards the gauge. Lose a little filtering but it will brighten them up a bit. That, brighter bulbs and clean gauges where the light flows and you should see pretty good. I keep a Ray-o-vac brand headlight in the truck just the same. Has a red LED, white LED and regular bulb so you can select the light needed. Mega handy for tons of stuff including chow after dark in the cab.
 

Monster Man

New member
884
1
0
Originally posted by Recovry4x4

There exists a template for putting a light right there. Its part of the low air warning light kit and it puts the low air warning light in that location. I have an extra dash panel and have thought about moving my bright indicator to that location and using a greenlee punch to add another gauge hole where the bright indicator originally was. Also, try this. Pull the lense/filter and drill some 1/16 holes through the filter to allow direct light to flow towards the gauge. Lose a little filtering but it will brighten them up a bit. That, brighter bulbs and clean gauges where the light flows and you should see pretty good. I keep a Ray-o-vac brand headlight in the truck just the same. Has a red LED, white LED and regular bulb so you can select the light needed. Mega handy for tons of stuff including chow after dark in the cab.
ahh!!! BRIGHT INDICATOR! well, the bulb is burned out, which explains why I didn't know my brights were on during the trip home, which I think is part of the reason I fried my light switch, running the brights for like 4 hours straight might have heated it up a bit <img src="emoticons/icon_smile_approve.gif" alt="Approve">
I may just have to convert that then to another dash light and put it between the gauges

so how common are the red lenses? I hate doing permanent mods, so I'll pick up a set of new ones and drill the old ones
 

stefos

Member
106
0
16
Location
Greece
I wanted a low air light and a swich to change from sound to light warning. I also had to find were to put a swich and an indicating light for my ultra red lamp. And some gauges too. All that without permanent changes. So I made a new panel which bolts on existing holes under the steering wheel.

Image Insert:
<img src="data/stefos/200516104847_a25.JPG" border="0">
[1] 59.84 KB[/1]
 

Recovry4x4

LLM/Member 785
Super Moderator
Steel Soldiers Supporter
34,014
1,814
113
Location
GA Mountains
Looks good George! Lance, red lenses seem to be everywhere. the blue ones are the ones in short supply. Modify at will man!
 

Loose Deuce

New member
470
0
0
Location
South MS.
Finished my Instrument Cluster upgrade and the lights work excellent. I used the 1873 bulbs, but I think they may be too much heat while on bright. May have to go with the 1864. I got some Blue lense filters from Saturn and they are great. They have RED, GREEN and BLUE, or did have. <img src="emoticons/icon_smile_approve.gif" alt="Approve">
 

Attachments

Top
AdBlock Detected

We get it, advertisements are annoying!

Sure, ad-blocking software does a great job at blocking ads, but it also blocks useful features of our website like our supporting vendors. Their ads help keep Steel Soldiers going. Please consider disabling your ad blockers for the site. Thanks!

I've Disabled AdBlock
No Thanks