• Steel Soldiers now has a few new forums, read more about it at: New Munitions Forums!

  • Microsoft MSN, Live, Hotmail, Outlook email users may not be receiving emails. We are working to resolve this issue. Please add support@steelsoldiers.com to your trusted contacts.


M1009 6.2 diesel removal guide

2INSANE

Well-known member
722
819
93
Location
Belgrade, Montana
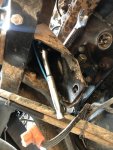
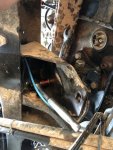
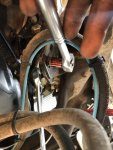
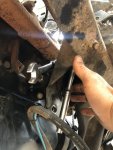
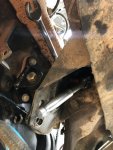
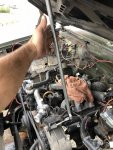
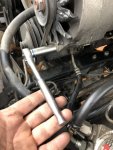
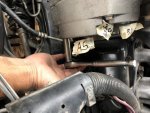
Step 23 continued...

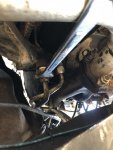
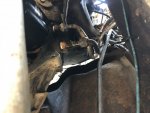
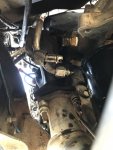
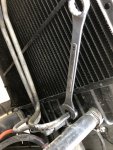
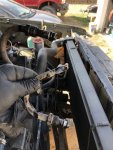
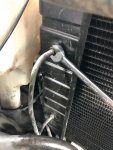
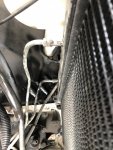
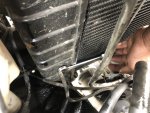
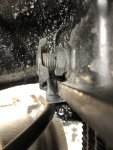
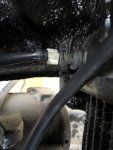
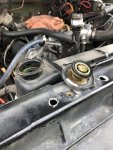
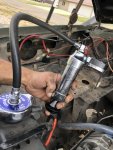
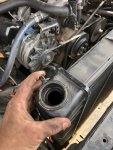
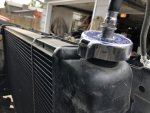
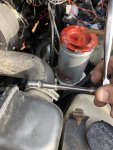
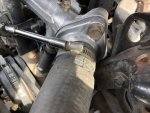
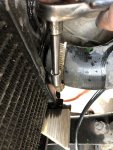
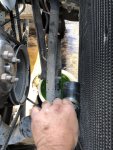
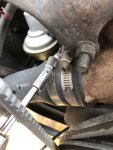
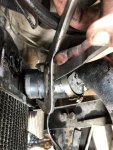
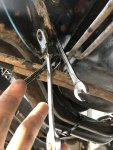
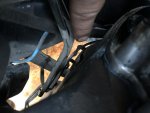
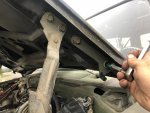
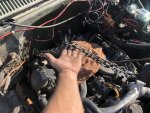
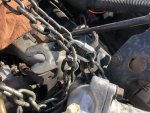
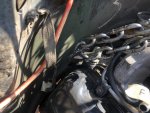
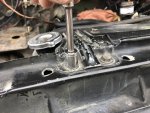
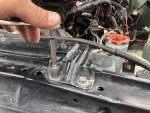
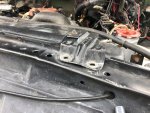
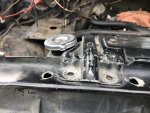
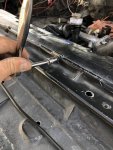
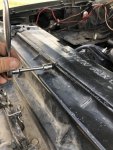
Use 13mm socket and wrench and unbolt the top 4 radiator supports.

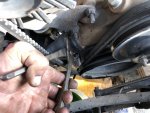
Use 10mm socket and wrench and unbolt the 2 bolts holding top radiator cover.

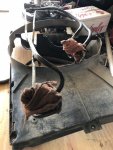
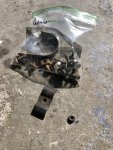
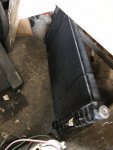
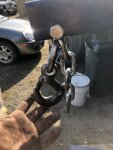
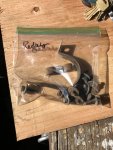
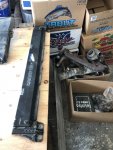
Remove the supports and top cover as one whole piece and put it on your work bench. Place the bolts into your labeled radiator sandwich bag.
 

Attachments

2INSANE

Well-known member
722
819
93
Location
Belgrade, Montana
Step 24.

Oil Cooler line removal/Transmission cooler line removal.

Get under your ride with a rag and 7/8 standard wrench or 22mm wrench (7/8 fits better) and disconnect the oil cooler lines. Have the bucket and rag ready in case some oil comes out. Usually not much oil will come out because most of it already did when you drained the oil filter. ;-) Check to see if the O-Rings are on the hose. If not, get them out of the motor fitting and put them back on the hose.

Come out from under your ride and on passenger side, disconnect the oil cooler lines from the radiator with a 19mm wrench. After the lines are out, check to see if the rubber O-rings are still on the hose. If not, get them out of your radiator fitting and put them on the hose.

On driver side fender, disconnect the oil cooler line support bracket. Put the nut and bracket in your sandwich bag labeled radiator.

Carefully pull out the oil cooler lines, drain any oil into the bucket and place on work bench with rags on the ends of the lines so oil does not get on the bench and dirt in the lines.

On passenger side of radiator, disconnect the Low Coolant Sensor and label as Rad.

Step 24 continued...
 

Attachments

Last edited:

2INSANE

Well-known member
722
819
93
Location
Belgrade, Montana
Step 25.

Draining Radiator.

Next I am going to show you how to drain your coolant from your radiator without spilling 1 drop! 😎

Get about 2-3 feet of 1/4 inch hose and a 1/4 inch hose connector and 2 clean 5 gallon buckets from parts store.

Use wire cutters and cut the 1/4” hose connector to fit inside the radiator drain plug since there is no nipple for a hose to connect to.

Place the 1/4” hose on the connector and place the other side of the connecter into the inside of the drain on the radiator and use adjustable pliers to turn it counterclockwise. Make sure the other end of the hose is in the bucket.

For faster flow, remove top radiator cap.

When you think it is done draining, lift up the passenger side of the radiator and watch more come out! You could put a block of wood under the radiator if you don’t want to lift it up that long.

Still not convinced it is all out? There might be some soot clogging the drain hose. You can put a 3/8 rubber hose stop on the top radiator nipple and use a pressure tester to pump more out!

Don’t forget to put the radiator cap back on and tighten the radiator drain plug clockwise.

Draining could take about 30+ minutes so get yourself a coffee or make a sandwich.

Note: 5+gallons of coolant is not cheap! The more you catch, the more you will $ave if you plan on reusing it.

Yes, I have a custom made 4 core radiator. Original tanks with a new core done by a local shop.
 

Attachments

Last edited:

2INSANE

Well-known member
722
819
93
Location
Belgrade, Montana
Step 26.

Radiator Removal.

Use an 8mm socket, wrench and disconnect the heater core hoses from the radiator and crossover pipe from the motor. Wire tie them to the battery bolt in an upright position so coolant does not come out. If the hoses can not be removed by hand, use an adjustable wrench and gently twist the hose to break the bond.

Disconnect the upper radiator hose from the radiator and thermostat housing on the motor with the 8mm socket and wrench. If the hoses can not be removed by hand, use an adjustable wrench and gently twist the hose to break the bond.

Disconnect the lower radiator hose from the radiator on passenger side. There will be some coolant in that hose. Put the bucket under your ride and drain the left over coolant into the bucket. Then disconnect that same hose from the water pump. If the hoses can not be removed by hand, use an adjustable wrench and gently twist the hose to break the bond.

Very very carefully lift up the radiator and put it in a place where it is out of the weather and can not be bumped into and put the hoses on your work bench.

Note: Some coolant spillage will come out in this step. If done right you will only lose a few ounces.

Step 26 pictures continued...
 

Attachments

Last edited:

2INSANE

Well-known member
722
819
93
Location
Belgrade, Montana
Step 26 pictures continued...

Still a lot of room on the work bench! Doing a great job! You only have a few more easy steps left!
 

Attachments

Last edited:

2INSANE

Well-known member
722
819
93
Location
Belgrade, Montana
Step 27.

Flex plate/Torque Converter bolt removal.

Use a 24mm socket and breaker bar or torque wrench. Place it on the 24mm crank bolt on the front lower end of your motor. Crank the motor with the torque wrench or breaker bar until a flex plate bolt is exposed.

Now use a 15mm wrench doubled up with a 16mm wrench for leverage. Unbolt the 3 bolts that holds the flex plate to the torque converter.

For each of the 3 flex plate bolts, turn the crank with the torque wrench or breaker bar to expose each of the bolts on the flex plate.

Place the 3 bolts in your sandwich bag.
 

Attachments

2INSANE

Well-known member
722
819
93
Location
Belgrade, Montana
Step 28.

Remove exhaust from manifolds.

Chances are your nuts and studs on your manifolds holding the exhaust will be so corroded and baked that you will not be able to remove them without breaking a few of them.

Here’s a helpful trick...

Get some WD-40 and spray the nuts and studs. Use a small wire brush to brush the ends of the studs. Spray some more WD-40, brush, spray, brush and spray. When you had enough of brushing and spraying, let it sit over night so the WD-40 can penetrate into the threads.

It also helps to use a small hammer and gently tap the ends of each stud. Chances are the stud will come out of the manifold or the nut or it will break.

Use a 14mm deep socket and wrench with extensions and a leverage bar on the end of the wrench. It helps to have a swivel head tip on the last extension. Unbolt the exhaust. Lower the exhaust plate from the studs. Put the nuts, springs and washers in the sandwich bag.

Note: The nut sizes vary from 13mm, 14mm and 15mm. Buildup and corroded nuts might effect the tightness of the socket. If needed pound the socket into the nut.
 

Attachments

Last edited:

2INSANE

Well-known member
722
819
93
Location
Belgrade, Montana
Step 29.

Motor mount removal.

For safety reasons, put a Jack under the motor. You do not want to risk a 700+pound motor falling on your face. Accidents can and will happen.

Spray and wire brush the ends of all 6 motor mount bolts until satisfied they are clean.

Use a 14mm standard depth socket wrench, 14mm wrench or 9/16th wrench and unbolt the motor mounts from frame. Put the nuts on the bolts and place them in your sandwich bag.

Note: These are ORD upgraded motor mounts. They are far easier to unbolt then stock mounts.

If you have stock mounts, use Vice grips on the tops of the bolts and the 14mm socket wrench on the nuts. You will also need a leverage bar on the socket wrench because of corrosion and locking nuts.

Also with stock motor mounts, it will drastically reduce removal time if you can have a Buddy on top of the motor with a 9/16th or 14mm wrench holding the bolts in place while you are under your ride unbolting the nuts.
 

Attachments

Last edited:

2INSANE

Well-known member
722
819
93
Location
Belgrade, Montana
Step 30.

Power Steering Pump Removal

Use a 15mm long socket wrench with leverage bar, extension and loosen the 3 driver side alternator bolts. Disconnect the belt from alternator.

Use a 1” wrench and disconnect the top hose from the power steering pump. Have a bowel ready to catch the fluid coming from hose. Move the hose from between the belt and reconnect the hose to the pump.

Use the 15mm long socket wrench with extension, 15mm ratchet wrench and unbolt the power steering pump. When unbolted, place the whole intact pump out of the way from the motor. Put the nuts and bolts back on the pump and motor so you do not lose them.

Note: This PSC upgraded pump and reserve hose may differ from your removal.

Step 30 pictures continued...
 

Attachments

2INSANE

Well-known member
722
819
93
Location
Belgrade, Montana
Step 31.

Hood Removal.

Before you remove the hood... Triple check that everything is out of the way of the motor and nothing will hold the motor back from removing it.

In my case I forgot to remove the transmission cooler hard lines from the motor clamp mounts.

Use a 13mm standard size socket and wrench with extension and unbolt one side of the hood. Put a long pipe on the front and unbolt the other side of the hood. Remove the hood and place it somewhere it will not get damaged. Put the bolts in a Sandwich bag.

It helps to have a helping hand for this step.
 

Attachments

Last edited:

2INSANE

Well-known member
722
819
93
Location
Belgrade, Montana
Step 32.

Engine Removal.

There are many ways to pull out a motor. Factors may vary depending on if your ride is lifted or not and what you have to remove it with.

Since my ride has about 5 1/2” of lift with 37” tires, my cherry picker will not lift the motor high enough to clear the radiator support. (Most won’t)

What I do in this situation is remove the front tires and lower the front axle on blocks of wood just low enough so the rotors do not hit the ground. Use caution and make sure your blocks of wood are on a nice flat surface and chock your rear wheels.

Use a chain long enough and double it up. Use an 800+pound adjustable chain link and run the chain threw the driver front motor ring and passenger rear motor ring. Don’t have too much slack in the chain. You only need enough slack on the chain to get the hook on the cherry picker threw.

For more clearance, you can take the slack out of the Cherry Picker chain.

Carefully lift the motor up and make sure it lifts with nothing attached to it. I like to lift 2”, check, lift 2”, check... Until the motor is finally high enough to clear the radiator support.

Coolant will come out of the motor as the motor swings and moves while being lifted.

Once the motor is out, bolt it on a motor stand or do whatever you see fit with it.
 

Attachments

Last edited:

48cj2a

Active member
311
34
28
Location
Central, IL
Awesome thread! Definitely Sticky Worthy !!!!

Very informative even with all your mods. I've only swapped a 6.2 once but will refer back to this when the time comes.

You should add the url to your signature line to keep it actively viewable.

ps: I'm Milverado over on ChevyK5Blazer.
 

2INSANE

Well-known member
722
819
93
Location
Belgrade, Montana
Awesome thread! Definitely Sticky Worthy !!!!

Very informative even with all your mods. I've only swapped a 6.2 once but will refer back to this when the time comes.

You should add the url to your signature line to keep it actively viewable.

ps: I'm Milverado over on ChevyK5Blazer.
Thank you!
 

Dave Kay

Active member
Steel Soldiers Supporter
499
29
28
Location
Kingman AZ
Wow! Wow! And WOW! Awesome write up! Have done a few V8 engine pulls/swaps on gassers before, but was pretty much flying blind the whole time. This article should be published on one of the DieselPage forums too. The attention to small detail is priceless! Thanks a million
 

2INSANE

Well-known member
722
819
93
Location
Belgrade, Montana
Wow! Wow! And WOW! Awesome write up! Have done a few V8 engine pulls/swaps on gassers before, but was pretty much flying blind the whole time. This article should be published on one of the DieselPage forums too. The attention to small detail is priceless! Thanks a million
Thank you! I hope it helped!
 
Top
AdBlock Detected

We get it, advertisements are annoying!

Sure, ad-blocking software does a great job at blocking ads, but it also blocks useful features of our website like our supporting vendors. Their ads help keep Steel Soldiers going. Please consider disabling your ad blockers for the site. Thanks!

I've Disabled AdBlock
No Thanks