wsucougarx
Well-known member
- 6,951
- 65
- 48
- Location
- Washington State
ABS Troubleshooting...talk about testing patience
After the battery issue was solved, I turned my attention to that blasted ABS Light on the dash. As mentioned previously, the light is always on. This indicates a faulty ABS system and the truck should not be driven over 40 MPH. To me, 40 MPH is still too fast with how well these brakes work. I did have some lock up issues during my recovery trip home and, quite truthfully, it scared the crud out of me a couple times. Nothing like having the rear end trying to slide to the side.
Anyways, before tackling this issue I printed off a copy of "Field Maintenance Troubleshooting ABS Without Diagnostic Tools" from TM 9-2320-272-23-2 pages 0156-1 to 0156-15. It has a step by step process on how to check your entire ABS system one component at a time. The process is actually quite easy, just time consuming. I love stuff like this anyways .
.
So a summary of what you're suppose to do in order:
1) Check both wheel speed sensor leads in the rear axle
2) Check to make sure both front and rear ABS Solenoid Valve Connections are OK (3 prong plug that screws in)
3) Check the ABS wiring harness 28 pin connector.
4) Check the ABS wiring harness
5) Check the ABS Power Supply Connection (circuit #10)
6) Check the ABS Ground Wire
7) Check the under the dash ABS Harness Connections
 Check Circuite #54 from the Starter switch (Is the 3 AMP fuse OK?)
9) Check the battery voltage (between 21-24 VDC?)
10) Check the ABS Volatage Supply w/multimeter
11) Check the ABS Ground Wire w/multimeter
12) Check the under the dash ABS wiring harness wire individually w/multimeter
13) Check 15 AMP fuse and wires w/multimeter
So heres the deal with my truck. When you go to start up, the ABS system does try to do the self-check. However, it only does half and the ABS Light stays on. Now when I say half I mean you only get 1/2 of the audible clicks from the rear of the truck. During the normal self-check, after flipping both switch (but not engaging the starter) you hear two series of 3 clicks followed by the ABS light turning off. In my case, I only got one set of 3 clicks followed by a sustained ABS Light. So I went to the task of checking everything mentioned above not once but twice to no avail. I traced every single wire checking for abrasions, nicks, cuts, burrs etc etc. Nothing!! I checked every connections 6-7 times each to no avail. I pulled out the dash wires to see if they were mismatched...nothing. I wacked the ECU with a rubber mallet...nothing. I found that whoever put this unit together or whoever replaced the 3 AMP fuse put a 30 AMP fuse in instead!!!! I thought for sure the ECU was fried. I went down to NAPA and secured some 3 AMP fuses and came home to try it out. I was expecting the fuse to blow as many have had their 3 AMP fuses blow when the ECU was fried. However, mine did not blow. Maybe there was hope for my ECU. Then I just sat there and stared off into space. Then it hit me. What was the source of the "clicks" during the self-check? What did the "clicks" represent and why? I recruited my son for this task. As I laid down in the wet gravel, he sat in the cab toggling the off/on switches. I found out the "clicks" were coming from the ABS Solenoid Valve units. The reason for the two sets of clicks is because there are two ABS Solenoid valves (front and rear). I found the Rear Solenoid Valve unit was making the clicks but the front unit was not. The front unit is also where the ABS ECU is. Hmmm, I thought if my ECU was fried then how would the ABS Solenoid know to do the self-check.....OK, now we're onto to something here. I ran into my garage and searched for a spare ECU/ABS Solenoid Valve unit I bought off ebay for $35 last year. I disassembled the ECU portion off the bracket so I was just left with the Solenoid valve. I crawled under the truck and disconnected the front solenoid valve wire from the old unit and connected it to my spare. I kept the original ECU in the truck hooked up. I jumped into the cab, said a prayer that this would work. I switched on both switches......I hear the first set of clicks....pause.............then there it was, the 2nd set of clicks......I look down to see my ABS light...........shut off. It worked!!!!!! So my ECU was good after all. Just had a bad ABS Solenoid Valve unit!!! All this took 8 hours of work!!! But hey if I don't roll over the truck and die then 8 hours was worth it
Projects Completed:
ABS System Fixed and Fully Operational!!
Pics:
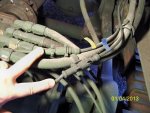
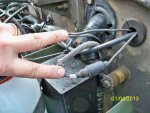
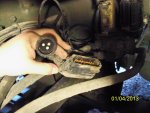
1- Speed sensor leads. Check the two prong connections. Located right on top of the rear axle.
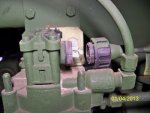
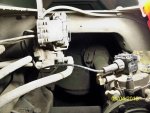
2- Rear ABS Solenoid Valve (click click click)
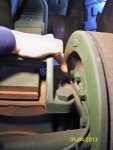
3- Speed sensor going into the hub of the rear axle.
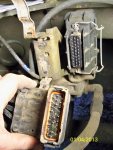
4- ECU 28 pin wiring harness and plug
5- ABS power source (Circuit #10)
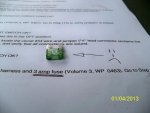
6- 30 AMP fuse in the 3 AMP's place.....seriously?!?!?!?!?
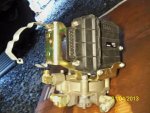
7- My spare unit I robbed parts off of
8- The old ECU mounted just above the middle axle. If I were any fatter I wouldn't be able to fit between the air dryer and axle.
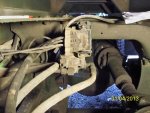
9- The two connections going into the front ABS Solenoid Valve/ECU assy
10- Having the original ECU hooked up but using my spare ABS Solenoid to rule out/rule in a faulty solenoid unit.
After the battery issue was solved, I turned my attention to that blasted ABS Light on the dash. As mentioned previously, the light is always on. This indicates a faulty ABS system and the truck should not be driven over 40 MPH. To me, 40 MPH is still too fast with how well these brakes work. I did have some lock up issues during my recovery trip home and, quite truthfully, it scared the crud out of me a couple times. Nothing like having the rear end trying to slide to the side.
Anyways, before tackling this issue I printed off a copy of "Field Maintenance Troubleshooting ABS Without Diagnostic Tools" from TM 9-2320-272-23-2 pages 0156-1 to 0156-15. It has a step by step process on how to check your entire ABS system one component at a time. The process is actually quite easy, just time consuming. I love stuff like this anyways
So a summary of what you're suppose to do in order:
1) Check both wheel speed sensor leads in the rear axle
2) Check to make sure both front and rear ABS Solenoid Valve Connections are OK (3 prong plug that screws in)
3) Check the ABS wiring harness 28 pin connector.
4) Check the ABS wiring harness
5) Check the ABS Power Supply Connection (circuit #10)
6) Check the ABS Ground Wire
7) Check the under the dash ABS Harness Connections
9) Check the battery voltage (between 21-24 VDC?)
10) Check the ABS Volatage Supply w/multimeter
11) Check the ABS Ground Wire w/multimeter
12) Check the under the dash ABS wiring harness wire individually w/multimeter
13) Check 15 AMP fuse and wires w/multimeter
So heres the deal with my truck. When you go to start up, the ABS system does try to do the self-check. However, it only does half and the ABS Light stays on. Now when I say half I mean you only get 1/2 of the audible clicks from the rear of the truck. During the normal self-check, after flipping both switch (but not engaging the starter) you hear two series of 3 clicks followed by the ABS light turning off. In my case, I only got one set of 3 clicks followed by a sustained ABS Light. So I went to the task of checking everything mentioned above not once but twice to no avail. I traced every single wire checking for abrasions, nicks, cuts, burrs etc etc. Nothing!! I checked every connections 6-7 times each to no avail. I pulled out the dash wires to see if they were mismatched...nothing. I wacked the ECU with a rubber mallet...nothing. I found that whoever put this unit together or whoever replaced the 3 AMP fuse put a 30 AMP fuse in instead!!!! I thought for sure the ECU was fried. I went down to NAPA and secured some 3 AMP fuses and came home to try it out. I was expecting the fuse to blow as many have had their 3 AMP fuses blow when the ECU was fried. However, mine did not blow. Maybe there was hope for my ECU. Then I just sat there and stared off into space. Then it hit me. What was the source of the "clicks" during the self-check? What did the "clicks" represent and why? I recruited my son for this task. As I laid down in the wet gravel, he sat in the cab toggling the off/on switches. I found out the "clicks" were coming from the ABS Solenoid Valve units. The reason for the two sets of clicks is because there are two ABS Solenoid valves (front and rear). I found the Rear Solenoid Valve unit was making the clicks but the front unit was not. The front unit is also where the ABS ECU is. Hmmm, I thought if my ECU was fried then how would the ABS Solenoid know to do the self-check.....OK, now we're onto to something here. I ran into my garage and searched for a spare ECU/ABS Solenoid Valve unit I bought off ebay for $35 last year. I disassembled the ECU portion off the bracket so I was just left with the Solenoid valve. I crawled under the truck and disconnected the front solenoid valve wire from the old unit and connected it to my spare. I kept the original ECU in the truck hooked up. I jumped into the cab, said a prayer that this would work. I switched on both switches......I hear the first set of clicks....pause.............then there it was, the 2nd set of clicks......I look down to see my ABS light...........shut off. It worked!!!!!! So my ECU was good after all. Just had a bad ABS Solenoid Valve unit!!! All this took 8 hours of work!!! But hey if I don't roll over the truck and die then 8 hours was worth it
Projects Completed:
ABS System Fixed and Fully Operational!!
Pics:
1- Speed sensor leads. Check the two prong connections. Located right on top of the rear axle.
2- Rear ABS Solenoid Valve (click click click)
3- Speed sensor going into the hub of the rear axle.
4- ECU 28 pin wiring harness and plug
5- ABS power source (Circuit #10)
6- 30 AMP fuse in the 3 AMP's place.....seriously?!?!?!?!?
7- My spare unit I robbed parts off of
8- The old ECU mounted just above the middle axle. If I were any fatter I wouldn't be able to fit between the air dryer and axle.
9- The two connections going into the front ABS Solenoid Valve/ECU assy
10- Having the original ECU hooked up but using my spare ABS Solenoid to rule out/rule in a faulty solenoid unit.
Attachments
-
51.6 KB Views: 182
-
66 KB Views: 181
-
53.7 KB Views: 186
-
73.8 KB Views: 169
-
74.3 KB Views: 180
-
38.3 KB Views: 208
-
63.4 KB Views: 181
-
71.1 KB Views: 192
-
59.1 KB Views: 182
-
67.6 KB Views: 195
Last edited:


