• Steel Soldiers now has a few new forums, read more about it at: New Munitions Forums!

  • Microsoft MSN, Live, Hotmail, Outlook email users may not be receiving emails. We are working to resolve this issue. Please add support@steelsoldiers.com to your trusted contacts.


WSUCougar's M925A1 Acquisition and Build Thread

wsucougarx

Well-known member
6,951
65
48
Location
Washington State
Door M-4 Weapon Mounts

Tonight, I completed my cab weapon mounts. Like my M923, I wanted weapon mounts on the doors. Rather than spend $100 for a M939 3 weapon mount kit from TNJM, I spent $70 for two M35A2 weapon kits off ebay (4 weapon mounts total) and fabricated my own 90 degree mount for the forearm mount. I used nutserts for mounting rather than sheetmetal screws. I felt with one good tug on a mounted M-4 and the bracket would pull loose with screws.
I used a piece of 2" metal stock from Home Depot. I cut it down to length to 6 inches. I then used my cutter wheel to make a 1/16" line at the 3" mark. This line will make the metal bend where I want it in a nice clean straight line. I put the metal piece in a bench wise and whacked it a few time with a hammer until I had a 90 degree bracket. I then marked my mounting holes, primed, painted, and bolted her to the truck. I tested my mounting job with my M-4.
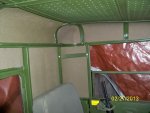
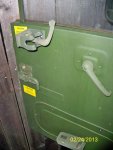
On the passenger door, I did need to flip the door handle around to accomodate the M-4 mount. Also, the passenger won't be able to roll the window up/down at their leasure unless they remove the weapon from it's mount.
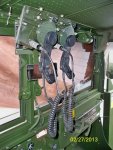
On the driver door, no issue other than you'll have to move your left arm forward if you rest it on the door.

Pics:
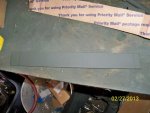
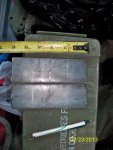
1- Metal Stock cut down to size (2"x6")
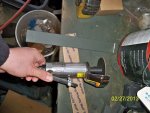
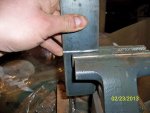
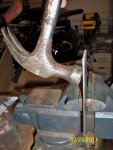
2- Putting metal stock in bench vise to bend her to a 90 degree
3- Nothing glorious here, just whacked it with a hammer
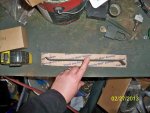
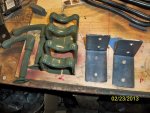
4- Two 90 degree brackets ready for mounting holes
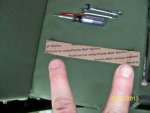
5- All the main parts for this project
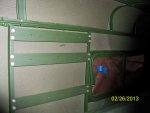
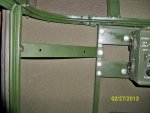
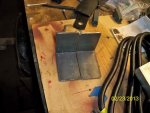
6- Nutserts installed in passenger door
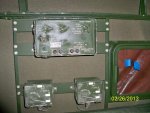
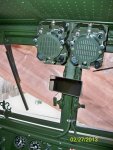
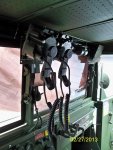
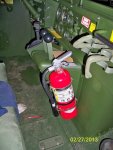
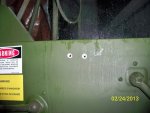
7- Dash weapon mount. Just got around to mounting the buttstock mounts today
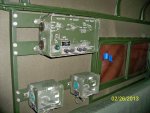
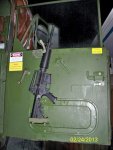
8- Driver side door
9- Driver door fitament test
10- Passenger door fitament test
 

Attachments

Last edited:

Clay James

Member
524
3
18
Location
Reno/NV
Are those switches three position? I have those same lights I need to wire in and would like high and low beams on the same switch. If you need any more IR lenses I'd trade the two I have for some clear ones.
 

wsucougarx

Well-known member
6,951
65
48
Location
Washington State
The switches are just On/Off. On my M923 project, I mounted the foot Hi/Lo pedal for the IR lights just under the dash. I made it a knee switch to go from Hi/Lo. Just an idea. I mounted the switch in an M35A2 airshift switch bracket.
 

wsucougarx

Well-known member
6,951
65
48
Location
Washington State
VIC-1 Project: AM-1780 & C-10456 Mounting Bracket

I got a couple hours in today. Today I fabricated my AM-1780 and part of the C-10456 mounting brackets. Rather than going crazy on a mount, I just utilized the support structure on the hardtop. I used 2" steel stock for the mounts. I also used 1/4" Grade 8 bolts and nuts for the install. I know I don't need to use Grade 8 hardware but that's all I bought for this project. I predrilled all my holes and rolled on some Behr paint. Funny how lighting impacts a pic. The AM-1780 and C-10456 control boxes look almost new. However, with the camera flash they look they need paint. The two C-10456 control boxes are going to be jumped together using a CX-4723 cable. The C-10456 will provide comms to the middle passenger and the second C-10456 will feed a signal to the LS-671...hopefully. I'll know if everything works once I get cable ran and the MX-7777 hooked up.
I still need to fabricate the passenger and driver's C-10456 mounting bracket in the corners of the hardtop. I also need to run an additional CX-4723 to the bed of the truck to provide comms in the bed. I'll just simply run the cable through the hardtop window and make a piece of foam to keep the weather out.
I plan on making a cover for the AM-1780 with 1 inch foam piece to protect the passenger's head.

Pics:
1- Mounting brackets on the passenger side of the truck
2- AM-1780 and two C-10456 control boxes mounted and ready to go
3- Got everything predrilled and painted first
4- Side view of the VIC-1 AM-1780
 

Attachments

Last edited:

wsucougarx

Well-known member
6,951
65
48
Location
Washington State
VIC-1 C-10456 Mounting Brackets-Driver and Passenger

I followed the same idea I did for my M923 project. I used a single layer piece of cardboard as my template (thanks USPS for the cardboard). I marked where the bends needed to be on the cardboard, transferred the marks into the 1/8" steel stock, used the cutting tool to etch the steel stock, placed the stock in a vise, and beat the metal until the correct angle was attained. Then I just drilled the mounting holes, primed, and painted her up. One thing I need to mention, you need to use star washers on the mounting bolts. You need to create a decent ground for the AM-1780 and C-10456 (C-2298 also) control boxes. I again used 1/4" Grade 8 bolts and nuts for mounting. I ran out of daylight so the contol boxes will need to be mounted later. Once I get all the VIC-1 control boxes mounted, I'll start running my CX-4723 cables.
I'm going to mount the MX-7777 and hook up my light power wires as soon as I get my dual solargizer mount ready to go (also the same as what I did on my M923). I want to do all the battery work all at the same time.
Pics:
1- Dry fitting a piece of cardboard. Marking where the bends in the metal go
2- Marks made and now time to transfer marks to metal
3- Metal piece ready to be etched
4- The cutting tool used to etch. Nothing more than a cheap HFT;-)
5- Bends made and ready to mount
6- Using my final piece as a template for the other
7- Matching pair
8- Bracket in place (passenger side). Note the glossy paint. It's actually some ingredient in the Behr paint that simply needs to be wiped off with a damp cloth. Once wiped off it'll be flat in color;-) I'm waiting a couple more weeks before I go in with a bucket and sponge to wipe down the surfaces.
9- Bracket in place (driver side)
 

Attachments

Last edited:

wsucougarx

Well-known member
6,951
65
48
Location
Washington State
LS-671 Console Completion and Fire extinguisher Mount

I received my second LS-671 today to complete my overhead LS-671 Loudspeaker console. I added a couple H-250 handsets to complete the speakers. I also completed my fire extinguisher mount on the winch control console. I was surprised this truck didn't have a fire extinguisher bracket in the cab. I still need to run the CX-13292 speaker cable to the rear of the cab and hope it inferaces with the VIC-1 OK. I thought the H-250's would interfere with the rearview mirror but looks like it'll work just fine. I did buy a pair military microphone brackets just in case. Looks like I won't need them. I'm pretty happy with how the LS-671 console turned out. If everything works I may need to copy the console for my M923 project;-)
Next project
-Dual Solargizer rotating mount
 

Attachments

Last edited:

machinist75

Member
777
7
18
Location
Murphy, TEXAS
Couple questions. Did you just use a putty knife to scrape off the old insulation on the cab top, and what type of glue did you use to mount the gi sleeping mats? Thanks in advance.
 

ntxcop

New member
186
1
0
Location
Fort Worth, Texas
Mike,

Another OUTSTANDING job Sir! You build awesome trucks, and you're detail to attention in work AND posts/pics have help me with my own projects and I'm sure they have helped others.

Thank you Sir!
 

wsucougarx

Well-known member
6,951
65
48
Location
Washington State
wait no headsets in this truck just handsets?


of course beautiful work when i get my 5 ton its going to your house you realize that right?
I have H-161 Headsets to go with the four VIC-1 Stations I'll have set up (3 in cab and 1 in the bed). I have the LS-671's have their own purpose. One will be tied into the VIC-1 and act as a 1MC while the VIC-1 is on. The Second will be tied into a future HAM type radio (SINCGARS radio maybe?).

Couple questions. Did you just use a putty knife to scrape off the old insulation on the cab top, and what type of glue did you use to mount the gi sleeping mats? Thanks in advance.
A putty knife would work great. I used my hands to literally pinch the nasty old insulation off the top as well. I used a silicone based glue like RTV to glue her down.
 

usmarines72

New member
65
2
0
Location
California
Outstanding! Just read this thread and only outstanding comes to mind. Thank you for keeping your truck "Military". You're definitely extending respect and honor to your trucks by what you do! I see a bunch of build threads where a guy junks his truck with civilian garbage like civy truck seats and shiny this and that. Makes me wonder why they just don't go out and buy a surplus bread delivery truck from Franz and do this. Your attention to detail and your military bearing are highly commendable! Keep up the outstanding job Mike!
Semper Fi
 

wsucougarx

Well-known member
6,951
65
48
Location
Washington State
Thanks John, I know what you mean. Bread truck...that's pretty funny. Yes, I agree there are several 2.5 ton and 5 ton bread trucks out there. Thanks for your words Marine!
 

wsucougarx

Well-known member
6,951
65
48
Location
Washington State
Yikes!!!

I had my biggest MV scare ever today!!! I spent about 4 hours wiring up my Route Clearance Lights today. I was stepping all over the engine bay trying to route my wires up and over the hood area. I was stepping all over the tranny cooler and top of the engine to accomplish this task. I wanted a nice clean install of all my wires. I got everything hooked up and proceeded to hook up my MX-7777 to the battery compartment. So pretty much it was an electrical day. I went to start my truck and noticed the batteries were too weak to turn her over. No problem. I grabbed my 50 ft set of slave cables and used my M923 to jump her. Everything was going well, I jumped the M925A1 and ran her for about 10 minutes. Not too scary I know, it's coming.
After idling the M925A1 for 10 minutes I shut her down to see if that batteries were good to go. I went to restart her and the starter was turning over very slowly. I did it again and started smelling something funny. I thought I was sniffing battery acid but it smelled very strong. Then I thought maybe my engine could be hydrolocked because of the slow start (just was brainstorming what if possibilities). Well, the smell got really strong so I stopped cranking her. I thought wow that smell really got strong all of a sudden. I didn't smell any smoke so I jumped out of the truck. As I passed the front of the truck, I noticed the ground was BLACK!!! Oh crud, that's not water!!! That's OIL!!!! Ok, don't freak out Mike just open the hood to see what happened. All kind of things were going through my head. The hydrolock thought, blew a head gasket, etc etc etc. I popped the hood and slowly walked around to the driver side. Of course in a situation like this, it all happens in slow motion. I looked around and didn't see any steaming oil or wet spots. I proceeded to the passenger side...nothing! Hmmm, then I noticed oil was dripping down in the wheel well area. Then it dawned on me. I must have kicked the tranny fluid drain valve on top of the tranny cooler. Sure enough!! Needless to say, I had about 2 gallons of oil on the deck.
Well, since I had some of the tranny fluid drained I might as well change out the filters and put in ATF fluid. I've wanted to replace the 10 wt motor oil for sometime and today was the day to do. Whew!!!!!! What a relief that was. Sorry I neglected to take any pics due to panic.:roll: Lesson learned, don't accidently open your tranny fluid drain valve;-)
 
Last edited:

srodocker

Well-known member
6,549
68
48
Location
Lacey, Washington
glad it wasnt your engine dumping the oil! just did something similar on the car. did the oil change and turned on the car. heard a loud hiss. looked under the car after turning off the car and it dumped its oil. a piece of the oring from the last filter was on there and made the seal pop on the new filter...yea driveway is smelling like oil even after i cleaned it...
 
Top
AdBlock Detected

We get it, advertisements are annoying!

Sure, ad-blocking software does a great job at blocking ads, but it also blocks useful features of our website like our supporting vendors. Their ads help keep Steel Soldiers going. Please consider disabling your ad blockers for the site. Thanks!

I've Disabled AdBlock
No Thanks