• Steel Soldiers now has a few new forums, read more about it at: New Munitions Forums!

  • Microsoft MSN, Live, Hotmail, Outlook email users may not be receiving emails. We are working to resolve this issue. Please add support@steelsoldiers.com to your trusted contacts.


What have you done to your CUCV today/lately - Part 2

MarcusOReallyus

Well-known member
4,524
810
113
Location
Virginia
I swapped out sheaves on the drivers side alternator so they both sheaves on the alternators are approx. 78 mm in diameter. The rebuild alternator originally had a sheave of approx. 68 mm in diameter which is why I had no adjustment left even with a new belt, now it is great. As cucvrus said the, rate of charge did not change at all with the sheave diameter so other than the belt needing to be 1-1/4" shorter, the sheave size has no affect on the rate of charging ....
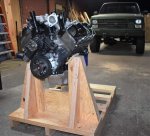
That's because the smaller pulley spins the alternator faster, thus (potentially) creating more power... but the regulator clamps it down to the correct output. The smaller pulley put more load on the engine, so putting the correct size on there is a good thing.

If you put a much bigger pulley on there, you will spin the alt slower, and if you get the pulley big enough, you will get to a point where you don't spin the alternator fast enough to put out the correct power. There's not enough mechanical energy being transferred from the engine to create the required electrical energy.
 

LT67

Well-known member
654
499
63
Location
Bowdon, GA
Threw a set of pizza cutters on the 86 M1008... KM2 255 85 16's. Yuge improvement over the 235 85 16 all terrains..

42816048_1947573508619372_8422519678789746688_n.jpg 42884433_1947341685309221_308390175250055168_n.jpg
 

emeralcove

Member
Steel Soldiers Supporter
134
14
18
Location
Battle Ground/WA
MarcusOReallyus, your post regarding the idea of taking the sheave size to ridiculous extremes reminded me of an article I read regarding the Ford tractors from the late 30's to the mid 50's and the availability of aftermarket gear boxes that could be added. The writer of the article had acquired several of this gear boxes and out of curiosity installed 3 of them on a tractor he had put together and shifted all the add on boxes as well as the original transmission in low gear, calculated out the rear wheels were turning so slow it took hours to have the drive wheels make one revolution. I was thinking I could put posts on my driveway so the tractor could be used as a diesel powered clock, LOL. All silly ideas but it does make one smile. While the two sheaves on my M1009 were easily noticeable as being different in diameter when you were thinking about it and looking for it, it didn't jump right out, but it made a very noticeable difference in the ability to fully tension the belt.
 

Merddin

Member
91
-1
6
Location
Cape Girardeau, MO
Sanded and primed my front and rear bumper and top of bed sides. US Forest service mounted a spray rig in my truck and apparently had a contest as to how many holes they could drill into the bed. My count is around 50. I have been filling these and doing body work on them for two weeks. Bed sides and both bumpers will be painted in the morning. Ready to move on to fixing holes in bed floor.
 

KI4FKW

Member
98
6
8
Location
Alabama
Ordered a front marker, diesel fuel gauge, and steering column from Hillbilly. FINALLY gonna be able to start driving this thing - just in time for winter! No A/C worries for a few months.
 

Keith_J

Well-known member
3,657
1,313
113
Location
Schertz TX
Got the parts for the 1031. Class V hitch, Air Lift for the rear suspension, overhauled injection pump and cooling upgrade/bypass kit..making the 1031 a RV tug. Already have weight distributing stinger, brake controller and trailer wiring kit.
 

TechnoWeenie

Well-known member
Steel Soldiers Supporter
1,644
1,651
113
Location
Nova Laboratories, WA
Sanded and primed my front and rear bumper and top of bed sides. US Forest service mounted a spray rig in my truck and apparently had a contest as to how many holes they could drill into the bed. My count is around 50. I have been filling these and doing body work on them for two weeks. Bed sides and both bumpers will be painted in the morning. Ready to move on to fixing holes in bed floor.
Speed holes.

Make sure you drill holes in the brake lines and engine block to make sure you're cooling the fluid properly and improving airflow
.

Rofl
 

acthomp781

Member
79
30
18
Location
Massillon, OH
Replaced right inner fender on my M1009. I found an original GM one in South Carolina when the wife and I were on vacation. I replaced the left one with a reproduction inner fender. I have to say the original GM one went in MUCH easier. I made some battery tray braces from 18ga sheet metal and riveted them in. The GM inner fender had dimples for drilling the holes for the braces. While the inner fender was out I decided to replace the fuel pump since it was easier to get to. When I pulled the old fuel pump out, the push rod was broken, but the truck was funning fine. Strange. It took some searching to find a push rod, no auto parts stores in my area carried them anymore. I found one from a place in South Carolina that specializes in HMMWV parts. I used a Mity Vac hand pump to bleed the fuel system. The truck started right up.
 

Sharecropper

Well-known member
Steel Soldiers Supporter
1,816
944
113
Location
Paris KY
Completed on my P400 build -

New injection pump driven gear installed
Rebuilt 200 HP DB2831-4911 mechanical injection pump installed
Brand new injectors installed
Brand new injection lines installed
700R4 TV bracket refurbished and installed
HMMWV oil pump gear installed
New FlowKooler high-volume clockwise rotation water pump installed

Also, I became concerned my engine stand may not hold the weight of the P400, so I jumped into my shop and designed/built a laminated beam cradle. By getting the engine off the stand and onto the cradle, I can now go ahead and install the 700R4 transmission.
 

Attachments

Rutjes

Well-known member
Steel Soldiers Supporter
359
272
63
Location
Amersfoort, The Netherlands
Spent the afternoon removing stuff from the frame. Fuel lines, exhaust bracket, sidebar brackets, shocks, cable clips, etc.
IMG_20181015_174623.jpgIMG_20181015_174745.jpgIMG_20181015_174753.jpg

Rick must be laughing his ass off seeing my progress...

Anyways, people have been asking on forums how to remove rivets from the frame. I found it to be pretty easy. Here is my way for the next person to Google it.

Tap a dimple onto the rivet head with a center punch and start drilling it with a small drill bit. Stop at about the height of the frame, maybe a bit deeper. Repeat with a drill bit about the size of the rivet hole, but try not to go to deep or you might distort the hole. You should now be able to knock the head off using a chisel or a large screwdriver. With the head knocked off, knock the rivet out. If it won't budge try drilling it some more.

IMG_20181015_170045.jpgIMG_20181015_170051.jpgIMG_20181015_170302.jpgIMG_20181015_170307.jpgIMG_20181015_170428.jpgIMG_20181015_170435.jpg
 

cucvrus

Well-known member
11,274
9,603
113
Location
Jonestown Pennsylvania
If you are referring to me I am NOT laughing at your technique. It is harder that way but you have to do what you have to do. I rebuild the engine on a table and have an engine stand. I do a lot of hand sanding and have power tools. So it is not how it gets done just so it gets done. I am NOT one to remove a transmission with out letting the torque converter attached floating in the front pump seal. That is risky business. Good Luck. If I could come visit I would help you get it done quickly. I still have 5 weeks vacation this year. Have any tickets?
 

Rutjes

Well-known member
Steel Soldiers Supporter
359
272
63
Location
Amersfoort, The Netherlands
If you are referring to me I am NOT laughing at your technique. It is harder that way but you have to do what you have to do. I rebuild the engine on a table and have an engine stand. I do a lot of hand sanding and have power tools. So it is not how it gets done just so it gets done. I am NOT one to remove a transmission with out letting the torque converter attached floating in the front pump seal. That is risky business. Good Luck. If I could come visit I would help you get it done quickly. I still have 5 weeks vacation this year. Have any tickets?
I was indeed referring to you. I wasn't talking about technique though. Seeing your progress on your M1009 thread, mine seems to go really really slow ha ha! Btw., thanks for that thread (and others). I learn a lot from your posts, and they are motivating!

I will remove the torque converter ASAP then. I am NOT a mechanic, I learn as I go. Also getting tools as I go. Large air-compressor for media blasting and painting is next. I also bought a 13 by 26 feet tent that I'm picking up this Wednesday as an upgrade to my open-air workshop.

Oh and if I could afford it, I would get you those tickets!
 
Last edited:

Rutjes

Well-known member
Steel Soldiers Supporter
359
272
63
Location
Amersfoort, The Netherlands
Rick, I did I misunderstand? It is a good thing to pull the trans without the torque converter? Or should I have removed the torque converter before pulling the trans? When I put the trans back in, I have to attach the converter to the trans first?
 

Kaiser67M715

Member
699
26
18
Location
NH
You should unbolt the torque converter from engine, and remove with the transmission. Install the transmission with the torque converter installed in the transmission, not on the engine.

You are also more likely to damage the seal when installing then removing.
Rick, I did I misunderstand? It is a good thing to pull the trans without the torque converter? Or should I have removed the torque converter before pulling the trans? When I put the trans back in, I have to attach the converter to the trans first?
Sent from my SM-S920L using Tapatalk
 

cucvrus

Well-known member
11,274
9,603
113
Location
Jonestown Pennsylvania
Rick, I did I misunderstand? It is a good thing to pull the trans without the torque converter? Or should I have removed the torque converter before pulling the trans? When I put the trans back in, I have to attach the converter to the trans first?
I would remove the 6 M10 bolts that attach the torque converter to the flex plate and remove the transmission and torque converter as an assembly. I would never put a transmission back in once it's out with out changing the front seal. I know people that did and they regretted it. Most things that have seals I replace the seal if I have it apart. Always beats the time and effort then doing the job twice. Looks good. Keep up the good work. Good Luck on your future efforts.
 

rustystud

Well-known member
9,071
2,388
113
Location
Woodinville, Washington
You should unbolt the torque converter from engine, and remove with the transmission. Install the transmission with the torque converter installed in the transmission, not on the engine.

You are also more likely to damage the seal when installing then removing.

Sent from my SM-S920L using Tapatalk
That's correct. There is no way in the world to get the torque converter into the transmission with it bolted to the engine. There are three "steps" the torque converter must gear into. The pump drive gear, the stator support shaft and the input shaft. That's why you must twist and spin the torque converter to seat it into the transmission fully.
 

Merddin

Member
91
-1
6
Location
Cape Girardeau, MO
Finally got all 50 holes filled in bed, primered and painted. Bumpers are painted now too.

Unfortunately, I ran out of flat black in middle of painting and switched to a new can. The new can had same batch code as the old can of flat black. After painting both bumpers I realize the flat black was gloss black! Went back to local farm and home for another can of rustoleum flat black, got it, returned home. Painted a spare part with the new "flat" black, and the dregs of my original can side by side. New can was glossy as well. Was getting mad at this point. Took second can back. Went to three different stores spending all morning to get another can of flat. Finally called Menards and they had it. We painted some on a paint stick at the store and dried it with a heat gun. Finally after 2 previous gloss flat black cans I found one. Pain in my butt!!

Now I need to resand both of the bumpers and paint them again. Oh well. I have the hard part already done and more layers of paint is more protection.

Finally my dad and I got out the porta power and pushed out the huge dent in front of my fuel door. It was 2 ft tall and 1.5 wide. We got 90% of it out. Took about 3 hours. Some of that time was to remove and clean fuel filler neck for access to back of panel. I do have one small high spot I have to beat back flat before I can remove paint and put in body filler. I am very much ready to be done with this truck bed. So close!

Next project is cab corners. Passenger side looks ok with a few bubbles. Driver's side has a small rust hole at bottom seam and one at back edge. On driver's side the body plug on back is gone and it got dirt in side of cab corners which exasperated the problem. I will know more when I remove paint and get it down to bare metal. God I love an angle grinder and a flap disc! My new electric orbital sander is nice too!
 
Last edited:
Top
AdBlock Detected

We get it, advertisements are annoying!

Sure, ad-blocking software does a great job at blocking ads, but it also blocks useful features of our website like our supporting vendors. Their ads help keep Steel Soldiers going. Please consider disabling your ad blockers for the site. Thanks!

I've Disabled AdBlock
No Thanks