• Steel Soldiers now has a few new forums, read more about it at: New Munitions Forums!

  • Microsoft MSN, Live, Hotmail, Outlook email users may not be receiving emails. We are working to resolve this issue. Please add support@steelsoldiers.com to your trusted contacts.


XM1027 - CUCV Crew Cab Build

tim292stro

Well-known member
2,118
39
48
Location
S.F. Bay Area/California
Yeah, okay... so I didn't wait :)

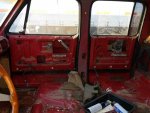
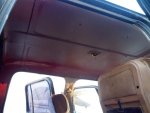
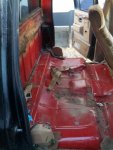
I tore out the headliner (what was left of it), and the rear bench and carpet. Headliner fiberglass came out in one large brittle piece, but completely covered in two layers of crumbling foam and ripped headliner fabric...
pic1.jpg

another shot towards the back window...
pic2.jpg


Some of the screws were stainless steel, but some were normal dry-wall screws - those didn't look too good when they came out. Notably the four screws that were holding on the center over-head console were 3-1/2" drywall screws just pushed into the inner ceiling... not optimal.

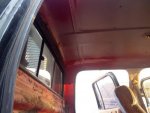
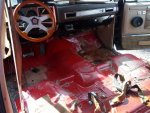
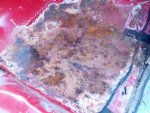
Couldn't get the front two seats out (bolts spun, so I think there is a nut under the truck), but I removed the center console/seat (all 8 of the #6 screws that held that in...). Also got out the rear bench - foam was crumbling out as I moved it, by the time I got it all the way out, I could feel the springs in the top of the seat. Cut out the carpet and under carpet padding:
pic3.jpg

As you can see, the sheet metal is clean and rust free - shows the original color was a maroon color...

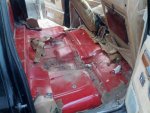
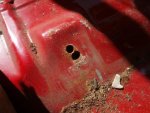
Back wall has some crap on it from the disintegrating seat foam but is rust free:
pic4.jpg

More to come this weekend.


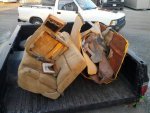
Edit: Forgot to mention my "don't need it" pile is getting larger, will need to do a dump run (after I get the front row out).
pic5.jpg
 
Last edited by a moderator:

tim292stro

Well-known member
2,118
39
48
Location
S.F. Bay Area/California
Got the last two seats out, and most of the carpet.
pic1.jpg


These seats didn't want to come out because the installer used aftermarket bolts and nuts (not the normally welded in seat nuts). There were a few less than ideal hole placements, this one was literally drilled right through the side of the original nut, making it unusable going forward...
pic2.jpg


The transmission hump and front driver's floor pan are in great shape - but there is some early-onset cancer showing where the passenger side floor padding was holding water against the floor. It's starting to bubble on the inside, but the bottom (road-side floor pan) is still good - a few hard whacks with a mallet shows that the rust is not to far into the pan to require cut-out (but I may still anyway - I hate rust).
pic3.jpg


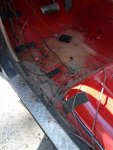
And finally some creative wiring decisions on the driver's side floor...
pic4.jpg


The plastic from the interior trim is totally shot, it crumbled when the screws holding it on were turned. There are a few screws that are stripped and seized and will need to be drilled out. My plan had me pulling the whole interior out to bare metal and then building a new interior from scratch, so the condition of the interior plastic parts makes that absolutely assured. :deadhorse:


All in all, par for the course when it comes to '80's GM interiors. I get to dig into the electrical a bit later and see how much more of a mess that is. There are a lot of aftermarket electrical things I would have done done differently - like the high-current +12V power feed for the under-bed air compressor is zip-tied to the fuel line... I'm sure that's safe aua. There are non-watertight splices all over the place, and there are abandoned wires with lightly electrical-taped tips everywhere too. I will be doing a full electrical clean-out and tear down soon, I will be pulling the Cummins engine off the transmission this weekend, and starting the rebuild tear down on that too. Should be really busy - Saturday I can't work on the truck due to a prior engagement, so it'll have to wait until Sunday.

Hope that's enough to keep you guys hapy for the next day or so.
 
Last edited by a moderator:

tim292stro

Well-known member
2,118
39
48
Location
S.F. Bay Area/California
My Saturday project has bled into Sunday, it's 8pm now so I'm out of time to work on this for the weekend. I'll see about splitting the engine and transmission tomorrow morning before work...
 

tim292stro

Well-known member
2,118
39
48
Location
S.F. Bay Area/California
Separated the transfer case from the transmission - attempted the transmission split, but it wouldn't budge. I suspect the way it is sitting on the bed, it is putting tension on the input shaft and torque converter. I'm going to shim the engine housing tomorrow morning and see if that takes the tension off.

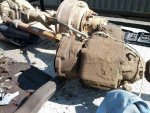
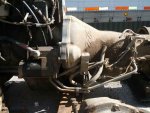
Dang that NP205 was heavy (I like it!):
IMG_20130708_094127_small.jpg


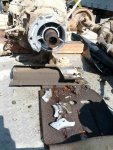
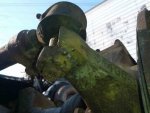
Here is what the knackered tail housing looked like:
IMG_20130708_094120_small.jpg


Got all of the bolts off the transmission, but it wouldn't move even with "persuasion"...
IMG_20130708_094540_small.jpg
IMG_20130708_094554_small.jpg

Above transmission pictures show that the transmission accessories are still attached to the block, I tried taking those off (though I did not take more pictures), and it still wouldn't budge.
 
Last edited:

tim292stro

Well-known member
2,118
39
48
Location
S.F. Bay Area/California
Got the auto separated - didn't think to take a picture though (darn). Also got a line on the last big ticket item - the Fuller 6-speed manual transmission. Will have to ship it across the country though, total on that will be about $1800, bringing the total project cost to just shy of $7K ($10K is the budget for this build). I will also have to convert the Fuller from an FS (synchromeshed) to an FSO (synchromeshed + overdrive). Parts aren't hard to get for that.

I have an appointment to talk to the California BAR Referee about the Gas/Diesel conversion tomorrow, to get the engine change bullet list "blessed". I don't want to miss anything at the early stages of the conversion.
 

tim292stro

Well-known member
2,118
39
48
Location
S.F. Bay Area/California
Had 2-3 hours to work on it today. Got the rest of the interior trim pieces out, got the dash out and started working on cutting back some of that creative wiring.

Here are some of the highlights.

I got the cracked door cards off - the two driver's side cards came off in one piece, the two passenger side cards came off in more than two pieces:
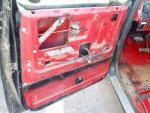
IMG_20130714_192827.jpg
IMG_20130714_192839.jpg

Pulled the dash cover off - there was a carpet over the dash when I bought the truck, but it was just hiding a bad dash, so it went in the "don't need it" pile:
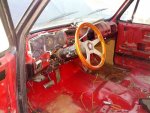
IMG_20130714_192833_1.jpg

Started taking a look at the wiring - first, pulled the battery. There is one wire for something aftermarket that had 4 splices in about 8 inches:
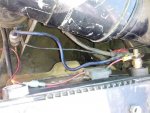
IMG_20130714_180206.jpg

After I pulled the battery, I started tracing out the ground wire - the one that was attached to the battery goes straight to the alternator bracket (good in my mind). Then I started looking for the engine to chassis ground bond. Hmmm, can't find it on the engine anywhere... Oh here it is tucked under the radiator overflow bottle:
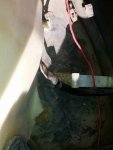
IMG_20130714_180222.jpg

For those who don't understand why this is bad (and why I'm being so sarcastic about it), the ground bond is essential to provide a return path to the battery. Some will argue that the engine is grounded by the drive-train and the exhaust (which is more or less true) - however, if you have a 40Amp positive wire coming off the battery to feed a compressor, do you really want that 40 amps going through your rear-end gears or your fuel lines to get back to that alternator bracket? Sound safe? One of the most common problems with vehicle electrical systems is bad grounds. It leads to all kinds of problems like dim lights, gauges that show funny values when other accessories are turned on, and slow motors that burn out. Does this sound like most of the problems I described in the original recovery :)

Here is some more from the firewall - this is how NOT to wire a circuit breaker (note that only one terminal has connections - the other side is not connected, meaning that there is no protection from this breaker!):
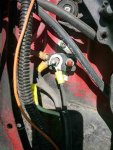
IMG_20130714_181353.jpg

You will also notice that it is wired with extension cord wire...


On to the dash board. I cut out the old alarm system, since I didn't like it... old gear, :grd: wiring and sensor mounting, and just poor routing of everything (wire bundles were wrapped around other wire bundles, looked like a rush job). Here is what I found when I pulled the radio out of the dash:
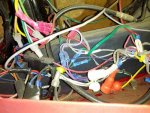
IMG_20130714_183342.jpg

Not too bad, it's what I'd expect from a WorstBuy/BuyMore or other "chain" stereo shop, but I'd be embarrassed to have my name on it, and I used to do Car Stereos. This was the real treat when I opened the dash - the passenger side air duct is not... um "original":
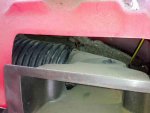
IMG_20130714_175807.jpg

Your eyes do not deceive you - that is 3" corrugated landscaping drain pipe:
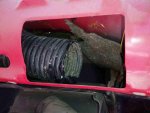
IMG_20130714_175753.jpg


Yeah, so I knew I was going to pull the entire interior and start from scratch - no GM parts. I also wanted to gut the electrical and go with mostly M series parts, and it looks like I'm going to get my wish (this would fall under the "be careful what you wish for" category). The original wiring harness is for lack of a better word "butchered". There are splices on top of splices and wires that have burned through and other wires that were just abandoned.

For the Cummins engine I'm putting in, there are really only four circuits I need to get right:


  • Fuel shutoff solenoid (power/ground/start-trigger)
  • Fuel lift pump (power/ground)
  • Starter (power/ground/start-trigger) <-- I'm going to simplify this a bit by putting a larger solenoid that will power both the starter solenoid and the starter motor - no current will pass through the solenoid's contacts, it will simply move the armature into position on the flywheel ring.
  • Alternator (power-out/ground/charge-light/ignition[aka "fuel shutoff solenoid power"])

For the lighting there are only a few circuits again:


  • Left Turn Signal
  • Right Turn Signal
  • Brake Lights
  • Headlights Low
  • Headlights High
  • Running Lights/Markers
  • Blackout Drive
  • Blackout Markers
  • Dashboard Lights
  • Dome Light(s)

These circuits come pre-configured in the M-series master light switch, turn signal switch, and turn signal flasher. The light fixtures likewise are pre-configured, except for the front turn signals which I am still thinking about ([Update] - figured it out, found TruckLite 24V LED Amber F/P/T, which I'll slip inside the original front turn fixture [/Update]). Critical electrical devices are the headlights, brake lights, and wipers (on/off, two speeds). Everything else is a luxury, and will be wired as such. Instead of running the wires in a split-loom plastic sleeve like the wires attached to the parking brake cable were - I'm going to run the wires inside a DOT air-brake hose, and used water tight fittings on both ends. This will keep the wire from rusting and make it possible to replace them afterwards without pulling new split-loom. All electrical circuits will be getting a ground return as well rather than relying on the body and frame as a return path. I should note that every body panel will get not one but two ground+RF bond ("Quiet," the project mantra doesn't just mean acoustic noise!!).

All of the gauges will be mechanical, so there are no senders to match to gauges (they will come attached for temperature, or be built-in for pressure).

Now before you ask, I'm keeping A/C on the truck - but, I'm not going to use the factory A/C (although it would be easiest). I can get the same performance out of a smaller unit and put it in the center console. I have been planning this route due to the very real possibility that I will need to fabricate a new firewall to fit the Cummins in there.


And I started pricing out the paint, I'm going to blow my budget a bit there. High zinc primer over everything!!!! Then intermediate filler primer, then top coat of CARC. I will attempt to get my hands on the CARC powder-coat for the frame and inside of body panels, so stay tuned for that... Still appear to be dodging the rust bullet on this truck. :naner:
 
Last edited:

tim292stro

Well-known member
2,118
39
48
Location
S.F. Bay Area/California
Just talked to the dismantler that was finding my transmission. On friday I chatted with the sales lady and she took a physical look at the transmission they listed as a FS-6406A, turned out to be an FS-5406A (not what I'm looking for). I read into the email a bit and presumed they might not have a ton of experience identifying the transmissions they get in, so I sent a few emails with "spotters guide" info and gave some suitable alternatives for the exact part number I am looking for. The sales lady got back to me that just this morning the yard mechanic when out and looked and nearly found the part I'm looking for, and it's still on a truck with all of the parts. I should be able to get the clutch master cylinder, clutch slave cylinder, release arms, clutch bell housing and transmission out of one truck (that reduces my fabrication requirements significantly!!!).

The transmission they found is not 100% what I'm looking for - it isn't overdrive, but I can swap out a few gears and a shift tower cover to convert it into an overdrive transmission. I'm going to withold the exact info and dismantler yard info until I get it shipped - I don't want someone else to snag it out from under me...
 

tim292stro

Well-known member
2,118
39
48
Location
S.F. Bay Area/California
Today's update doesn't come with pictures and is probably a bit boring - I spent a lot of time this weekend measuring, and I have quite a bit more to do. The front and rear suspensions are one area of focus, the engine compartment and interior the other two more significant areas. I'm putting some of the truck in CAD so I can virtually test fit the parts into the chassis, and I may go nuts on the CAD angle (put the whole truck in).
 

tim292stro

Well-known member
2,118
39
48
Location
S.F. Bay Area/California
Did some more work on the Cummins engine, mostly taking off accessories - almost down to the block. Took off the AC compressor, alternator, all of the sensors and harness for the Dodge electronic instrument cluster, power steering pump, starter, and the heat exchanger for the auto transmission. Basically what is left is the block and oil-pan, injector pump, head, fuel injectors and lines, the flywheel housing, and the gear train on the front of the block.

Didn't manage to take any pictures, however, I did bump into an old high school classmate who apparently has the storage stall behind mine, and he's helping a friend modify an M416 trailer for use with his Land Rover. Helped them diagnose a strobing LED brake-light issue due to the ABS detection circuit on the land rover - and came up with a fix using relays for them. Basically they installed relays near the trailer plug on the tongue, that presents an inductive load to the Land Rover, then using the 12-volt pin of the 7-pin trailer plug, supplied the power to the LED brake lights through the switched terminals of the relay. Was good to catch up with an old acquaintance, and he's interested and offered to help on this XM1027 project. He works in a sheet metal shop as a day job, and welds and works on cars (I got him hooked on LED fixtures back in the early 2000's) - in addition to off roading and modding trucks for off-road. Sounds like the perfect extra set of hands for this project... :beer:
 

tim292stro

Well-known member
2,118
39
48
Location
S.F. Bay Area/California
Got the last of the "extra" parts off the engine - only the injection pump, front gear train, water pump, exhaust with turbo, and the flywheel housing and flywheel are left. I'm going to take off the flywheel this weekend, and unmount the engine from the cross-member that was provided with the engine (so I can copy it or weld it into the truck). I'll take some pictures once the flywheel is off so you guys who haven't seen one can see what a 6BT looks like in its minimum running configuration.

After the flywheel and housing comes off, it's time to tear down the engine itself, and rebuild it. Some of the things that are important to check on an engine are:


  • Engine block for cracks
  • Head for cracks
  • Crankshaft for cracks and scoring
  • Cylinder walls for deep scoring or rust rings
  • Main bearing caps and seats for cracks (part of "block" check, but worthy of special call-out)

As part of the rebuild, all of the seals and gaskets will be replaced, all of the crankshaft bearings will be replaced, pistons and rods will be replaced, water and oil pumps will be replaced. Normal cost for a rebuilt kit (parts only) on these engines is between $500-$800 (depends on quality of the parts). I'm going to go a bit crazy here and get anything that touches hot combustion and exhaust air with PolyDyn Ceramic coating, anything that rubs (bearing surfaces) or could rub will get the PolyDyn lubrication coating. I'm not going to go into why any more than that. If you feel you want to search for PolyDyn and research what those coatings do that is your choice.

The block will be painted Cummins Beige, which is similar to desert tan - while all of the accessories and hoses will be black. Same scheme will be repeated on the outside (black accessories, on Tan base).

I also found a device in storage I had intended to use on a separate bus-conversion project that will now find its way into this build, it's called "Turbosafe". This device is a 2-stage oil accumulator - it is charged by normal operating pressure and takes about 1-liter of oil. Once the engine is stopped, the oil accumulator will release about half of its volume until it hits a stop on an internal rod. Since this is upstream of the restrictor fitting on the turbo, it provides about five minutes of oil at roughly 20psi. Once it hits the stop, it sits waiting for the engine to start again. When you start the engine, a solenoid releases the stop and the other half of the oil is released into the turbo - or until the oil system comes back up to pressure which again recharges the accumulator. The solenoid on the one I have is already 24V, so will wire in parallel with the starter motor (easy wiring :)).

I have also decided that I will be getting rid of the Holset turbo with a sleeve bearing that comes with the engine, and moving to a Garrett ball-bearing turbo (also water cooled as a bonus). I think it's really awful how tight a sleeve bearing grabs the turbo's shaft - it's difficult to spin by finger, and that tells me when nothing but air pushes on the turbine that it loses a lot of effort of the turbo to the bearing (and it probably makes it take longer to spool, and makes the back pressure and EGT's higher). TurboSafe plus water cooling and ball bearings in the turbo should lead to the best reliability and power I can get out of that segment of the engine compartment.


I'm also starting to bring the rest of the engine compartment components into focus...

Intake air: I'll be using a snorkel pre-filter and a large volume Donaldson PowerCore type air filter with a thick core inter-cooler. Intake air is specified at 750CFM, which should easily support 300RWHP (~350@flywheel) eventually.

Exhaust air: Pipe will pass down the passenger side, underneath the clutch housing (between the engine and transmission) and down the driver's side of the frame, where I should be able to fit a hospital grade (40-50db cut-down) muffler and up a stack on the driver's side at the front of the bed. Everything from the exhaust manifold to the top of the bed will be wrapped with very high temp blankets (I will build myself). Pipe size I'm working with for mock-up is 5" exhaust, with exhaust air specified at 900CFM, which should also support 300HP eventually.

Electrical: Dual supply system, both 24VDC. Two alternators, two pairs of group 31 batteries, both systems isolated completely except for the starter/engine-run circuit. Passenger side battery will power "add-ons" and the NATO plug in the front right next to it. Driver's side will power the truck's normal circuits. I have designed an auto-selector logic circuit which will select the battery bank with the highest state-of-charge (SOC) to start the engine, and if the highest bank is at or below 40% SOC or the ambient temp is below 32F, will tie both banks together for a start. It's all analog except for a few components, and those are simple digital components - using modern parts, I can get the power consumption down under 50 Micro Amps (0.00005 amps). I will start with one bank due to cost, but will at least make the space and the cables for the second bank.

Cooling: I will stick with belt-driven mechanical fan. Aluminum radiator will be recycled from the 7.3L currently in the truck, unless I find rot or significant damage when I start to pull out the under hood stuff. Intercooler is going to have to be custom to fit in the core support - I got my LMC catalog today, and I think I'm reading right that all core supports for this year are the same, even the military version. If someone can call BS, please do so and publicly :). One thing that I will be paying attention to when I put it all back together is the sealing around the edges of the radiator and fan. If there are gaps, the air pressure will take the path of least resistance and just go around the radiator - I want all of the air the fan pulls to go through the intercooler and then the radiator, and then out the fan and fan-shroud onto the face of the engine - then down out and back towards the bed where the exhaust runs. Firewall, inner fenders, and hood will be getting a custom thermal/acoustic blanket to keep the engine heat in the air stream of the radiator fan, and the engine compartment noise down. The only heat I want to get into the cab from the engine bay is the intentional heat from the heater.


I think that's enough for tonight...
 
Last edited:

tim292stro

Well-known member
2,118
39
48
Location
S.F. Bay Area/California
Just got an email from another vendor today that one of my focal pieces is ready to ship tomorrow - I'm going with the push-button Master light switch. I know a bunch of people here will laugh and say that it's unreliable, I'm hoping that by ordering the tough new (not surplus) "Generation 3" from Esterline AIS (Esterline p/n: 9375-00311) that has the EMI, surge, and over-current protection built in (and dedicated grounds, new wire, and all LED fixtures) - that I won't have the issues others have seen. I still have a 3-lever type switch I purchased from another member here (classifieds) a while back that I can fail down to if I do run into those problems.

FYI, this thing had a lead time when ordered new from the factory - I ordered it in late February... Probably like GSS, they military gets first dibs, then silly civilians like myself get the leftovers :).
 
Last edited:

tim292stro

Well-known member
2,118
39
48
Location
S.F. Bay Area/California
Wow, already a week gone by... Got the G3 MVLS from Optimum Vehicle Logistics. It's pretty :)

MVLS-Small.jpg

This isn't as cheap as the G1 version that you can still get, but it has internal current limiting (like the old 3-lever type), and ESD/Surge/EMI protection. I'm going to keep the currents low through the switch, and will run a dedicated ground return for this switch so it doesn't rely on the chassis ground. I have faith there won't be any fires reported here ;).

More pictures this weekend, should be some visible progress that's photo worthy.
 
Last edited:

tim292stro

Well-known member
2,118
39
48
Location
S.F. Bay Area/California
Forgot to mention, I also got an email from a wheel vendor in Wisconsin yesterday, so I should have my wheels lined up. 20"x9" bead-locks (also called double-bead-locks by some), with cold-rolled rock rings, and the factory look to the center section. Finding the 20"x9" for a dually truck's offset was a pain...

If you go to the link I have above, they have a picture of a white crew-cab truck at the bottom of their home-page that is kind of along the lines of where I'm going with this project.
 
Last edited:

tim292stro

Well-known member
2,118
39
48
Location
S.F. Bay Area/California
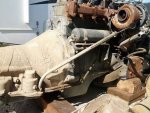
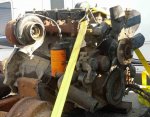
So I got back to the pre-work clean up today, and remembered to take a picture of the engine minus the transmission and the other accessories finally:
Base_Engine_Small.jpg


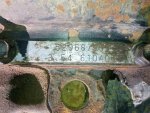
In addition to organizing my "don't need it pile", I started on some of the clean up of the axles and transfer case. The NP205 was uneventful, it cleaned up, and is now set-aside. Didn't get to the rear axle yet, but I spent a bunch of time going over the front axle. I did find the diff tag while cleaning, and was pleasantly suprised that I wouldn't have to buy a $500 3.54:1 Pinion/Ring set for when I rebuild the axle - this unfortunately tells me though that the axles were not matched (and not from the same vehicle as originally described) since the rear Dana 70 is a 4.10:1 Pinion/Ring set:
Front_Diff_Tag_Small.jpg

And then the real bad news came... as I was cleaning off the caked-on mud and dirt from the connecting rod, it just kept coming off, and kept coming off.. and then I found a weld on the nut:
Broken_Link_small.jpg

It looks like an emergency trail repair, but that won't do for my build up - I'm not rebuilding an axle and leaving a broken cast knuckle on it... So now I'm back out that $500 for a replacement knuckle (actually probably a bit over $1000 for a matched set).

Bummer, there goes the budget. More tomorrow, I'm pulling out the last of the dash, interior wiring, etc... Should be bare sheet metal by the end of the day.
 
Last edited:

jdknech

Active member
1,095
4
38
Location
Jeffersonville, Indiana
man, that sucks about your axle... but $1k for a set of knuckles?? wow, makes me glad to live out here in redkneck-ville!! that would run you about $200 if you remove them.. $300 if they remove them..
 

tim292stro

Well-known member
2,118
39
48
Location
S.F. Bay Area/California
$1150 is the price for a set of Crane high-steer chromoly knuckles. Figure I don't want to break them again, and it probably broke because it hit something... Off topic: sorry I didn't buy your M1031, didn't seem like a good idea to chop up a real CUCV for this project :).
 

jdknech

Active member
1,095
4
38
Location
Jeffersonville, Indiana
$1150 is the price for a set of Crane high-steer chromoly knuckles. Figure I don't want to break them again, and it probably broke because it hit something... Off topic: sorry I didn't buy your M1031, didn't seem like a good idea to chop up a real CUCV for this project :).
mixed feelings on that.. I'm glad it didn't get chopped up (you wouldn't have if you had seen it anyways, it still pops your ears when you shut the doors) but I do need to sell it.. It doesn't pull a gooseneck very well with the tool body.. lol
 
Top
AdBlock Detected

We get it, advertisements are annoying!

Sure, ad-blocking software does a great job at blocking ads, but it also blocks useful features of our website like our supporting vendors. Their ads help keep Steel Soldiers going. Please consider disabling your ad blockers for the site. Thanks!

I've Disabled AdBlock
No Thanks