So in my other thread regarding checking the 24 volt system and the DUVAC, I found the upper alternator was bad and only putting out 10-11 volts and that assumes the DUVAC is actually working, which there is really no test for those. For my use, I have zero need for any 24 volt system and the glow plugs relay had already been converted to a 12 volt style prior to me. My quest to convert to 12 volts began.
With the help of my best friend, who is an auto electrical tech working on emergency/command post type vehicles, we set out to figure what wires needed to be kept, what we could remove and what we needed to add. We studied in detail, the TM wiring diagrams and figured out all the wiring to the lower alternator is unneeded. We also found a majority of the DUVAC wires could be removed. Since much of this is loomed into the engine harness on the back of the engine, we decided to cut back and "stub" the unneeded wires and sealed those ends and taped them up. We did find we could keep a positive (RED-2B) and negative (BLK-151F) wire (that went to the DUVAC) long so I would have a nice feed on the driver side should I ever need this. We also found we needed to tie the brown wire (BRN-39G) to the white wire (WHT-103C) which would in turn be the switched ignition to the new alternator. Since we were joining these, we ran a stub pink wire and bundled it with the black and red so I would have a switched source should I ever need it.
This basically took care of the main modifications needed and focused on the main power leads from the batteries and single alternator. Prior to all the wiring, I swapped the 24 volts starter to a newer gear reduction 12 volt style. This also meant I needed the starter bracket for this style starter. Luckily a Chevy dealer in town had it in stock! Overall that took time but was fairly easy to do. Then it was time to remove both of the old 24 volt alternator and put the new 12 volt in in the upper mounting spot, as it's easier to get to. Then it was simply wiring a new 12 volt + lead to the power block and the two batteries in parallel.
Now one thing I did would prevents one battery (which could have a bad cell or short out) from killing the other battery is I added a heavy duty solenoid between the +12 front battery cable and the power block on the firewall. It is wired so when you turn the key on, it will connect the front battery to the system as if the two batteries are parallel but when the key is off, it disconnects the front battery from the system. This just adds an extra level of safety should one battery have a problem and not drain the whole system down.
I also picked up a new 12 volt gauge to put into the stock location of the 24 volt one. Just had to modify the dash mount to remove an unneeded bracket. I used the pigtail off the old gauge and changed the connectors for the new one. This way I can still remove the dash and unplug the gauge just like the 24 system was.
Okay, enough talk and onto the pictures! Hope this helps someone else should they want to do the same.
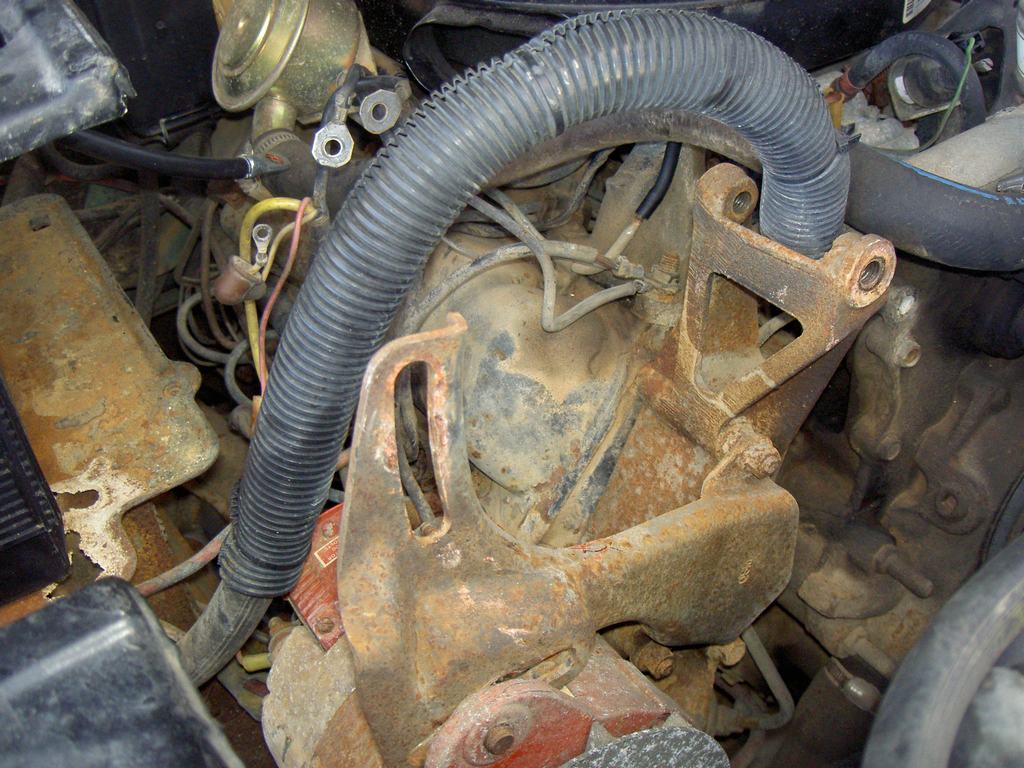
Start with removal of upper and lower alternator (after disconnecting the batteries)
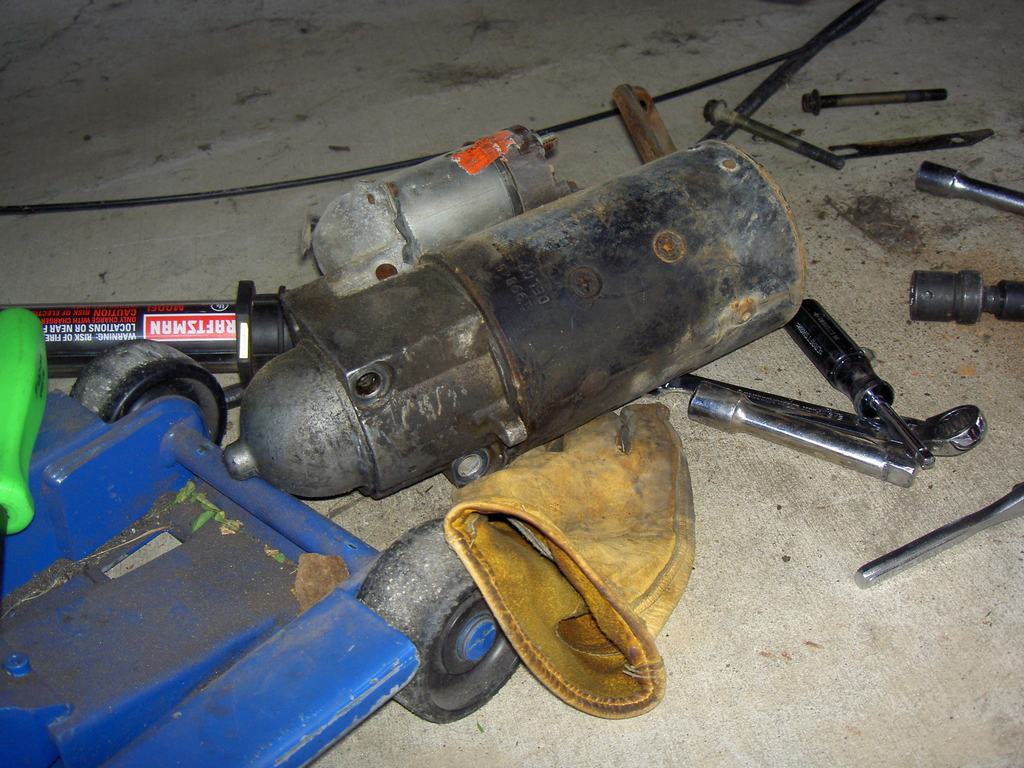
Remove the old 24 volt starter
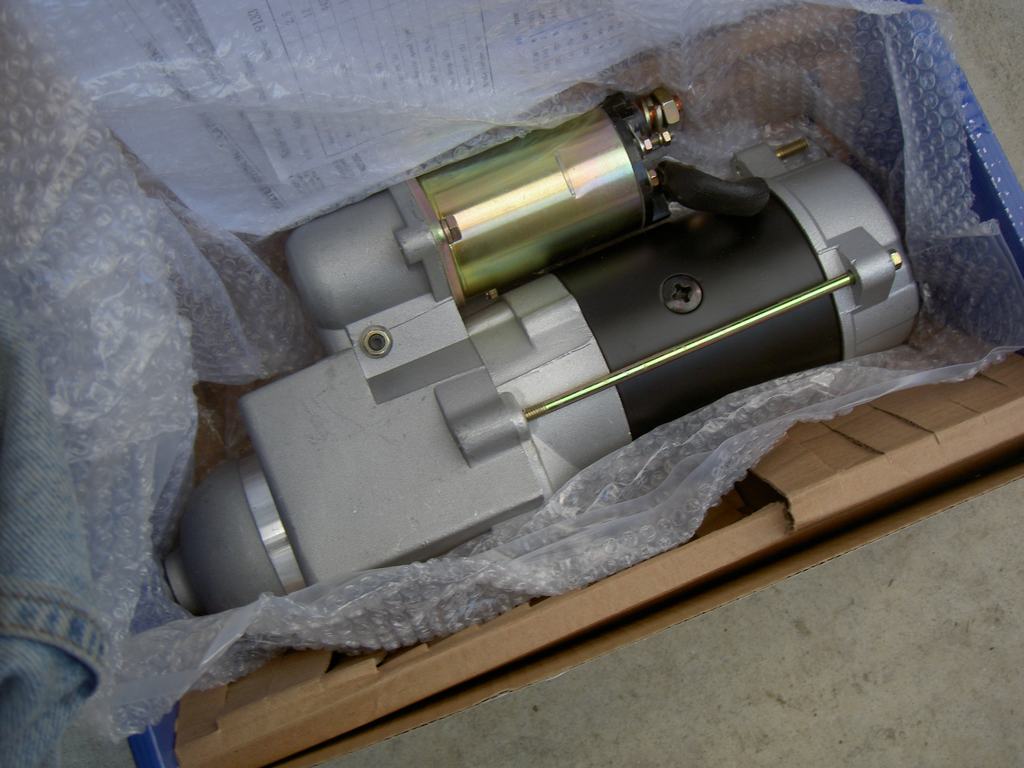
New 12 volt gear reduction starter... shiny
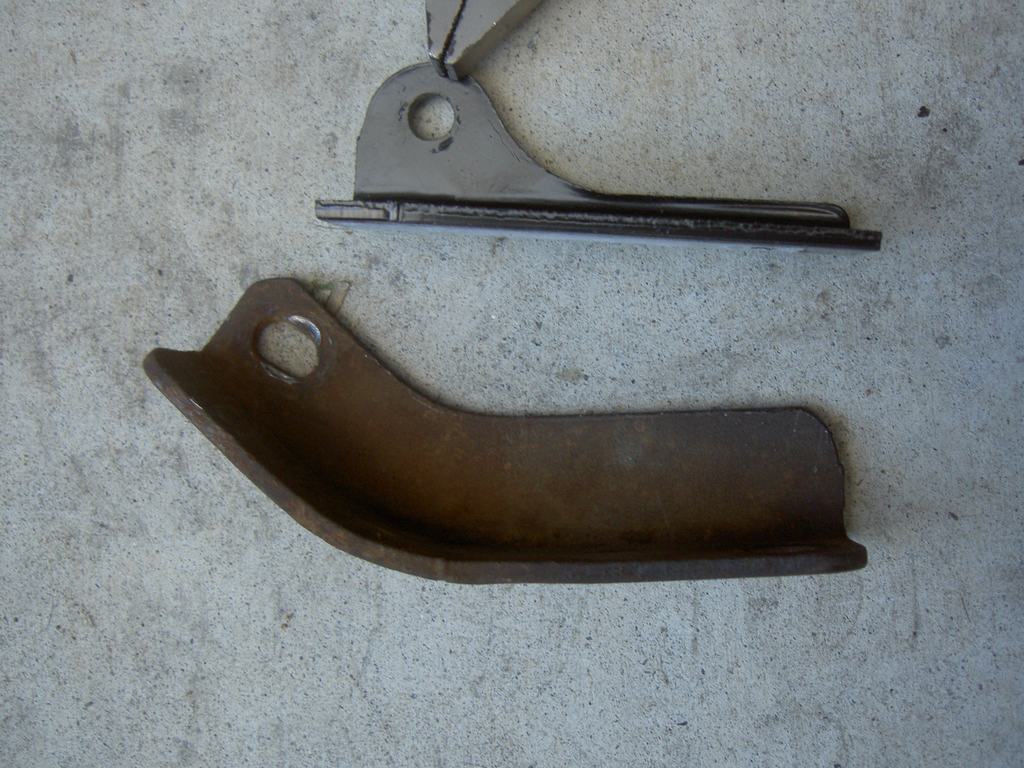
Old large starter bracket and new gear reduction starter bracket
New starter all mounted up
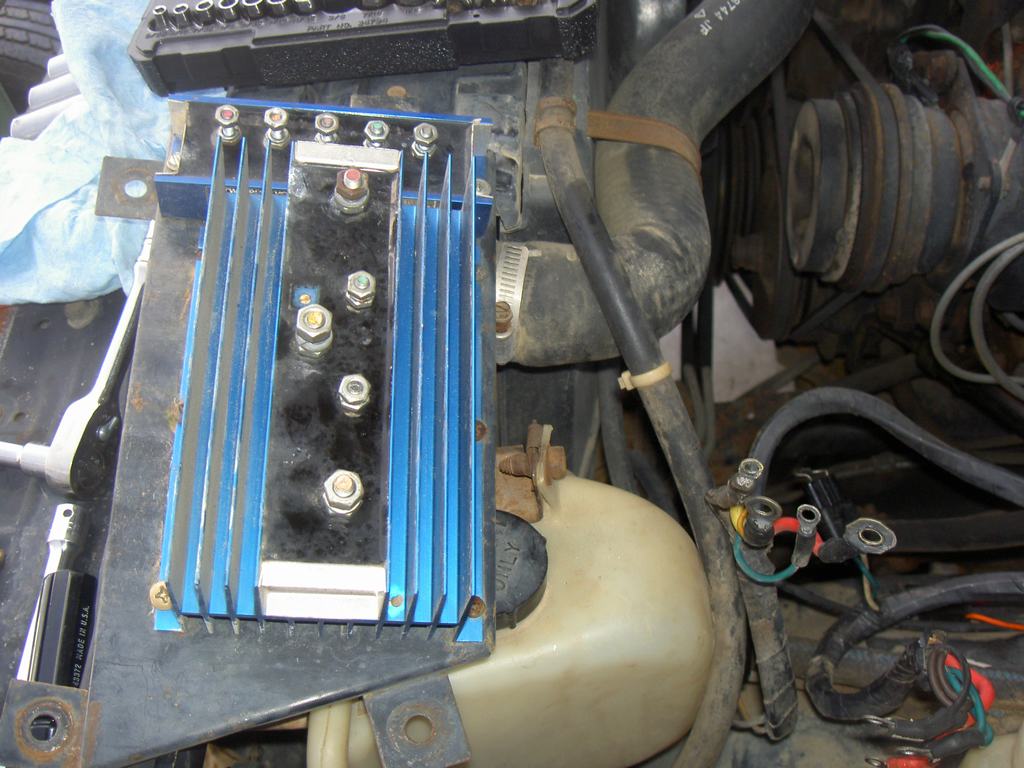
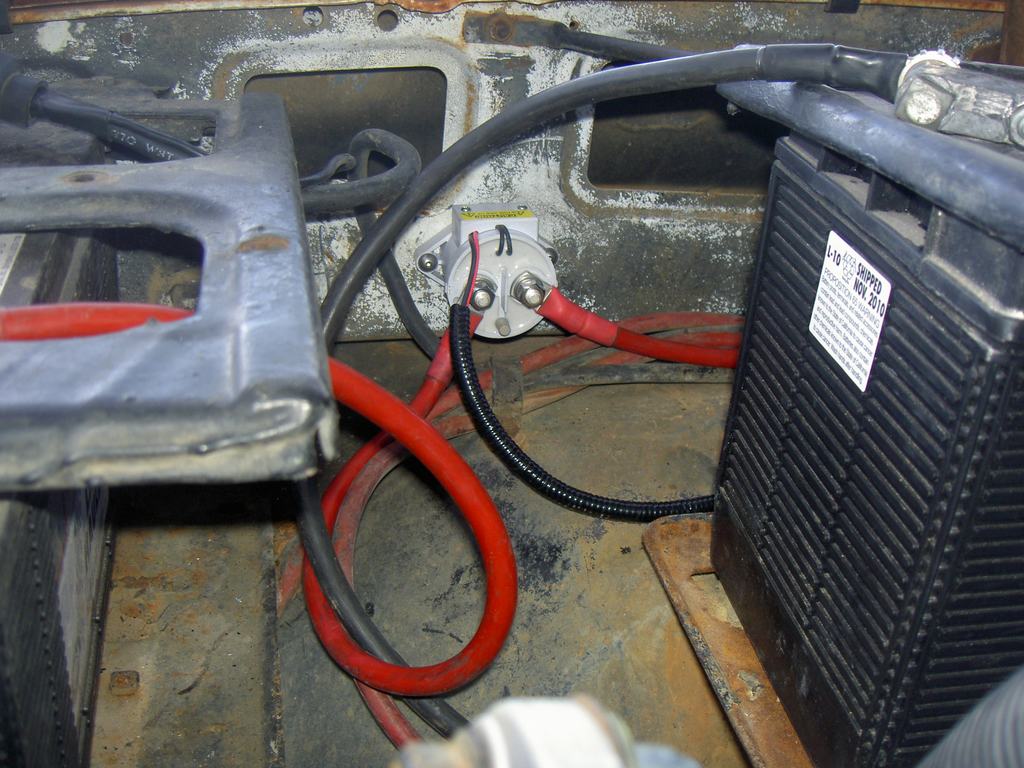
DUVAC removed
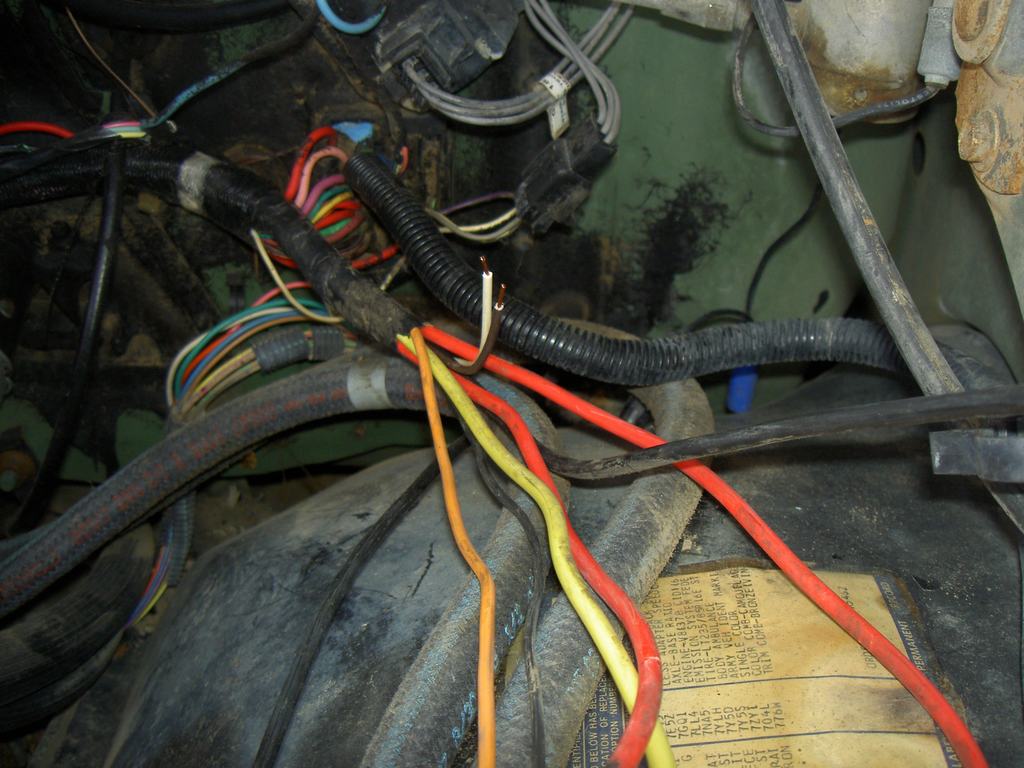
Peeling back the DUVAC harness, which had been modified before when the "orange wire" conversion was done
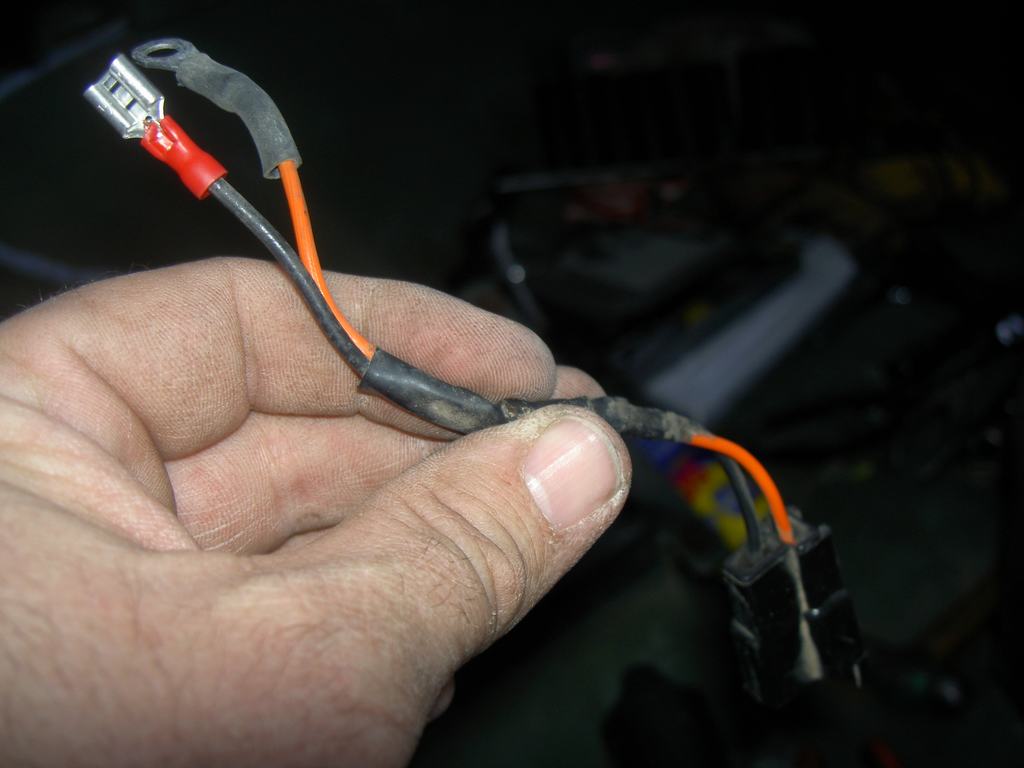
Here are the brown and white wires cut back and to be joined. This is where we also placed a pink switched ignition lead for future use
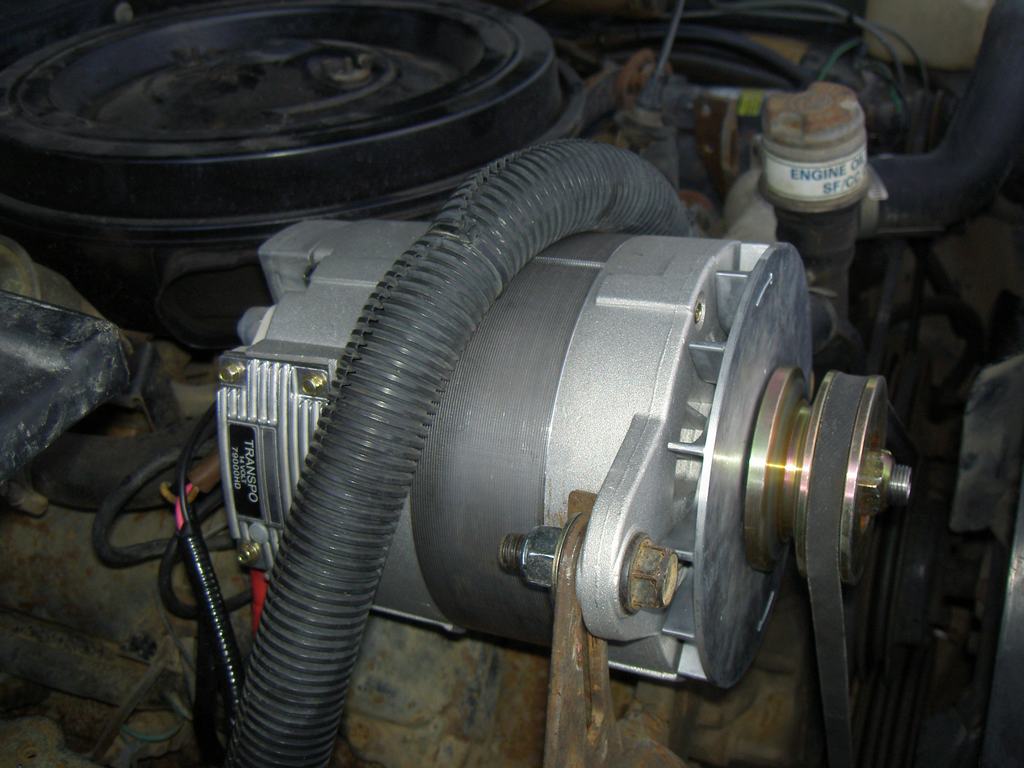
New 12 volt, 200 amp, J-180 style mount alternator
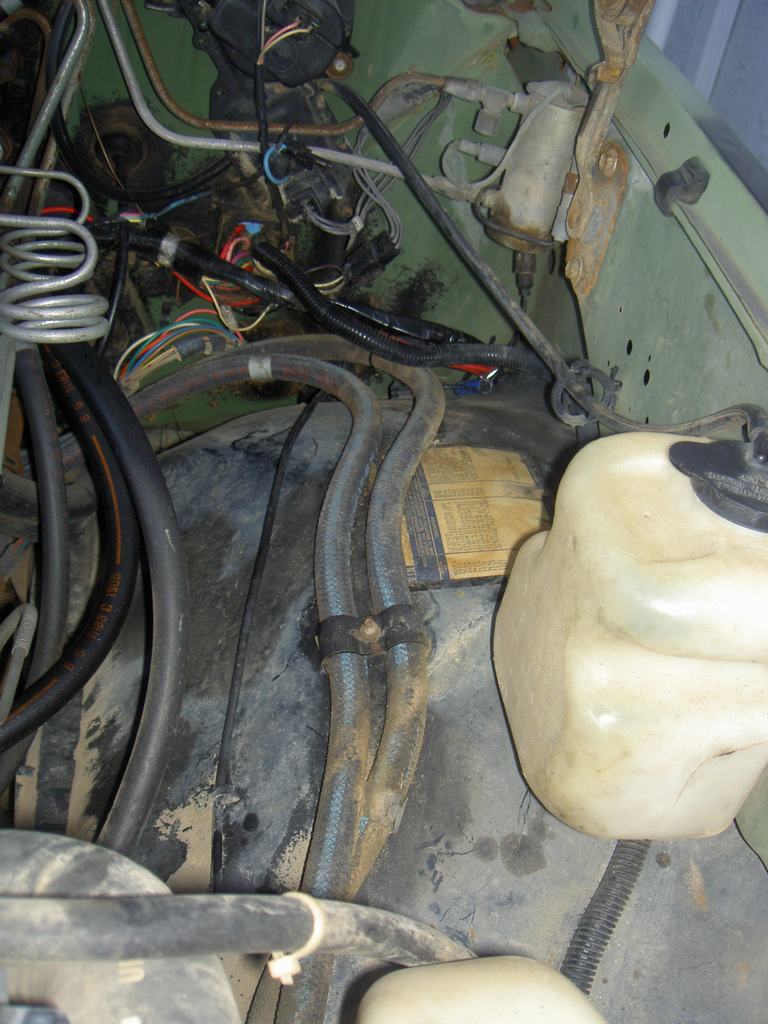
Much cleaner without all the DUVAC wires
Blue Sea ultra heavy duty, sealed battery solenoid (300 amps continuous, 2000 amps surge)
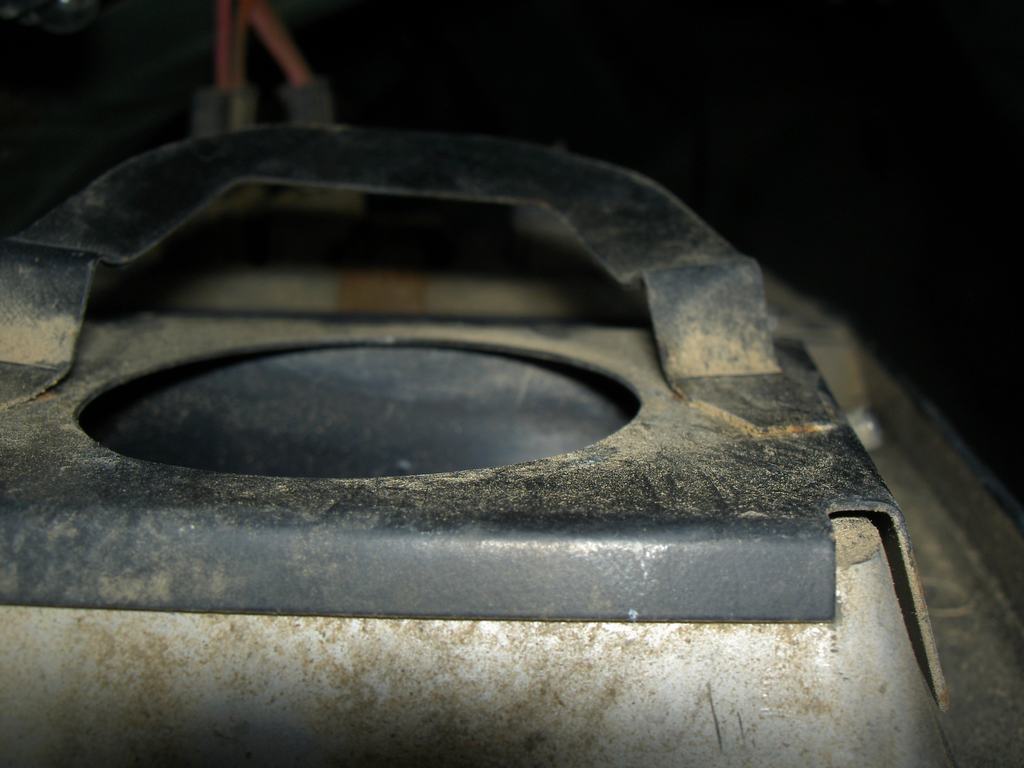
Bracket on backside of dash where the stock 24 volt gauge goes. Needed to trim this off so an aftermarket screw flange mount 12 volt gauge can be mounted
Gauge I got a Kragen
Using the original pigtail off the old gauge and swapping it over to spade connectors. I did this as my friend had to leave and took all of the good connector and shrink tubing.
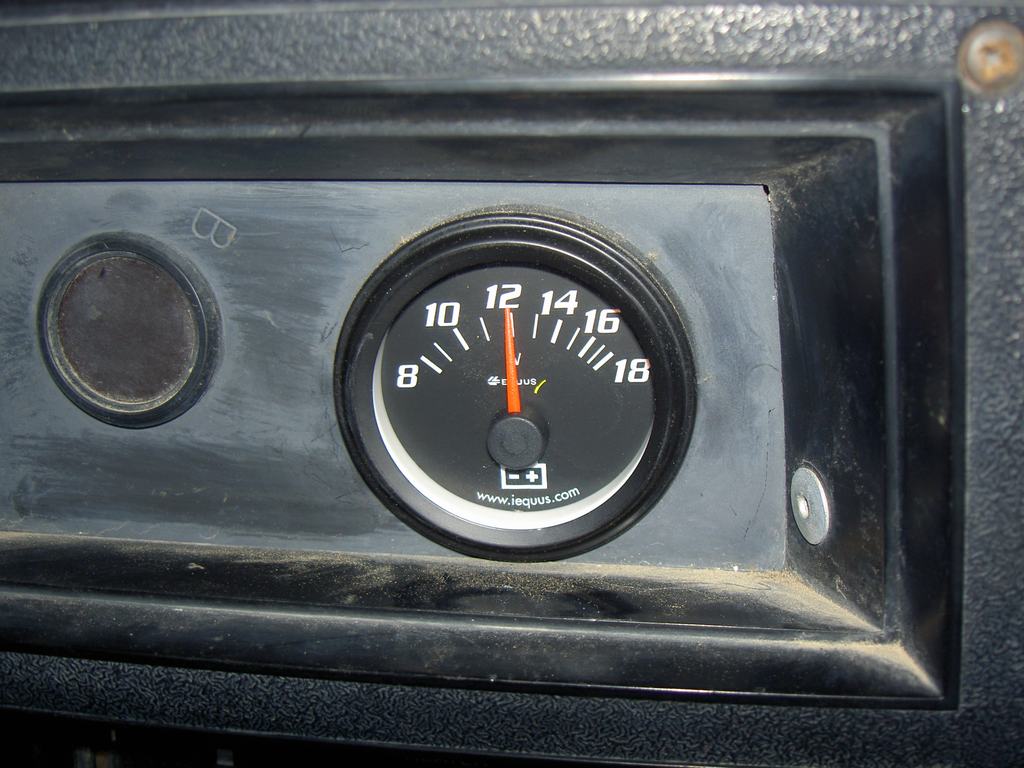
Gauge mounts and showing 12 volts with the engine off. I was able to use the original gauge light that pushed into the new gauge. Made that really easy
Well that is basically it. Starts right up, charging at 14.4 volts, all the lights work, even the black out lights. I documented the printed TM diagrams and will go through and make the changes and print out an updated diagram.