• Steel Soldiers now has a few new forums, read more about it at: New Munitions Forums!

  • Microsoft MSN, Live, Hotmail, Outlook email users may not be receiving emails. We are working to resolve this issue. Please add support@steelsoldiers.com to your trusted contacts.


Bonedoc's M35A2 modification thread

bonedoc

New member
502
1
0
Location
Bangor, PA
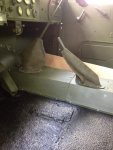
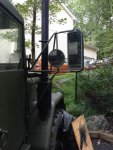
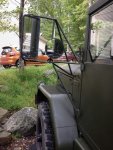
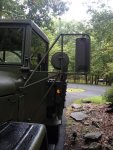
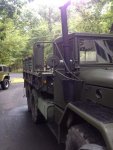
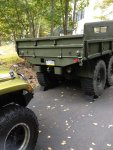
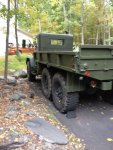
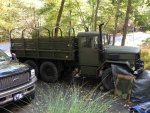
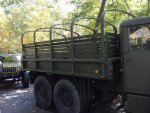
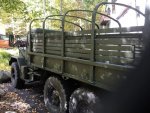
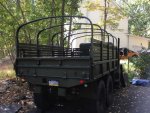
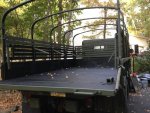
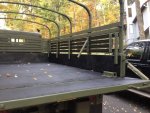
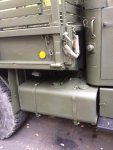
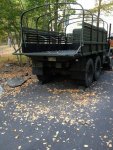
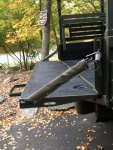
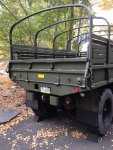
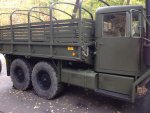
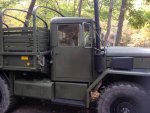
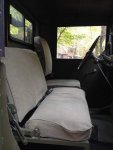
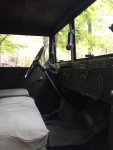
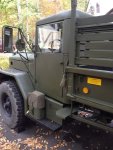
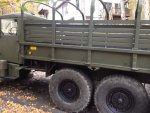
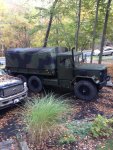
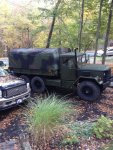
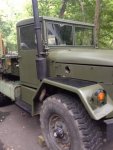
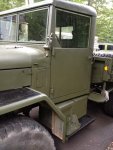
Here are a few pics with the doors on. If you look at the one of the passenger side you can see how the door is a little crooked. I had posted this am about adjusting the hinges after searching TM's and past posts. I think I figured it out and it sits nice and square now. Just need to adjust the hardtop as it is farther forward on the passenger side then the driver's, need to shift it back a little to give me about a 1/8-1/4" more clearance to clear the weatherstripping mounting brackets
 

Attachments

RAYZER

Well-known member
3,380
58
48
Location
sanford/florida
Nice job Bonedoc, looks good!
I especially like the herculiner
application where everything gets walked on!
What color paint is that and what brand?
 

bonedoc

New member
502
1
0
Location
Bangor, PA
It is Rapco 34079 forest green. The truck had a 'bedliner' material of sorts when I purchased it. Some was chipping off so I removed most of it and freshened it up after painting it with Herculiner. I like the look as well. I'm hoping it will take the abuse of feet and spare the paint of that kind of wear. An added plus is it is easily repairable, given that I'm also going to do the inside of the bed with it as well.
 

bonedoc

New member
502
1
0
Location
Bangor, PA
I'm really happy with the color. Unfortunately I just realized I did a bone head move. I had air wipers and had purchased a NOS electric wiper kit. Just looked at it and installation requires removal of roof....DDDOOOHHHH!! I guess I'll do it when I swap the hardtop seal....lol
 

bonedoc

New member
502
1
0
Location
Bangor, PA
Got my Winterization boots from Jatonka today. Had a 2 hour mid day break so I went home and installed them. They look and fit great. I love the smell of the oiled canvas.
 

Attachments

bonedoc

New member
502
1
0
Location
Bangor, PA
Well it was pouring this morning so I wasn't able to get all my weather stripping done but I did have time to get my mirrors on. They went together good. No fitment issues. Weather looks good for Thursday morning so I should be able to get my weather stripping on my doors and hardtop opening then.
 

Attachments

bonedoc

New member
502
1
0
Location
Bangor, PA
Things are really coming together now. Got my bed, troop seats and headboard, and my cargo cover bows all painted. Should be able to install those tonight. This weekend I hope to get the bed bedlined, fuel tank installed, cargo cover installed, and my driver and passenger seats finished and back in. Then the truck should be done except for some odds and ends. The underside and 2 other colors for the camo will likely have to wait till spring as we are running out of warm enough weather here in the east and I really need to get some things done at home before winter hits....lol.
 

Attachments

rustystud

Well-known member
9,071
2,388
113
Location
Woodinville, Washington
Looking real good ! I'm going to copy you and paint my fender tops with Herculiner too. What a great idea ! No more slipping off the fender in the rain !
Keep up the good work !
 

bonedoc

New member
502
1
0
Location
Bangor, PA
Got some pics of the deuce with the troop seats and cargo bows installed. In the one pic you can see my Jerry can and cover as well. Will be painting the underside of the seats tomorrow then bedline the bed. If I have time I'll get the fuel tank installed as well. I also have to finish the seats and get them installed and have chain covers for the cargo bed chains to install as well.
 

Attachments

bonedoc

New member
502
1
0
Location
Bangor, PA
I'm getting closer to being done. Just have to finish the seats, paint the wheels and some minor odds and ends and all is good to go. This weekend I got a lot done. Got the undersided of troop seats painted, bed bedlined, jerry can installed, fuel tank installed and hooked up, mud flaps installed and chain covers on.
 

Attachments

Ford Mechanic

Active member
1,805
6
38
Location
Edenton, NC
Thanks Mike, it has been alot of work but very enjoyable. I have a question for you. Did you put on the spin on oil filters on the deuce I purchased from you? If so, who made it? John Tennis or Westfolk?

Thanks
Harold
They were bought from Westfolk. Did my PM not go thru I sent the other day?
 

bonedoc

New member
502
1
0
Location
Bangor, PA
They were bought from Westfolk. Did my PM not go thru I sent the other day?
It did Mike, Got it. I posted the question here then realized I should of just sent a PM, my bad.
Thanks, that helped a lot. Actually it works out good because I got my primary and secondary fuel spin ons from Westfolk as well.
 

bonedoc

New member
502
1
0
Location
Bangor, PA
Finally the truck is ready to roll!! I have to put my cargo cover on but that is basically it. After work this evening I'm going to take the truck out for a run to get some fuel....can't wait to get back behind the wheel!! Got my seats installed, wheels are painted, data plates are on the bed, stenciling on tank, steps and under hood.
 

Attachments

bonedoc

New member
502
1
0
Location
Bangor, PA
Here it is with the cargo cover on. Really happy with how it turned out. Hopefully I'll get it out for more and better pics tomorrow. Took it out for a run last night and other then needing to adjust my side mirrors better all worked and rode very well.
 

Attachments

bonedoc

New member
502
1
0
Location
Bangor, PA
Installed my spin on primary and secondary fuel filters today. I went with Westfolk's setup, 1- because my spin on oil filters are his, and 2- because I really liked his design especially with the secondary fuel filter. The secondary fuel filter kit comes with 4 new lines to replace all the lines coming to and from the secondary filter. This was a nice feature and made for some preventative maintenance for those with lines needing or due for replacement.
Installation was very straight forward, took me about 3-3.5 hours total taking my time, working by myself. I'll admit as an amateur it at first appeared a bit complicated...even intimidating, but once I started labeling lines and removing stuff it all fell right into place and became very obvious, familiar, and easy to follow.
Here are some pics of it done.
 

Attachments

voltedge

New member
24
0
0
Location
Madison,GA
Could you tell me how you was able to get the front two nuts off of the compressor to remove it from the base? It is an 11/16 nut and I've tried multiple sockets and even a crows foot, but the stupid compressor is shaped as to keep a socket or a box end wrench to slip over the nuts. I don't fee as if there is enough room to use an open end wrench and furthermore, mine are rusty and need a fair amount of torque to force the nuts loose. Your help is appreciated! BTW, your build is very nice!
 
Top
AdBlock Detected

We get it, advertisements are annoying!

Sure, ad-blocking software does a great job at blocking ads, but it also blocks useful features of our website like our supporting vendors. Their ads help keep Steel Soldiers going. Please consider disabling your ad blockers for the site. Thanks!

I've Disabled AdBlock
No Thanks