• Steel Soldiers now has a few new forums, read more about it at: New Munitions Forums!

  • Microsoft MSN, Live, Hotmail, Outlook email users may not be receiving emails. We are working to resolve this issue. Please add support@steelsoldiers.com to your trusted contacts.


S250 Comm Shelter Project - HAM & Military Radios

Timberwolf22

Member
154
24
18
Location
Kenett Square PA
I LOVE your setup!!!! It looks fantastic! :drool: [thumbzup]:jumpin: I can only dream of owning a rig as nice as yours. Also, this is a long post but I have lots of ideas that I want to share. :mrgreen:

I'm also a 'computer guy' and a 'network guy'. :) Is that an aluminum Chatsworth rack in post #6?

I'm going to throw out a bunch of out-of-the-box ideas that you may want to consider. I get the sense that your mobile ham shack will be used in many places without shore power, and it will be used A LOT. :) If that's the case, I feel that your M105 trailer is too small for your needs. I get the feeling that you're trying to cram too much stuff into a very small space. I think you need a larger double axle trailer. Right now there is a bolster trailer with a large bed on it for sale in the Classifieds. (For the record, I have no affiliation at all with the individual selling the trailer.) You could move the S250 into the bed on the bolster trailer and sell the M105 if you don't see a future need for it. You'd have plenty of room for your MEP with that bolster trailer - you may even be able to mount the MEP under the bed and fit a Deuce fuel tank to the other side to counter balance the weight. The bed already has a cargo cover so you could extend your equipment into the bed. That bed looks huge, which means you could fabricate some ramps and load a small road legal vehicle or motorcycle which would help you make grocery/fuel/supply runs without having to drive the M35A3. You could move the refrigerator out of the S250 and into the bed, which would free up a lot of room.

I have a couple ideas as for your need of a heater. You will have a substantial heat load produced by all those radios provided you're using multiple rigs at the same time. My advice is to put a cheap fan in the shelter to circulate the hot air when the temperatures drop. You won't know what your true heat load is until you have everything installed, SWR meter checked, outfitted, and functioning. If you're using your shelter in sub zero temperatures and the radios aren't producing enough heat to keep your fingertips thawed, go buy a small ceramic space heater from Wally World. Stay away from propane heaters. The space you want to heat is small and there's no need to add a device that produces major BTUs.
Let's start with a thanks for the compliments!

My M35a3 is the "other kid" and part of the collection of "Dad's Stuff" that everyone just leaves alone at the house. She did not get like that in a day..... many Steel Soldiers and other individuals have helped me with her over the years....takes time but I am proud of how she looks and runs.

The S250/M105 trailer combo needs to be mobile - I want to take it with me to Sussex, Aberdeen and Gilbert each year I have some plans to get more involved with the Military radio groups. I also plan to use it for my HAM radio club events such as field day so yes mobility was important in the design. I have set aside some $ to purchase one of those small Honda EU2000i generators - I have always wanted one for portable power needs when noise was a concern and I think it might supplement the MEP generators well.

I went out and checked, yes the rack is aluminum [was fun to cut] but no stamped brand name on the rack.

The M105 trailer being to small....... your right. But then my garage is to small for all my toys, my house is too small for my stuff and the M35a3 is not a 5-ton so it's also too small. The reason for the trailer selection is simple..... just like why I own an M35a3 - it's what I am comfortable driving.

You have to be honest with yourself - and when I started to plan this I had aspirations of the XM1061a1 5-Ton trailer with an S250 shelter and dual 5-ton truck fuel tanks with a MEP-002 permanently installed.... haul that with my M35a3 and your in for a long day = too much weight. The truck becomes way too "long" and no longer "fun" for me to drive.

So the S250 in the M105 is the best compromise for me. The trailer is so close to the truck and light that I hardly know it is there.

Keep in mind I have an S280 in the M35a3 bed for "stuff" as well.

Now lets also take a step back and laugh ... at me ...This entire project began with wanting to install a single radio. I have had a great deal of fun trying to see what I could fit inside the S250. The project has become a lesson in what do I need vs. what do I want.

I agree on the fan - already have a 12V one for installation. The propane tank will already be available on the S280 shelter but for simplicity and comfort right now I am leaning towards the electric heater option.

Keep the ideas coming!
 
Last edited:

tomcata3

Member
151
2
18
Location
spring city, pa
Hi Todd,
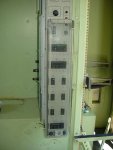
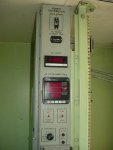
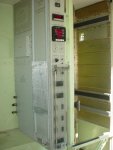
I have a fuse panel that i'm removing from a shelter I just picked up, and I also have equipment racks
Let me know if your interested
Here is some picsDSC02551.jpgDSC02550.jpgDSC02548.jpg
 

Timberwolf22

Member
154
24
18
Location
Kenett Square PA
Very impressive! I like seeing progress! Make sure you include your command chair pictures and ideas too!
So MadCat2 let some of the S250 plans out of the bag............ after all we have on the left a refrigerator, network rack with HAM radio's and in front a radio table with military Radios and to the right side we have a table with laptop computer and plans for a wall mounted monitor.

What would go in the middle of all that open space...... the right chair - something that I can swivel between "Command Stations"..... which is code for never have to actually get up.

Command Chair.jpg

I may not have a starship or a cool yellow shirt with a nifty emblem but I deserve a cool chair!

Just have to decide if it's going to slide front and back in addition to swivel. Once I add the comfy chair I might never leave.

On a humorous note I decided to pass on the heated seat option - that costs more power. Chair color will be Black or Green.... to be decided.

Madcat2 should also be updating the OT-90 thread since he has been making great progress on that......................
 
Last edited:

Timberwolf22

Member
154
24
18
Location
Kenett Square PA
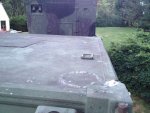
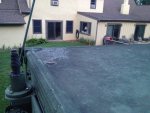
Looks like I need some S250 shelter roof work.........

IMG_2318.jpg IMG_2319.jpg

Just finished scrubbing the roof to clean it.

So I have decided on some JBWeld to fill in some cracks. Some silicon to fill in those seams and then I am spraying the entire roof with the Rust-Oleum Rubber Leak Seal.
 
Last edited:

Timberwolf22

Member
154
24
18
Location
Kenett Square PA
First, thank you for your service. :)

The configuration I have:

You'll see, it hasn't been removed (didn't have a reason to yet - didn't want to try and find a place to store it if I yanked it). I was mistaken about the shock mounts. Here are the pictures, the big picture:
Even if you don't want it - I have someone looking for legs apparently, I'll reply to that PM shortly.
Let me know, you'll get first dibs :beer:
I am going to start with - that's an awesome rack/storage setup. Would not mind having that already installed on one of my other shelters.

That being said it would be painful to rip out, keep intact and ship across the country so I will have to pass but thanks for the offer and the ideas!

That is more massive of a setup than my current radio table..... and I thought it took up too much room already.... don't think I could fit much more in an S250 after you put in that shelving/rack system.
 

Timberwolf22

Member
154
24
18
Location
Kenett Square PA
Wiring...........

This post will become very .... very detailed = eventually. The engineer in me has Visio diagrams and Excel spreadsheets on this stuff already..... it's ok to laugh but please save it for when I am not actually there.

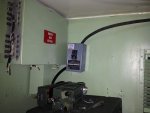
The first task was to inspect the already installed wiring. If I am going thru all the time and effort to get all this hardware in the box it would be nice not to fry it on the first day.

IMG_2321.jpg

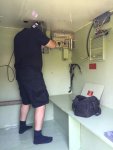
Fuse box = too small... yes size does matter. I have eventual need of more than 2 breakers and multiple sub panels is not my "style" so this will be replaced. I did not like the lack of a master breaker for all inbound power - so a rewiring exercise is in order.

The wall mounted box with all the external facing bonding posts will be used for the SB22 switchboard. There will be a NEMA box mounted outside to provide some water protection for when I run all the TA-312 and TA-1 phones for no reason other than because I can... and I have them.

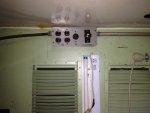
IMG_2322.jpg

Oh look lot's of outlets.... I love outlets ... what is that a "circle" outlet... could it be a 208V outlet = joy! Throw in a spot for me to plug in a lightbulb .... ok we are good everyone go home now....

You ever heard don't judge a book by it's cover... well apparently you don't judge outlets by what's written on them.... you see they need wires attached to them to actually....... work.

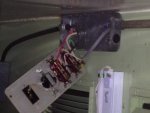
IMG_2323.jpg

When you screw in the light-bulb and it does not work..... place it in another light socket and it does.... well your hopes & dreams become your fears..... or in my case you just start ripping out wires.

I justified my rewiring by the fact that I "strongly dislike" the use of the push in posts on the back of outlets..... better to use the metal posts on the sides and even better to use a pigtail when wiring so all downstream current for other outlets does not have to flow thru the upstream outlet.

Since I have two outlet gang boxes right now and plans for a third I might pull a dedicated wire for each box fed off it's own breaker... see I knew I needed more breakers... the voices said so.... and they were right! Might be a bit overkill but once I started adding up amps on some of the circuits..... seemed like a wise plan.

I also liked the idea of isolating my high amp loads from each other and if needed to be able to shut off entire systems without the tedious "unplug it" method.

We will get into surge protection and fuses later......

In my humble opinion the $ of the radio equipment in the shelter warrants a lock on the door and some extra TLC for the wiring providing voltage to the hardware. Besides one of the other cool Steel Soldier guys working on the project with me gave me the lock!
 
Last edited:
tim292stro

Well-known member
2,118
39
48
Location
S.F. Bay Area/California
...That is more massive of a setup than my current radio table..... and I thought it took up too much room already.... don't think I could fit much more in an S250 after you put in that shelving/rack system.
The phone patch/entry boxes on either side make it look like it takes more room than it does - it's about as wide as your rack, but taller.

...That being said it would be painful to rip out, keep intact and ship across the country so I will have to pass but thanks for the offer and the ideas!...
It would fit on a standard 4x4 pallet, and it bolts/unbolts. Hardest part installing it is putting in the rivnuts. :)

It's okay if you pass, I have a taker for the support legs - if you're out they go to him.
 

Timberwolf22

Member
154
24
18
Location
Kenett Square PA
Paint.............. continued

Sometimes you have to go backwards to then go forwards.

I have done some of that in this project.

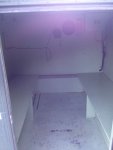
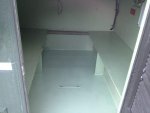
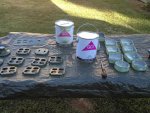
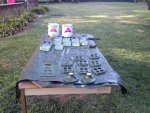
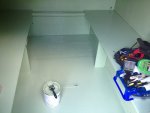
Since I decided that a nice new coat of SeaFoam Green was needed = everything had to come out of the shelter.

IMG_2355.jpg IMG_2356.jpg

Then came cleaning......

Finally with the S250 empty I was able to start painting..... I should NOT have unwired all the electrical boxes that AC would have helped.

Mental note - there is little ventilation if you plan to paint in the "box".... I had to stop and go find a way to stop sweating into the paint.

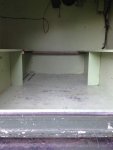
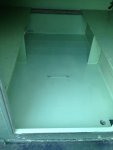
I started on the floor and painted myself out of the box thinking I was "so smart".... yeah well I am not all that bright. Because I stood there with my paint and brush outside the box after I was done with the floor wondering how I was going to do the walls. The answer was wait till tomorrow and give the floor a chance to dry.

IMG_2357.jpg IMG_2358.jpg

At least it came out looking great!

Tomorrow I will finish up the benches and the walls and next week starts final assembly for all the hardware.

While I have everything like the refrigerator and radio table out of the shelter they are also getting a coat of CARC green - the "greens" should look good inside the shelter.

Sunday Update - More painting .... then more painting then left everything to dry for the day.

IMG_2434.jpg IMG_2435.jpg

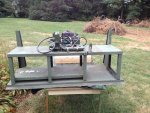
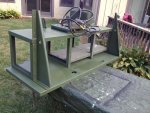
Once I started painting I just kept going........ ended up pulling all the radios off and painting the radio table to match the CARC green of all the other internal shelter equipment.

IMG_2504.jpg IMG_2508.jpg

Some before and during painting for the radio table
 
Last edited:
Timberwolf22

Member
154
24
18
Location
Kenett Square PA
Started the wiring this evening after the paint had a chance to dry..... no shoes allowed.

Yes I know where are my rubber soles shoes or boots? Cut me some slack..... today was removal day, there is not even a main feed into the shelter yet - I pulled the old one out.

That being said lets start the post off right..... electricity is not something to take lightly.... be careful!

IMG_2238.jpg

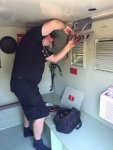
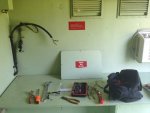
Once I had all the old wiring pulled I started rewiring all the outlets.

Because of the amps I know my radios will draw [significantly more when transmitting] and the $ value of the stuff in the S250 I decided to over-wire......

When I pulled all the panels there were two multi-outlet boxes daisy chained off a single piece of Romex 14/2 [Gray] wire......that wiring meant the entire box's internal circuits were wired for 15amps with all the outlets and lights passed thru the same cable...not going to cut it.

Romex 14/2 is fine for lighting applications but I wanted something able to support a higher power load.

So I ripped all the 14/2 wire out and went with Romex 10/2 [Orange] wire rated for 30Amps and the ran a dedicated line to each of the now four outlet boxes that I installed. I pigtailed all the outlets in the boxes vs. daisy chaining them.

IMG_2246.jpg

Each of the outlet boxes received a dedicated run back to the new breaker panel..... I even ran a dedicated outlet for the AC Unit so I could just kill it at the panel if needed and to keep it out of my multi-outlet boxes.

Decided to pull the metal tubing linking all the outlet boxes. Made the call to go with a non-conductive PVC configuration. Needed an increased pipe diameter for the additional wires and the PVC proved to be easier to work with and install.

The BIGGEST decision I made today was how to feed the main panel. The shelter had a permanently attached heavy duty extension cord drilled thru the shelter body and fed right into the breaker box. You can see it bundled up in the corner of the pictures......

So much was wrong with that that to be honest I did not know where I wanted to start. The extension cord contained only 3 wires... Hot, Neutral and Ground..... try to wire that into a main panel and you have to scratch your head - that's right where is my other "hot" for the panel = it's not there I am MIA a wire.

IMG_2361.jpg

But it was working on both sides of the old panel? So I pulled the old panel apart and as I suspected there was a jumper across Hot 1 to the other side Hot 2.... after a head shake, a chuckle and a smile that I just did not leave the electrical "as is" I threw that stuff into the trash.

I have decided to standardize on a L14-30 input mounted on the side of the S250. This will give me the same generator input as my house, let me use the same cables and finally gives me a 220V solution for the shelter if I ever need it.

I feel much better without a "Extension Cord" spliced into my main panel and instead now I will have a hard wired connection to the outlet that will let me purchase some adapters to safely accept multiple different feeds.

Now I need to spend some time wiring up the panel....

Did Mention that I used this project as an excuse to purchase two additional "civilian" generators...... One with more Wattage and another one of those "Silent" ones.... Don't worry I have a plan = I will paint them CARC and then it will be "OK"..... yes really that's my entire plan.
 
Last edited:
ODFever

Madness Takes Its Toll...
Steel Soldiers Supporter
2,011
73
48
Location
Orlando, FL
The further you get into this adventure, the more you discover all the cool things you can do to it and with it!! :)
 

tim292stro

Well-known member
2,118
39
48
Location
S.F. Bay Area/California
...The shelter had a permanently attached heavy duty extension cord drilled thru the shelter body and fed right into the breaker box...
...So much was wrong with that that to be honest I did not know where I wanted to start...
...I have decided to standardize on a L14-30 input mounted on the side of the S250...
Two bonuses from your decision, less likelihood for leaking (and thus electrocution), and less likelihood for the jacket of the extension cord eventually getting cut on the inner/outer skin of the shelter and causing a fire in the insulation foam...

Awesome work sir [thumbzup]
 

Timberwolf22

Member
154
24
18
Location
Kenett Square PA
Two bonuses from your decision, less likelihood for leaking (and thus electrocution), and less likelihood for the jacket of the extension cord eventually getting cut on the inner/outer skin of the shelter and causing a fire in the insulation foam...
When your right .... well your just right...... I pulled the whole extension cord out along the yard and laid it out see if it could be salvaged for anything other than just it's copper value. Sure enough right where the cable entered the shelter and had been flexed again and again the black rubber jacketing had already begun to crack. The hole into the shelter looked to have been partially sealed with = black tar of some kind.

More painting today - all the SeaFoam Green received a 2nd coat.

IMG_2373.jpg

Will get some more pictures up now that everything is painted.

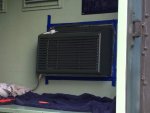
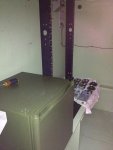
I like the two-tone green theme .... the SeaFoam and the CARC in the shelter. The AC Unit and Refrigerator look so much more official in CARC Green.

IMG_2436.jpg

Bunch of additional electronics arrived in the mail for the project - AC to DC converters, UPS, rack mount kits will put them away till I get to that section of the build.

Also decided to mount a solar vent fan on the roof of the shelter to keep air circulating all thru the day.

This week will see all the painting completed, final rack assembly for the radios and I will spend a few hours on the main panel and wiring.

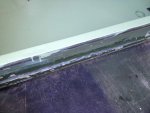
Fixed some cracks in the shelter..... the worst was the seam right below the door. Filled it with silicon and will likely have to go over it with something like JB Weld, sand then paint.

IMG_2376.jpg

Hit a bit of a snag when pulling off some of the internal panels = mold. Stopped with the painting and went back to the cleaning. Lysol is my friend.....but not in a confined and enclosed space. Will clean up and remove chemical / cleaner residue and keep moving forward with the painting.

Placed an order from HRO - HAM Radio Outlet for some radios and antenna components and will drive on down there for some coax this weekend...... it should be illegal of them to have a HRO 30 minutes from my house.
 
Last edited:
Timberwolf22

Member
154
24
18
Location
Kenett Square PA
Stopped at Home Depot and Lowe's today while returning from work.

It is amazing the consumables you go thru on a project...... it's not the paint it's the paint brushes, tape and the cleaners and the tarps and...... well you get the point.

Electrical is just as bad...... I needed a few more switches and outlet boxes, covers as well as more cable.... stuff adds up after a while on you.

IMG_2441.jpg

So what did I learn.... plan better for all the little $ on the project. Sure I budgeted for the large ticket items but all the wiring - anything with copper in it for sure these days can really add up on you.

Some additional radio components arrived today for the project..... decided to wait on opening all that up until the rack was installed..... and I think I might be out of rack space = what a surprise since I kept adding stuff.... when you work on radios remember your power supplies, antenna tuners SWR meters, speakers .... they take up space as well.

Some other items like flood lights for the external shelter lighting also showed up. Need to lay out the wiring for the switches and lights tomorrow.

Rack mounted PDU and Iota 120V to 24V converter also arrived.

Taking a good hard look at if I need to invest more time in how the S250 is grounded just based on the amount of electrical and communications equipment installed. Thoughts on grounding requirements are appreciated.
 
Last edited:
Timberwolf22

Member
154
24
18
Location
Kenett Square PA
Some rain and humidity put the breaks on painting at the moment so I began to organize.

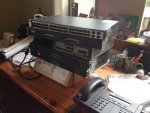
While I enjoy my older Military radios I also plan for the current HAM radios = mixing some old technology with the newer stuff.....same holds true for the phones.

I plan on mounting up the SB-22 switchboard and having a box of TA-1 and TA-312's. So the old and new world would not be complete unless I also deployed a router running Cisco Communications Manager Express in the S250.

A full sized server took up to much room but I may use a different router and run a SRE - Linux server inside one of the network modules and then use full blown Communications Manager and some other voice applications.... I might need voicemail in the S250 - who knows?

IMG_2390.jpg

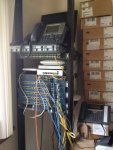
I also plan on breaking out one of my older but favorite technologies..... LRE = Long Range Ethernet.... I have a few of those boxes lying around here in my office.

IMG_2391.jpg

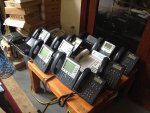
Nothing like having some IP Telephony in your shelter with a few PoE switches and a box of phones.

IMG_2388.jpg

My wiring and configuration challenge for the afternoon..... see if I can get the SB-22's trunk card to communicate with with either an FXO or FXS trunk on the router allowing me to bridge the two systems together....... without blowing up any modules or frying the trunk card in the SB-22.

This should also explain why I needed all the extra outlets and why I have been over wiring things...... I would hate to destroy any of my "toys".

This is my definition of fun .... why = because I am a Cisco certified SE and well..... that's what I do.

I should get out more.... I know.
 
Last edited:
Timberwolf22

Member
154
24
18
Location
Kenett Square PA
Is there such a thing as a field deployable ground plane?
The Marine Corps has many field deployable antenna options..... they are called Privates, PFC's and LCPL's..........add in DR-8 wire spools, trees, D-Cell batteries and canteen cups and you have the makings of an impressive antenna farm.

I don't have any E1-E3's just hanging around but I do have teenage kids...... and aren't those really the same things?
 

SgtHaas

Member
91
0
6
Location
Augusta Maine
The Marine Corps has many field deployable antenna options..... they are called Privates, PFC's and LCPL's..........add in DR-8 wire spools, trees, D-Cell batteries and canteen cups and you have the makings of an impressive antenna farm.

I don't have any E1-E3's just hanging around but I do have teenage kids...... and aren't those really the same things?
I can attest to that haha seen it
 
Top
AdBlock Detected

We get it, advertisements are annoying!

Sure, ad-blocking software does a great job at blocking ads, but it also blocks useful features of our website like our supporting vendors. Their ads help keep Steel Soldiers going. Please consider disabling your ad blockers for the site. Thanks!

I've Disabled AdBlock
No Thanks