• Steel Soldiers now has a few new forums, read more about it at: New Munitions Forums!

  • Microsoft MSN, Live, Hotmail, Outlook email users may not be receiving emails. We are working to resolve this issue. Please add support@steelsoldiers.com to your trusted contacts.


Easter find M1008 2015

cucvrus

Well-known member
11,274
9,603
113
Location
Jonestown Pennsylvania
DSCF7573.jpgDSCF7574.jpgDSCF7575.jpgDSCF7576.jpgDSCF7583.jpgDSCF7585.jpg
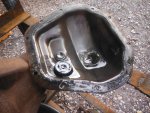
I had the opportunity to work on my M1008 frame. I pressure washed it and de-greased it and then I needle blasted it and wire wheeled the entire frame. I must hit a few more places and then give it an acid bath. I hope to have it in paint at the weeks end. DSCF7577.jpgDSCF7578.jpgDSCF7579.jpgDSCF7580.jpg
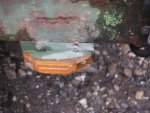
I know I pointed this issue out before. But if you have not ever changed our front shackle bushings. I would highly recommend you do it ASAP. This is a low mileage truck and is mildly deformed in comparison to what I have been seeing in the frame mounts. Do this maintenance item now and do all the spring bushings. It will make a huge difference. In 2 weeks I want to have this frame with new springs attached. Wishful thinking. But that is a goal I can live with. I made up 2 of the axle racks and they will be a joy to work with instead of having them on unstable jack stands. Them old steel racks are very handy. And i always used the long I beam frame saw horses as barricades on a few farm lanes. Very handy to have heavy racks and horses around.
 

cucvrus

Well-known member
11,274
9,603
113
Location
Jonestown Pennsylvania
DSCF7601.jpgI had a date with a wire wheel for the past 6 hours. DSCF7603.jpgAfter a few days of wire wheeling needle blasting, sanding , and pressure washing it is all ready for paint. First a through wash down with wax and grease remover and then an acid pre-wash. I then top primed it with an industrial shop coat grey primer. I bought a 5 gallon bucket and will be using it on all heavy steel going forward. DSCF7606.jpgDSCF7604.jpgDSCF7605.jpgI will flip the frame over and wash and prime from the other side. I will be top coating it next week some day.
 

reaper556

Member
282
3
18
Location
HOCKLEY, TX
looking good Rick. Sorry to hear your out of the parts business :cry: I know you had a few things that are on my list.

I hope to one day take both of my 1028's down all the way and go frame up with them like that
 

cucvrus

Well-known member
11,274
9,603
113
Location
Jonestown Pennsylvania
DSCF7645.jpgDSCF7646.jpgDSCF7644.jpgTurned the M1008 frame over today and primed the top side. This side will be painted first and then flipped and the bottom side painted last. DSCF7638.jpgDSCF7639.jpgDSCF7640.jpgDSCF7641.jpgDSCF7642.jpgDSCF7643.jpgI also tore into the front axle assembly and stripped it down. I was quick to discover the steering issues that the previous owner had. He said the truck would wander and pull from one side of the road to the other. The right outer axle U-joint was locked up. Look how nice the insides look. I had a close friend stop bye in his new Camaro 6.2 and ask me why I was working on that rusty POS. I said I don't know. Sometimes I ask myself the same thing. I could be out tearing up the town on my bike and sitting on my patio drinking Budweiser. But why not is what I said. He said lets go riding I said no I have to get this done. and back on a rolling chassis before the snow starts blowing. I have a huge order to make at Autozone tomorrow. This truck never had the wheel bearings serviced since I serviced them back in 1995. It basically fell apart when I took the bolts off. I have had to use sledge hammers and oak blocks to get spindles off of trucks in the past. Thanks for looking. Have a great week.
 

cucvrus

Well-known member
11,274
9,603
113
Location
Jonestown Pennsylvania
DSCF7644.jpgDSCF7645.jpgDSCF7646.jpgDSCF7647.jpgDSCF7648.jpgDSCF7649.jpgThe M1008 frame is all painted on the top side. i like to clean a frame and prep it good enough to still be able to read the part numbers in the frame rails and cross members after the final coat of paint. I see alot of frames that guys just slop and spray with heavy coats of undercoating and it looks good from 10 feet away and lasts about 6 months. 99% of a paint job is in the prep work. That goes for parts and frames also. The body work is more critical and very time consuming to do it right. Thanks for looking. I hope to inspire some of you guys to do the job right the first time. It pays to pay attention.
 

Attachments

cucvrus

Well-known member
11,274
9,603
113
Location
Jonestown Pennsylvania
DSCF7660.jpgDSCF7661.jpgDSCF7662.jpg5 days of rain have slowed the progress a wee bit. That di not stop me from doing other much needed work. The frame has been painted top and bottom. it held up well in the pouring rain. I have a couple other frames I may just take and clean and paint and store for my retirement funds. Then again a torch and saws all are easier to get them out of my field.
 

cucvrus

Well-known member
11,274
9,603
113
Location
Jonestown Pennsylvania
Tonight I pressed the front axle U joints from the axles. The one side was locked up. But the U Joint press and the cordless impact made short work of that stubborn joint. I have new ones from the zone to install. i will grease the yokes good and press them back in the opposite of taking them out. I like the press much better then the hammer and vise method of removal and installation. Much quicker and smoother also. No pictures. Self explanatory.
 

CUCVLOVER

Active member
Tonight I pressed the front axle U joints from the axles. The one side was locked up. But the U Joint press and the cordless impact made short work of that stubborn joint. I have new ones from the zone to install. i will grease the yokes good and press them back in the opposite of taking them out. I like the press much better then the hammer and vise method of removal and installation. Much quicker and smoother also. No pictures. Self explanatory.
It's definitely always best to use a press on that kind of stuff.
I use a arbor press for small bearings, bushings and pins and a hydraulic for the big stuff.
I can't stand it when some uses a hammer to put a bearing in something then complains when that bearing is burnt up in no time. Driving them in always messes them up.
 

cucvrus

Well-known member
11,274
9,603
113
Location
Jonestown Pennsylvania
DSCF2009.jpgDSCF2010.jpgDSCF2011.jpgDone some more work to the M1008 cab that is on the cab cart. Put new rocker and cab corners in. I also cut out that bracket on the passengers side floor. That was nothing but a rust haven. I think it was designed and never used just so it could rust the floors out on the truck. I also cut the fire extinguisher bracket from the tunnel. It had been drilled into so many times and the screws were pulled out each time. I assume from a center seat passenger. But that is gone now also. No rust thru on the floor. The under side looks real good. Once I get the sides complete I am going to tilt it back on the cab back and do a complete cleaning of the underside and prime and paint that also. DSCF2012.jpgDSCF2013.jpg Well the flash catches the dust particles in the air. I felt it was time to remove the perfectly undamaged OEM dash pad. It was getting close to harms way and they are next to impossible to find anymore. I have some work to do in the windshield pinch weld area. Hope to get some more work done soon. Winter is coming fast and between Grand Children, Work, and school I barely have enough time to keep up. I have a huge parts order to pick up tomorrow at Autozone and all the new leaf spring suspension at the spring shop and I will be under way getting the frame back to a rolling chassis. I have decided to use the Goodyear Duratrak LT23585/R16 10 ply E range tires on the truck. They are the last thing. The transmission and transfer case are out being overhauled and the engine is getting all new seals and gaskets. I am doing that in house. Thanks for looking have a great day. Two more weeks till Rausch Creek.
 

Attachments

cucvrus

Well-known member
11,274
9,603
113
Location
Jonestown Pennsylvania
I have the M1008 cab off the cart and laying on the cab back. I have a pile of cardboard and fire blankets to cushion the cab back. I cleaned the entire underside of the cab off with DX 330. It is a wax and grease remover. I then hand scuffed the entire underside with 3M scotch pads brown grade. Then I washed the underside again with DX 330. It is ready for a coat of gray primer and a coat of undercoating. I will post pictures tomorrow. I cleaned all the cab mount bolt holes and ran a tap in and out on every bolt hole for the cab, seatbelts and seat on the floor. Moving right along. Winter is coming fast. We have a warm week this week and a Rausch Creek trip on Saturday. That interrupts production but so be it. Have a great day.
 

cucvrus

Well-known member
11,274
9,603
113
Location
Jonestown Pennsylvania
I am having difficulty loading pictures again today. I have them trying to load on another screen. not sure what is wrong. Today I sent the good Woman to the Dayco spring dealer in Harrisburg PA. I bought all new springs and all the hardware to install them. Including all shackles and the rear axle bottom plates. I will post pictures later. I tried posting 1 picture at a time no such luck.
 

cucvrus

Well-known member
11,274
9,603
113
Location
Jonestown Pennsylvania
DSCF2056.jpgDSCF2053.jpgDSCF2054.jpgDSCF2055.jpgTonight I took advantage of the 80 degree weather and finished sanding and primed the underside of the M1008 cab assembly. I used Rustoleum industrial Shop coat gray primer. It has great coverage and makes a nice job. I will let it dry well then paint and undercoat the entire cab assembly. The underside of the bed is going to be quite the task. But I will pressure wash it well and then clean it up and do the same thing. Thank you for looking have a great day.
 

cucvrus

Well-known member
11,274
9,603
113
Location
Jonestown Pennsylvania
DSCF2128.jpgDSCF2129.jpgDSCF2130.jpgI was able to get the under side coated on the M1008 cab. I used the Rusfree undercoating/rust proofing. It covers real nice and cleans up easily. It is 100% better then thespray cans of under coating. And it seems to last much longer also.
 

dougco1

Well-known member
Steel Soldiers Supporter
819
548
93
Location
Cooperstown NY
Rick,
Time to give your camera a bath. Its always snowing when you take your photos. Its looking good, your buddy is going to have a great truck when you finish
 

cucvrus

Well-known member
11,274
9,603
113
Location
Jonestown Pennsylvania
DSCF2189.jpgDSCF2192.jpgDSCF2188.jpgDSCF2190.jpgDSCF2191.jpgThe cab is back down and all ready for primer. Everything is fixed. Now I have to get my axles done so I can get the frame together. Winter is sneaking in on me.
 

cucvrus

Well-known member
11,274
9,603
113
Location
Jonestown Pennsylvania
DSCF2204.jpgDSCF2195.jpgDSCF2203.jpgDSCF2196.jpgDSCF2193.jpgDSCF2194.jpgMade some progress on the Easter find M1008 today. Cab is in sanding primer and the front axle housing is painted. DSCF2207.jpgDSCF2205.jpgDSCF2208.jpgDSCF2206.jpgI also found a nice straight 99.9% rust free tailgate to use on the truck. That saved me from opening up a new one from the box. And makes this one more useful then sitting in the barn collecting dust. I must note the barn storage is not as organized as I would like it to be. I keep finding things I did not know I had. Like this tailgate. Someone had painted over the red and never sanded or sealed the red. The CHEVROLET decal was still on the lettering. That gate has been in storage for 20+ years.
 
Top
AdBlock Detected

We get it, advertisements are annoying!

Sure, ad-blocking software does a great job at blocking ads, but it also blocks useful features of our website like our supporting vendors. Their ads help keep Steel Soldiers going. Please consider disabling your ad blockers for the site. Thanks!

I've Disabled AdBlock
No Thanks