• Steel Soldiers now has a few new forums, read more about it at: New Munitions Forums!

  • Microsoft MSN, Live, Hotmail, Outlook email users may not be receiving emails. We are working to resolve this issue. Please add support@steelsoldiers.com to your trusted contacts.


M934a2 bhtrv

Mos68x

Active member
825
30
28
Location
Seligman,AZ
The axles are the same but the brakes are different. The older m51 uses single circuit hydraulic brakes, m939 series has air brakes.

If the stock hydraulic brake components are on the 'trailer' your m939 series will activate them using the standard glad hands, just won't have a parking brake on the trailer. The hydraulic brakes are strong enough to lock up the wheels.
Assuming there is nothing in the way of braking, how hard would it be to convert those axles to the air brake style that I have? I'm not sure what is still on the chassis, but I'll assume that there is nothing at all.
 

red

Active member
1,988
22
38
Location
Eagle Mountain/Utah
I'm most of the way through with that conversion on my m816 wrecker (same brakes originally as the m51, now m939 series air brakes). By far the hardest part of the conversion is removing the rivets that hold the hydraulic brake backing plates onto the axles. There are 10 per hub, 9/16" shank. Using a cutting torch, quality long stroke air hammer, cutoff wheel on a grinder, and a drill you can remove those rivets in about 2-3 hours per hub IF they mostly cooperate. Read some of the latest pages in the "Rescued M816" thread for lots of pics on it.

Plumbing would be easy, 2 R12 valves (might be able to get by with 1) and 1 R14 valve.
 

Mos68x

Active member
825
30
28
Location
Seligman,AZ
OK....in other words "yer better off adapting to it"

Obviously it's possible, but is it worth my time? Probably not. If anything is left on the chassis I'll probably just try to make it work with what I already have. If nothing is left then I may consider actually converting it to air. Right now one of my main objectives is to get a chassis that is long enough for my purposes. That means at least 17ft in front of the center of the rear axle. So far this one is the only one that I've found.
 

red

Active member
1,988
22
38
Location
Eagle Mountain/Utah
Yea if the stock brake components are there, I'd recommend using them. Have about $900 in fittings/hoses/valves with the air brake conversion on my m816 so far. For a parking brake with the stock hydraulic brakes you might be able to use the factory one installed on the transfercase and rig it up onto one of the axle diffs.

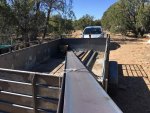
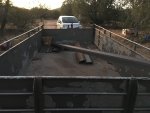
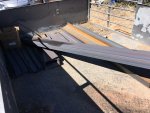
I'm turning a m51a2 into a trailer as well but keeping the dump bed. Dump bed is 10ft long not including the tailgate plus about 4ft for the cab protector just to give you a visual reference.

IMG_20161014_180253892_HDR.jpg IMG_20170603_152529918_HDR.jpg
 

Mos68x

Active member
825
30
28
Location
Seligman,AZ
Got a message from the seller this mornin, I guess the chassis has most of the brake system still intact. That'll save me a headache at least. Red, think the chassis length will be enough for what I want to do? I'm not concerned about the lack of chassis on the back of the bogey since I have to make a frame anyways for the ISO container. I'm 99.9% sure it'll work for what I need since the seller said it had about 17' in front of the center of the rear axle. I figure 10' for the ISO and another 5' for the tongue and 2' for sliding the ISO forward and the kerf from cutting the chassis to make it a trailer.
 

red

Active member
1,988
22
38
Location
Eagle Mountain/Utah
yea that will be fine. The chassis is either 21 or 23ft long if I remember right. If your ISO is 10ft then it's the same size as the dump bed in the pics (minus the cab protector).
 

Mos68x

Active member
825
30
28
Location
Seligman,AZ
Lol no, you misunderstood what I was saying. I'm gettin the 20' ISO container, but I'll have 10-12 of it in front of the rear tandem center. I'll be cutting it mighty close since I was told the chassis is 17' forward of that point. I'm hoping that 10-12' will be enough to keep the trailer from wanting to sway. Typical trailer tongue length (pintle to axle distance) is twice the distance between the tire's on the axle so I'll be safe there. But I think 5' will be as short as I'll go for the tongue in front of the ISO, that should in theory leave me a foot of clearance between the truck and trailer should it ever get jack-knifed. Of course that won't account for uneven ground, but I hope that I won't be that tight when trying to back up the trailer on uneven ground anyways. If the chassis' are the same dimensions (height and width) between the M51 and the 939s then I should hopefully have enough extra chassis to extend the trailer as well.
 

red

Active member
1,988
22
38
Location
Eagle Mountain/Utah
Ah gotcha. With it sitting 12 ft forward it will be snug but should be fine.

The chassis are the same on the regular 5 tons. Wreckers and the extra long wheel base trucks got extra reinforcements.
 

Mos68x

Active member
825
30
28
Location
Seligman,AZ
Ah gotcha. With it sitting 12 ft forward it will be snug but should be fine.

The chassis are the same on the regular 5 tons. Wreckers and the extra long wheel base trucks got extra reinforcements.
The reason I was asking if the chassis' are the same is because I should be getting some 939 chassis at the same time. Of course I'd rather use the 939 chassis for the trailer but if they are the same then whatever is left when I'm done extending the truck's chassis can be used to extend the trailer as well. I measured mine at 9" x 3" x 3/8"(?)
 
Last edited:

Mos68x

Active member
825
30
28
Location
Seligman,AZ
Most likely the same way the original design handles it, springs and bolts. I'll admit that I'm not a big fan of that design, but after seeing the pictures in this thread I've decided to stick with it for now. The damage looks to be limited to those same attachment points and saving the rest of the chassis from damage. The only other way would've been with the 2 point articulating mounts for the ISO, however until I can satisfy myself on a couple things I'll stick with solid mounts.
 

Mos68x

Active member
825
30
28
Location
Seligman,AZ
After going through the truck front to back doing my intial PMCS, found some issues but not much other than what I already knew about. I still have more work to do for the PMCS like opening up the wheel bearings to inspect them. Really not looking forward to having to pull every wheel to do that. Got all the grease points taken care of minus a couple, but overall I'm feeling better about the condition of the truck. I would however feel loads better if I had an immediate fix for my class 3 oil leak that I'm 99% sure is coming from the engine somewhere up front. I'm also hoping to get the chassis' in a week or so, that'll at least make me feel like I'm accomplishing something even though I haven't lol
 

Mos68x

Active member
825
30
28
Location
Seligman,AZ
Hey y'all, been a while. Though I haven't made any progress materialisticly, I have made progress in other areas. I did have a major setback though as my trusty old laptop finally croaked on me. Fortunately for me I'd just finished designing the ISO frame for the truck. Don't worry, that file is saved to my Dropbox for safe keeping until I get a new replacement laptop. I also stopped by a "local" metal supply shop and had a good chat with them. I'm still going with my original design idea and components, mainly S8x18.4. The only change I made to my idea between brain to computer was that I added C8x11.5. Total weight of the frame pieces, not including welding wire, gussets, corner post locks, and wood 4x4 is going to be 1060 lbs.

IMG_7685.jpg

I also finally gave in and called Cummins for the engine oil leak I had as I couldn't find the proper part number for what I needed (or thought I needed). I still have to call back again as I have changed my mind, thankfully before I purchased anything.
 
Last edited:

Mos68x

Active member
825
30
28
Location
Seligman,AZ
Sorry I havent posted anything in a while, I’ve been super busy since school started. Even though I’m going to be spending nearly all my time on school stuff this project will still be moving forward thankfully. I have a friend that I think I can trust with doing parts of it, and the first task is to create the frame to be able to mount the ISO container on the back of the truck. Turning it into an RV first will be top priority for me.
 

ALFA2

Member
205
2
18
Location
Phoenix, Arizona
Mos68x, in case you are interested, in AZ once you mount a camper box in your truck, that has a sink and a stove in it, it become a camper/RV. When you go to register it a your friendly MVD office, tell them it is a personal RV. ( non-commercial, personal use only) Then no wight fees, no cdl lic requirements, will apply to your truck, just over-height and overall length with trailer concerns. If your camper box is bolted/manually secure to the bed/chassis of the truck you are OK. Just do not get commercial plates for it. Just thought it may help you along in your project.
 

Mos68x

Active member
825
30
28
Location
Seligman,AZ
Just an update, been a busy few days for me. The steel has been ordered to make the ISO frame, the corner locks have been ordered as well, the ISO is also ordered, and the wheel orings show up in a couple days. The steel order will be complete in a week and then I/we can start on welding it together. As soon as I can I need to get my spare tire together and mounted so I can double check my chassis to ground measurements while using the 14” tires. I’m not staying with them but it would be nice to not be limited to using the 9s, 11s, or 12s in duallies. I also have a set of those coming too, mid-Oct will be a VERY busy time for me. The shipping container should be here in about two weeks. I also started ordering certain parts for the RV part as well, so it’s been exciting for me these last few days. I’ll be sure to post pics when I can.
 

Mos68x

Active member
825
30
28
Location
Seligman,AZ
OK, this will be attempt #2 to get this post loaded. I hope I remember everything that I had written the first time since it dumped it all. I finally had to just wait and use my school's internet.

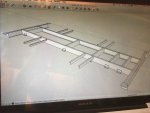
Screenshot 2017-10-15 17.31.12.jpg

This is the most recent iteration of the ISO container frame design to allow for shipping container height and about 6" extra for an RV AC unit.

Monday night before I got my flat tire I also took the truck to get the truck an "oil change" and to Blue Beacon to get it washed so I could tell if I had fixed the oil leak I'd had for a while.
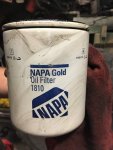
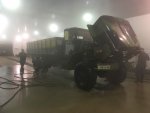
IMG_7838.jpgIMG_7839.jpgIMG_7840.jpg

Friday, I finally made the trip to Prescott to pick up the load of steel after dealing with the engine issue in Sur Móvil (link here).

IMG_7846.jpgIMG_7845.jpgIMG_7847.jpg

I was originally going to use my battery operated welder (www.readywelder.com) but after some thought I decided I didn't want to have to deal with recharging the batteries as often as would be needed for welding this thick material. The c channel is the thinnest stuff and and it's web measures at .220 in thick. When I first bought my Ready Welder I used it with group 31 batteries and it did great, but I never welded anything as thick as this stuff with it and I don't remember if I ever welded to the point of having dead batteries either. I figured I'd rather not test it out it my house batteries (4 golf cart batteries for my solar setup) and have to run the generator for hours to recharge them every night, not to mention having to take them out of the house and set them up for welding every morning. I opted for convenience this time and I'm going to borrow my neighbors gen/tombstone welder instead, I'd rather pay for the gas and keep welding instead of having to stop early to recharge the batteries.

I've got all the steel for the SketchUp rendering at the top so I hope that I can start on welding it together. I know I'll be adding small bits to the drawing later on, but this is the main frame that everything else will be built upon. I can change the wood spacer that is only 3/4" thick for a much thicker one later when I have hammered out everything on the top of the container, especially the AC unit. Eventually I'll also design a hydraulic jack system for the corners so that I can lift and drop the containers off the truck by myself. Right now I'm more concerned about trying to get the container on the truck and get the box "usable" for me since I have to drive 200miles every day for school. If I can get this done by next semester I would be really happy, though I doubt that will happen. I'll be taking a plethora of pictures I'm sure so I'll have plenty to share here and videos on my YouTube channel as well.

Anyways, enough rambling, and I have school in the morning so I gotta get this text up and then I'll add the pics so it don't dump everything on me again.
 
Last edited:
Top
AdBlock Detected

We get it, advertisements are annoying!

Sure, ad-blocking software does a great job at blocking ads, but it also blocks useful features of our website like our supporting vendors. Their ads help keep Steel Soldiers going. Please consider disabling your ad blockers for the site. Thanks!

I've Disabled AdBlock
No Thanks