- 3,173
- 3,095
- 113
- Location
- NORTH (Canada)
I finally made it to a local scrap yard that spans acres. It has a lot of fire trucks, OTR trucks and all sorts of equipment. I found an air ride seat out of a late 80' International cab. Price was right, $50.
I wanted to make this work with the high-back HMMWV seat that I already had.
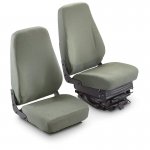
Humvee High Back Seats (photo: Sportsmansguide)
Note the "box" or "cubby" under the driver side seat.
I had to remove the seat only from the HMMWV spring seat base. That means I also lost the practical cubby storage under the seat. Height is an issue; I needed the seat to be as low as possible.
The sliding tracks on the air ride base were spaced at 8 inches on center, as opposed to the 10 3/4 inches on the HMMWV seat. I therefore cut a piece out of the handle that operates the sliding mechanism and re-welded it 8 inches apart.
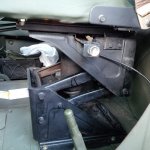
The steel plate that formed the "floor" of the cubby compartment under the seat gets bolted to the air ride seat base (new holes required in the steel plate) and the seat bolts to that steel plate (2 holes re-drilled). The 90 degree bend of this plate at the rear (former rear wall of the cubby) was in the way, so I cut it off.
The air ride base, with new mounting holes drilled, mounts to the square steel plate with riveted on aluminum profiles I already made for the HMMWV seat base. The whole assembly bolts to the cab floor with 4 bolts already used for the factory springer seat.
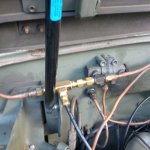
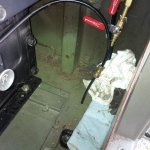
Air supply: I tied into the air horn copper line. I used a "T" connector with adapters for the 3/8 copper line (ferrule and fitting) and for 1/4 DOT air line to provide the supply for the seat. I wanted to screw the T right to the air pressure governor but could not locate the needed pipe thread to fine thread adapter. I made do by connecting the right fittings with a short piece of copper pipe. Doing it this way means that I did not have to cut or alter the original copper line to the horn. It now attaches to the other side of the T.
9 ft of 1/4 in air line is sufficient to route it to the back of the cab, feed it up through a small hole that is already in the floor and connect it to the seat.
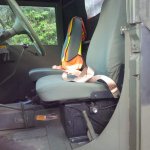
The ride comfort is way better than with the HMMWV springer base.
Make sure you measure the seat hight of your current seat before you set out to get an air ride base. They come in different heights, some are designed to be installed on top of a wheel well or box. You do not want to end up with a seat and base that are too high for a comfortable seating position!
I wanted to make this work with the high-back HMMWV seat that I already had.
Humvee High Back Seats (photo: Sportsmansguide)
Note the "box" or "cubby" under the driver side seat.

I had to remove the seat only from the HMMWV spring seat base. That means I also lost the practical cubby storage under the seat. Height is an issue; I needed the seat to be as low as possible.
The sliding tracks on the air ride base were spaced at 8 inches on center, as opposed to the 10 3/4 inches on the HMMWV seat. I therefore cut a piece out of the handle that operates the sliding mechanism and re-welded it 8 inches apart.
The steel plate that formed the "floor" of the cubby compartment under the seat gets bolted to the air ride seat base (new holes required in the steel plate) and the seat bolts to that steel plate (2 holes re-drilled). The 90 degree bend of this plate at the rear (former rear wall of the cubby) was in the way, so I cut it off.
The air ride base, with new mounting holes drilled, mounts to the square steel plate with riveted on aluminum profiles I already made for the HMMWV seat base. The whole assembly bolts to the cab floor with 4 bolts already used for the factory springer seat.
Air supply: I tied into the air horn copper line. I used a "T" connector with adapters for the 3/8 copper line (ferrule and fitting) and for 1/4 DOT air line to provide the supply for the seat. I wanted to screw the T right to the air pressure governor but could not locate the needed pipe thread to fine thread adapter. I made do by connecting the right fittings with a short piece of copper pipe. Doing it this way means that I did not have to cut or alter the original copper line to the horn. It now attaches to the other side of the T.
9 ft of 1/4 in air line is sufficient to route it to the back of the cab, feed it up through a small hole that is already in the floor and connect it to the seat.
The ride comfort is way better than with the HMMWV springer base.
Make sure you measure the seat hight of your current seat before you set out to get an air ride base. They come in different heights, some are designed to be installed on top of a wheel well or box. You do not want to end up with a seat and base that are too high for a comfortable seating position!


Last edited:


