-
Steel Soldiers now has a few new forums, read more about it at: New Munitions Forums!
1986 CUCV M1009 Decade after being wrecked.
- Thread starter cucvrus
- Start date

More options
Who Replied?cucvrus
Well-known member
- 11,274
- 9,603
- 113
- Location
- Jonestown Pennsylvania
Tis True. Supreme was bought by Wabash National last year. We still build Supreme Truck Bodies. That may change. But for now it continues. Have a Great Day. Stay productive.I was guessing that You worked at Supreme Truck Bodies?
nyoffroad
Well-known member
- 905
- 622
- 93
- Location
- Rochester NY
I pull 2 Wabash plate trailers, one sits getting loaded the other is hooked to my tractor. Thanks for making a good product!Dura plate is a steel panel that has polyethylene between the 2 sheets. It is very useful and versatile. Just Google Wabash Duraplate. They manufacture it and that is the company I work for.
cucvrus
Well-known member
- 11,274
- 9,603
- 113
- Location
- Jonestown Pennsylvania
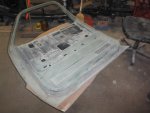
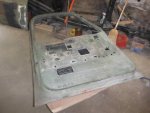
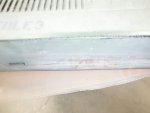
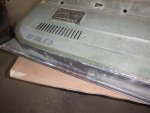
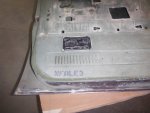
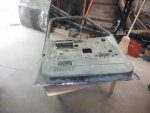
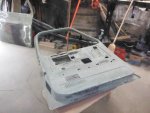 Today was a very productive day. I recommend if you are going to paint your CUCV that you strip the doors out and clean the bottom of the doors and the seam sealer. That area may appear good but can harbor a cavity filled with rust that never sleeps. I can not stop the rust but if I wire brush and blast the area I can coat it reseal it and slow its progression to a crawl. All hand sanded. The outside will be primed and the inside is ready for sealer and paint.
cucvrus
Well-known member
- 11,274
- 9,603
- 113
- Location
- Jonestown Pennsylvania
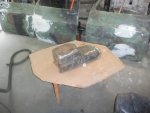
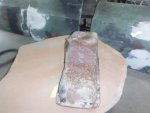
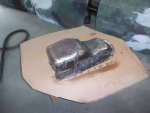
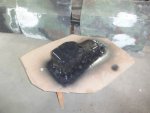 My Sons always like to harass me when they see me sanding odd parts. Oil pans are one of their favorites. They sneak videos of me sanding axles and driveshafts and post them on the web. But all in good fun. Today with more rain the forecast I moved back in the barn and worked on things I was avoiding. I hope to get more of the BS work done so I can progress on getting the engine reassembled. But every step is in the right direction. The oil paint has 2 coats on and will look great. It's a simple task.
cucvrus
Well-known member
- 11,274
- 9,603
- 113
- Location
- Jonestown Pennsylvania
I am still doing hand sanding on small parts. I cleaned and sanded the heat shields and 1/4 panel rear fillers. I am still cleaning up the underside. It seems to be less dirt every time I do it so that is a step in the right direction. In the next few days I plan on spraying DX330 wax and grease remover on the entire bottom side and will let that air dry a few days and then coat the entire bottom side with the Rusfre https://www.tptools.com/RUSFRE-Black-Rubberized-Spray-On-Undercoating,1611.html undercoating/rust proofing. I always get good results with that product. Very easy to apply and cleanup. Have a Great Day. Stay Safe. More rain in the forecast.
- 3,670
- 2,491
- 113
- Location
- Peoria, Illinois
One step at a time, Rick.....
Moving along VERY nicely!
Moving along VERY nicely!
cucvrus
Well-known member
- 11,274
- 9,603
- 113
- Location
- Jonestown Pennsylvania
Last night was more of the cleaning parts and cleaning the underside. It seems like I clean the underside a lot. I am trying to get it as perfect as possible. It has been sitting and I had cleaned it well 11 years ago. I wanted to check and recheck to make sure I am getting everything I can clean because I doubt I will ever take the body from the frame again. And when the frame is not in the way doing an awesome job is a reality. I also opted to reinstall the gun butt mounts behind the drivers seat. I had removed them so I could get that area LineXed and do away with the issue of future rust. I cut a pair from a donor truck and am cleaning them up and will glue/rivet them in place. I will have the gun butts but not the rust haven in that area. I will try the glue first then use mono bolts if that don't hold. Have a Great Day. The valve covers and timing cover were sanded and painted last night also. Forward.
Last edited:
cucvrus
Well-known member
- 11,274
- 9,603
- 113
- Location
- Jonestown Pennsylvania
With any Luck at all I will get the super structure primed and pushed back in the corner over the weekend. I need to get the frame reassembled. I have 4 stock steel wheels and tires from my 2014 Silverado 1500 I am trading in. They are 17 inch wheels. They will work to get the chassis assembled. I bought a different set of wheels for winter tires and will just keep the winter tires. These wheels will not fit my new truck it has 18" wheels. I think all should be well. If NOT I have the stock M1009 wheels to install after the build. Pictures this weekend for sure. Have a Great Day.
cucvrus
Well-known member
- 11,274
- 9,603
- 113
- Location
- Jonestown Pennsylvania
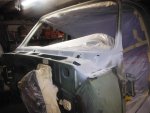
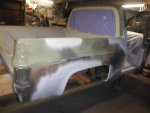
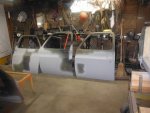
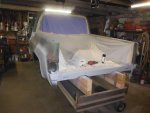
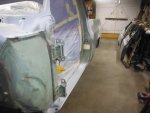
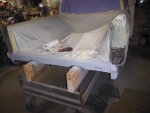 Tonight was the night. I primed the areas on the doors and the body structure that had body work done to it. That is going to need sanded and then I want to seal the edges and edge paint everything so I can store it and get the frame and chassis back together. Work tomorrow and the rain should begin soon. Have a Great Day. That goal was simple for this evening. The rain held off so I could spray the doors outside.
Merddin
Member
- 91
- -1
- 6
- Location
- Cape Girardeau, MO
Do you use a special gun to spray the rusfre? Can it be brushed on? What product do you use to seal body work? Thanks
cucvrus
Well-known member
- 11,274
- 9,603
- 113
- Location
- Jonestown Pennsylvania
https://www.tptools.com/RUSFRE-Unde...MI9ITY5di83QIVjONkCh2zaQivEAQYAiABEgIU5PD_BwE
This will get you on your way. No brushing Rusfre. It would be difficult. I seal with a 2 part epoxy sealer. The primer is also a 2 part primer. 1 gallon of the primer will set you back $200. But the end result is worth it. fills fine scratches very nicely. No doing things on the cheap. That is what you end up with a cheap poor end result with no durability. I plan on using waterborne CARC paint as the top coat. Sprayed thru some cheap Harbor Freight guns. Have a Great Day. More work on the CUCV later today. Pictures if they are worthy.
https://www.stockwiseauto.com/rusfr...VkAOGCh3iTgYSEAQYBSABEgLDIvD_BwE&gsID=p179571&
Will get you brush able undercoating.
Last edited:
cucvrus
Well-known member
- 11,274
- 9,603
- 113
- Location
- Jonestown Pennsylvania
https://www.tptools.com/Evercoat-Rage-Gold-Premium-Body-Filler,2714.html?b=d*8174
This is the filler I use. works well and sands easy. Very smooth.
https://www.tptools.com/Evercoat-Metal-Glaze-Ultra-Finishing-Putty,8737.html?b=d*8175
The glazing putty
The primers are available thru auto body paint stores. Use what you like. I have a shop line from PPG paints. Good Luck.
This is the filler I use. works well and sands easy. Very smooth.
https://www.tptools.com/Evercoat-Metal-Glaze-Ultra-Finishing-Putty,8737.html?b=d*8175
The glazing putty
The primers are available thru auto body paint stores. Use what you like. I have a shop line from PPG paints. Good Luck.
cucvrus
Well-known member
- 11,274
- 9,603
- 113
- Location
- Jonestown Pennsylvania
spell check
Much more of the same old boring edge sanding and looking over the entire main structure inch by inch to make sure no loose rough edges. Hand sanding with 220 and getting ready to seal and paint all the edges and exterior firewall. The doors are already for interior/edge painting. Looks like Friday for the sealer and Saturday for the edge painting only. Then onto the undercoating next week. Getting really close to shove it back up in the corner. I hope not till spring but it could be reality. This summer has not been the best as far as weather and that makes the deal when doing an extensive project after 6 day a week 11 hour days on a regular full time job. As long as progress is happening I am a happy guy. Looking forward to chassis assembly. I can do that in 10* weather in the barn. Still no room for the wood stove with the body and frame separated in the same bay. I can still get it done. Have a Great Day.
Much more of the same old boring edge sanding and looking over the entire main structure inch by inch to make sure no loose rough edges. Hand sanding with 220 and getting ready to seal and paint all the edges and exterior firewall. The doors are already for interior/edge painting. Looks like Friday for the sealer and Saturday for the edge painting only. Then onto the undercoating next week. Getting really close to shove it back up in the corner. I hope not till spring but it could be reality. This summer has not been the best as far as weather and that makes the deal when doing an extensive project after 6 day a week 11 hour days on a regular full time job. As long as progress is happening I am a happy guy. Looking forward to chassis assembly. I can do that in 10* weather in the barn. Still no room for the wood stove with the body and frame separated in the same bay. I can still get it done. Have a Great Day.
Last edited:
woody127
Member
- 33
- 36
- 18
- Location
- Huntingdon Valley ,PA
Question for you, please. I installed a radio in my M1009 today and trust me, followed the instructions to the letter like a good trooper. Radio came on and a loud POP!!. No sound at all and there was just a hint of smoke. Don't know what happen. Radio comes on and signal strength good. Just no sound. Did I fry the solid state unit. Any help would be greatly appreciated. Dang out $200.00 for now.
- 1,845
- 51
- 48
- Location
- Berkeley CA
Assuming it is a 12 volt radio, is it possible that you used one of the 24volt outputs on the fuse block?
woody127
Member
- 33
- 36
- 18
- Location
- Huntingdon Valley ,PA
Firefox:
don't think so since according to manual, the fuse box(under dash) is 12 volt only. Again the radio will come on, but no sound. It finds the strong radio signals, so I'm not sure why.
don't think so since according to manual, the fuse box(under dash) is 12 volt only. Again the radio will come on, but no sound. It finds the strong radio signals, so I'm not sure why.
- 134
- 14
- 18
- Location
- Battle Ground/WA
cucvrus, I have a question as to the original dash pad in the M1009, I got my M1009 from Nellis Air Force Base just outside Las Vegas in September 2011, it had 42,000 miles on it and appeared to have been cannibalized somewhat, but once I got it home and started working on it most of the parts were there, they had been removed and tossed back inside. At first I thought they were probably junk parts but they were actually usable. Since the miles were low I figured it was mostly original parts including the dash pad, it was cracked but any dash pad that old in the desert is cracked, but this one is gray, did the M1009 have a maroon dash pad when new or were they gray? I have a dash cover on it that a neighbor gave me so it is okay but if I do replace it I should at least get the proper color. Very much enjoying following this resurrection of a M1009 that cheated death after 10 years in an open grave.
woody127
Member
- 33
- 36
- 18
- Location
- Huntingdon Valley ,PA
All M1009's we had on base, had the maroon dash cover. working in the motor pool got see just about all the CUCVs.
- 134
- 14
- 18
- Location
- Battle Ground/WA
That is interesting, I somehow assumed they were gray based on what mine had but the build/resurrection cucvrus is doing got me thinking because he tends to try to stay "stock". Thank you for that bit of information. While I have and will modify my M1009, the overall goal is to not make it overly apparent it isn't stock. I truly appreciate cucvrus wanting to restore the stock springs/ride height. My 1980 K-5 briefly had re-arced springs but I was extremely disappointed with the "twitchy" way it handled and searched out a set of stock springs to bring it back down. I probably needed to make other changes to allow it to have the correct geometry for the steering and alignment but honestly I really didn't like the look either, just my taste in things not a judgement in anyway.
- 108,326members
- 163,625threads
- 2,302,438posts
- 664online users


