• Steel Soldiers now has a few new forums, read more about it at: New Munitions Forums!

  • Microsoft MSN, Live, Hotmail, Outlook email users may not be receiving emails. We are working to resolve this issue. Please add support@steelsoldiers.com to your trusted contacts.


Swapping front 3rd via pulling hub and stub axle as a unit

coachgeo

Well-known member
4,955
3,325
113
Location
North of Cincy OH
Previous post placed in another thread...... moving here to not hijack the other.

Pulling whole hub and shafts as a single assembly should save time..... Yet like everything there is advantage and disadvantages. Doing it the more typical way by disassembly of each front hub opens opportunity to swap out seals. etc. Thus at some point you will end up removing the hubs for this task anyway..... so why repeat labor if you can avoid it. Advantage is it may be faster and if your in the field or in a time crunch and just need to get that 3rd out (which was my case)....... this method may be better.

coachgeo said:
for quick install of highspeed 3rd in front axle (mostly so can get stock one/core out and ready for pickup asap) do ya'll think you could remove 4 bolts above and below king pin? on backside ... and then slide whole thing; axle and all outward so can swap the 3rd??? or will there be something that will stop the whole thing with axle attached from sliding out enough?
Well, now that’s an interesting thought.
Based on my time shimming my LMTV king pins and looking at the TM’s, it should work.
It seems that the front axle shaft is a floater like the rear, only with a knuckle in the middle.
So, the four king pin bolts are tough, lots of torque. Even with the brake drum removed everything is HEAVY. You’ll have to pull air brake and CTIS hoses as well as the tie rod and drag link.
Then you’d have to start the axle shaft in the third member and into the knuckle on assembly.
If you had a cradle for the knuckle to help support and align, I’d say it should work. And it’d save many hours of work.
On the other hand, you’d miss the fun of replacing a bunch of seals and re-shimming the spider gears...

Look forward to additional imput others may have

PS- there is numerous threads on swapping 3rd by what has become the traditional way (disassembly of each hub to access shaft) . One of the better threads on this is Pointman's located at:
https://www.steelsoldiers.com/showthread.php?180732-HIGH-SPEED-GEAR-SWAP-With-Photos-1995-A-0
 
Last edited:

coachgeo

Well-known member
4,955
3,325
113
Location
North of Cincy OH
contacted Neil Harris at WesternCanadian Rockwell and he was kind enough to offer toward this idea

My only advice is to have a good overhead hoist on hand, and make sure the king pin caps and shims don’t get mixed up, other than that you should be ok

Some Potential Plan B's if you do not have overhead hoist.

. forklift, even better if has "side shift forks" feature. (our case)
. Transmission Jacks. 3, wheeled transmission jacks. One for each side and 3rd one.... for the 3rd.
 

wandering neurons

Active member
248
112
43
Location
Fallon, NV
The TM for pulling the steering knuckles, which includes the king pins and re-shimming, is the -365-34-2, Task 9-6, page 9-22 or so. You shouldn’t need to re-shim yours.
I had to do it because the shimming wasn’t done correctly from the factory or something was WAY off on my truck. I needed nearly .125” of shim to allow free movement of the knuckles. The steering was basically frozen, and the power steering was overloaded forcing the steering back and forth. Wore out the steering box, drag link and tie rod. The whole box was wiggling on its mount with the effort to steer. Ugly.
Will follow this for alternate build method...
 

Keith Knight

Well-known member
Steel Soldiers Supporter
706
1,475
93
Location
Wauchula, FL
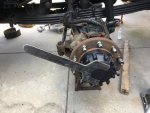
That is how I did my front axel gear swap. But not by removing the knuckle. But by removing the 10 bolts that hold the hub onto the steering knuckle. It does take two people though they are just so heavy.
Step 1: after the tires are off the brake drums don’t want to come off and I wasted a lot of time trying to do it the gentle way and finally had to resort to sledge hammer hitting it rotate hit it some more repeat until it’s off
2: drain oil out off hub
3: remove large cap bolt
wrench.jpg
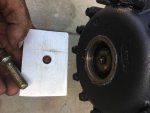
4: use some sort of flat bar like .25”x2”x4”
Drill a 3/8 hole in the center of
plate.jpg
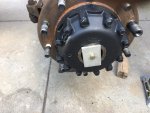
5: bolt it to the axle, this holds the axle to the hub assembly , with out it the axle stays in the axle housing.
4.jpg
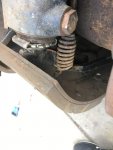
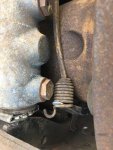
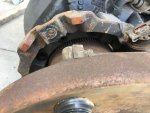
6: Remove the brake shoes sounds simple but getting them back on is the hard part, the springs are very difficult to manage.
spring2.jpgspring1.jpg
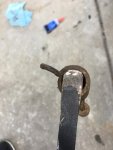
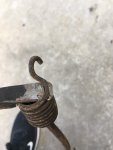
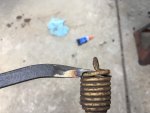
7: Make a spring removal and installation tool. I used a cheap pry bar from harbor freight. Grind it pretty thin to fit between the spring and put a small grove in it that the spring coil will fit into to help keep the spring from sliding off. Use different prying positions that work best to stretch the spring on and off.
tool2.jpgtool3.jpgtool1.jpg
 
Last edited:

Keith Knight

Well-known member
Steel Soldiers Supporter
706
1,475
93
Location
Wauchula, FL
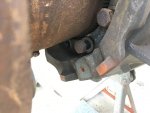
8: Remove the 10 bolts holding the hub to the steering knuckle. I had to get creative using different wrenches for loosening and removing the bolts because of the limited space, 1/2" breaker bar, 1/2" drive ratchet and 3/8" ratchet.
boltremoval2.jpgboltremoval1.jpg
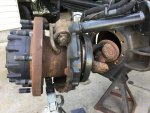
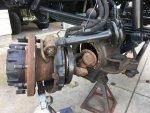
9: With help!!! pull the hub out and move air brake parts out of the way. I used a jack stand and a small dolly to support the hub.
hubremove1.jpghubremove2.jpg
Here is a picture of the donor axle all apart.
IMG_0399.jpg
10: Helpful tips, get a couple extra bolts and cut the heads off and use them for guide pins while putting the center section back on and a transmission jack is extremely helpful getting it in and out. The original sealant used on the center section is Permatex Anaerobic gasket maker #51813
guidepins.jpg
guide pins top and bottom
11: Last bit of info the axle absolutely does not go back into the center section easily its a major pain in the Butt, again two people, one push ing in the other trying to lift/pry the axle in the knuckle area to lift it just enough to guide it into the center section.
Put it all back together.
 
Last edited:

scottmandu

Active member
822
35
28
Location
Texas
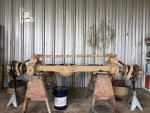
I've done the gear swap as an experiment I disassembled one side and took the other side off at the kingpins. It was about 3 hours to take apart the spindle and put back together. It took me 9 hours to get the corner mounted properly back on the king pins with use of an overhead crane, forklift and cherry picker.
 

ramdough

Well-known member
1,554
1,727
113
Location
Austin, Texas
I've done the gear swap as an experiment I disassembled one side and took the other side off at the kingpins. It was about 3 hours to take apart the spindle and put back together. It took me 9 hours to get the corner mounted properly back on the king pins with use of an overhead crane, forklift and cherry picker.
Just to be clear. You are recommending doing what Pointman did vs. what was done above in this thread?


Sent from my iPhone using Tapatalk
 
Top
AdBlock Detected

We get it, advertisements are annoying!

Sure, ad-blocking software does a great job at blocking ads, but it also blocks useful features of our website like our supporting vendors. Their ads help keep Steel Soldiers going. Please consider disabling your ad blockers for the site. Thanks!

I've Disabled AdBlock
No Thanks