• Steel Soldiers now has a few new forums, read more about it at: New Munitions Forums!

  • Microsoft MSN, Live, Hotmail, Outlook email users may not be receiving emails. We are working to resolve this issue. Please add support@steelsoldiers.com to your trusted contacts.


Hummerholic’s 1994 Humvee Build Thread

Humveeholic

New member
29
0
0
Location
San Antonio TX
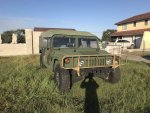
Humveeholic’s 1994 Humvee Build Thread

Thought I’d put together a thread to share the progress and modifications I’m planning for my newly acquired project. I’ve done a few build threads in the past with previous BMW vehicles and it seemed to really help people or just gibe them some ideas for their own vehicle. I’ll be going through the whole truck from a maintenance standpoint while adding modifications along the way.

Few details about the project in its in its stock format and potential plans:

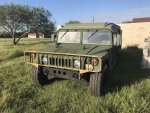
- 1994 National Guard Unit
- 2011 tags for typical upgrades
- Amtech helmet top
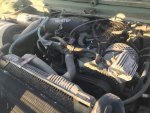
- 6.2L engine with TH400 (will be adding 4 speed and turbo)
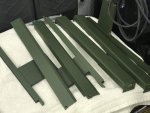
- Green in color but will be painting entire truck a sand color (not tan)
- X Doors to be added as I got them with purchase
- Upgrade tire/wheel setup to 17”/40”
- Insulate entire interior to reduce noise (researching materials now)
- Upgrade to reclining bucket seats

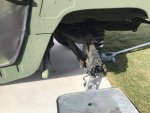
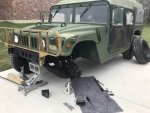
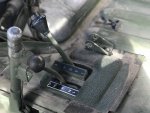
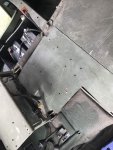
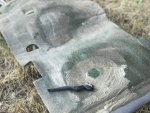
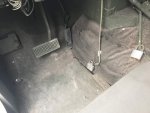
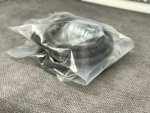
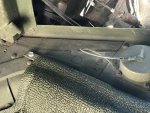
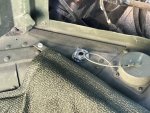
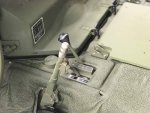
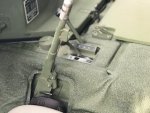
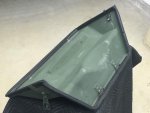
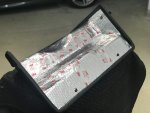
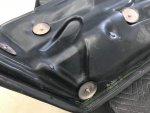
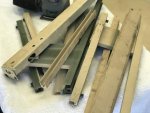
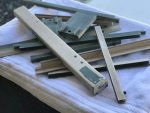
That’s about it for the short list but I’m sure I’ll run into a ton more projects. Here are a few photos of the project before I brought her home.
 

Attachments

Last edited:

Humveeholic

New member
29
0
0
Location
San Antonio TX
First task at hand to even be able to drive the humvee was replacing the half shafts. The left rear was completely toast and thankfully with the purchase the previous owner included upgraded 10k shafts. Overall this was a pretty straight forward job you just need to load the suspension on the drivers front to get the half shaft out of its place. While I was there I cleaned out all debris around the knuckle and gave them a good cleaning.

Pics of the bad halfshaft. And yes that’s a cinder block as my jack wouldn’t even touch the frame fully extended.
 

Attachments

Last edited:

Humveeholic

New member
29
0
0
Location
San Antonio TX
Next thing was to start dismantling the interior to do a deep cleaning of the insulation and remove all debris in and around the floor boards and tunnel. Here are a few pics of the interior before I got started.
 

Attachments

Humveeholic

New member
29
0
0
Location
San Antonio TX
So frustrated with this site trying to post pics. I’m using photobucket and have done so for years with other build threads. I hate the attachment function. Anyone can tell me of an easy way to post pics so that you don’t have to click them as attachments?
 
Last edited:

diesel dave

Active member
129
38
28
Location
north central pa
The way you are using the cinder/cement block to lift and hold the vehicle by laying it on its side is potentionaly dangerous. Cinder/cement blocks are meant to be “laid” vertically,not horizontally and thus have little structural strength on their side. Best to use wood blocking and forget the cinder/cement blocks altogether.
 

Humveeholic

New member
29
0
0
Location
San Antonio TX
Totally agree Dave. I was working with what I had and only went under when I have stands positioned. I have since picked up some 4x4 wood pieces until I get a larger jack.
 

Humveeholic

New member
29
0
0
Location
San Antonio TX
Battery Disconnect Install

Decided to tackle getting the humvee a little more secure when out in public so went with a keyed battery disconnect. I ended up buying a kit from TMG that would reach the drivers side. I ended up locating the switch between the doghouse and the shifter as there was already a pre-existing hole I could use. Overall the install was a breeze and after a a shot of green paint I like the fact that it isn’t very obvious.
 

Attachments

Humveeholic

New member
29
0
0
Location
San Antonio TX
LED Headlamp Replacement
Although I found it odd that both factory halogen headlamps were out I started to diagnose to see if it was the switch however I was getting the appropriate voltage at the headlamp bucket connectors. Went online and ordered up a set of LED headlamps and in a couple days started the install. For the LED headlamps I cut off the standard connector and required them with the connectors from the old headlamps. Soldered each wire and properly wrapped with heat shrink and we were ready to go. Install of the headlamp was relatively painless.
 

Attachments

Humveeholic

New member
29
0
0
Location
San Antonio TX
Doghouse Insulation Addition
With a focus to help reduce the noise inside the cabin I decided to further insulate the heat and noise from the engine by modifying the doghouse. Bought 10 sqft of Noico insulation which was the perfect amount of insulation to do two layers. Overall this was very straight forward and only required getting new bolts to use as a replacement for the insulation mounting rivets.

Conclusion: I could definitely tell that the engine noise was reduced however it’s going to take every effort to make a significant difference but I figure every attempt will get me closer.
 

Attachments

Bulldogger

Well-known member
Steel Soldiers Supporter
1,403
585
113
Location
Quantico VA
Doghouse Insulation Addition
With a focus to help reduce the noise inside the cabin I decided to further insulate the heat and noise from the engine by modifying the doghouse. Bought 10 sqft of Noico insulation which was the perfect amount of insulation to do two layers. Overall this was very straight forward and only required getting new bolts to use as a replacement for the insulation mounting rivets. Conclusion: I could definitely tell that the engine noise was reduced however it’s going to take every effort to make a significant difference but I figure every attempt will get me closer.
If the Noico is stick-on, why did you need to replace the mounting rivets? Doesn't make sense to me, but I'm nowhere near my HMMWV to look at mine to see if I can see the answer.

BDGR
 

StubbyTech

New member
3
0
1
Location
Las Vegas
If the Noico is stick-on, why did you need to replace the mounting rivets? Doesn't make sense to me, but I'm nowhere near my HMMWV to look at mine to see if I can see the answer.

BDGR
I believe he put his Noico under the insulation that is already there. The added thickness of the 2 layers of deadening is what caused the need for longer bolts.
 

Humveeholic

New member
29
0
0
Location
San Antonio TX
Stubby is correct. I used Noico on the doghouse itself then because I had to grind off the factory rivets used to hold the factory insulation in place I decided to use new bolts instead.
 

Humveeholic

New member
29
0
0
Location
San Antonio TX
Engine and Transmission Filter Service

Since the fluid age on the Humvee was unknown I decided to do a fluid and filter change for both the engine and trans. Crazy to think it cost me $600 to do a trans fluid and filter change on our BMW X5 and yet it only took cost me $75 for the filter, fluid and gasket. Love the simplicity of thee machines.

45C5A8CC-82BE-44DD-9035-1B41D4D8BD10.jpg323002C0-72E2-45BF-87F2-6DCAF8522B01.jpg6BD2CD83-3AC1-4979-9473-AA4EADAF2361.jpg492B6EEB-76E2-4E4E-ACC5-6841C10C86AF.jpg
 

83scrambler

New member
27
5
3
Location
Indianapolis, IN
What was the trans pan bolt torque you used to reinstall the pan?

Picking up my 998 4 door in a couple weeks and am planning to go through the same process of going through the fluids and starting fresh.
 

Humveeholic

New member
29
0
0
Location
San Antonio TX
Standard torque spec is 140lbs from what I remember but frankly I just torqued them all by hand alternating sides. I also warmed it up afterwards then took it for a drive then just did one last round of tightening. Not a drop of oil and have never felt comfortable with higher torque values and prefer to do by hand to get more feedback.
 

Milcommoguy

Well-known member
Supporting Vendor
1,653
2,098
113
Location
Rosamond, CA
144 INCH pounds or 12 FOOT pounds of torque and stop. Run it a week or two and check.

Righty tighty, feels good or something like that,

CAMO


New years resolution TM's :D

TM 9-2320-280-20-2
5-2. TRANSMISSION SERVICE (Cont’d)


NOTE

Perform steps 5 through 9 for 3L80 transmissions only.5. Insert end of suction tube (3) marked “filter” into oil filter (5).6. Install O-ring seal (7) onto upper end of suction tube (3) marked “case” and slide downward.7. Position oil filter (5) on transmission (1) inserting suction tube (3) into oil input port (2).8. Install oil filter (5) and spacer (4) on transmission (1) with capscrew (6). Tighten capscrew (6) to 10-15 lb-ft (14-20
Nm).
9. Install gasket (8) and oil pan (9) on transmission (1) with thirteen capscrews (10). Tighten capscrews (10)
to 12 lb-ft (16
Nm).


TM 9-2320-280-20-2
5-2. TRANSMISSION SERVICE (Cont’d)
d. Replenishing Fluid
1. Remove transmission oil dipstick (12) from dipstick tube (11).2. Check transmission fluid and fill to proper level (TM 9-2320-280-10).3. Install transmission oil dipstick (12) in dipstick tube (11).FOLLOW-ON TASK: Operate vehicle (TM 9-2320-280-10) and check for leaks.


Perform steps 5 through 9 for 3L80 transmissions only.5. Insert end of suction tube (3) marked “filter” into oil filter (5).6. Install O-ring seal (7) onto upper end of suction tube (3) marked “case” and slide downward.7. Position oil filter (5) on transmission (1) inserting suction tube (3) into oil input port (2).8. Install oil filter (5) and spacer (4) on transmission (1) with capscrew (6). Tighten capscrew (6) to 10-15 lb-ft (14-20
Nm).
9. Install gasket (8) and oil pan (9) on transmission (1) with thirteen capscrews (10). Tighten capscrews (10)
to 12 lb-ft (16
Nm).


Last edited:

Humveeholic

New member
29
0
0
Location
San Antonio TX
Prepping X-Door Window Frames
As I get closer to getting the doors prepped for paint, part of the task is getting all the other pieces ready as well. Here I took the window frames apart and sanded them down so that some new paint would stick. I’ll also be reconditioning the weatherstripping as well due to tan over spray from the military. Very tedious work but well worth it in the end.
 

Attachments

Top
AdBlock Detected

We get it, advertisements are annoying!

Sure, ad-blocking software does a great job at blocking ads, but it also blocks useful features of our website like our supporting vendors. Their ads help keep Steel Soldiers going. Please consider disabling your ad blockers for the site. Thanks!

I've Disabled AdBlock
No Thanks