• Steel Soldiers now has a few new forums, read more about it at: New Munitions Forums!

  • Microsoft MSN, Live, Hotmail, Outlook email users may not be receiving emails. We are working to resolve this issue. Please add support@steelsoldiers.com to your trusted contacts.


Valence's 1997 Pribbs M101A3

Valence

Well-known member
Steel Soldiers Supporter
2,135
605
113
Location
Davis County, UT
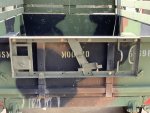
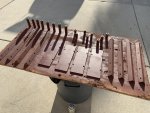
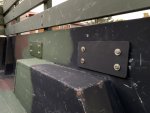
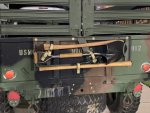
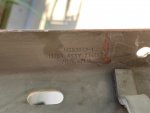
I was able to mount the pioneer tool rack to my M101A3 this weekend. For reference, the numbers stamped on the rack:
MS53053-1
19204 ASSY 734692
MFR 62412
2023-09-03 13.39.24.jpg

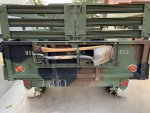
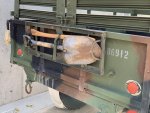
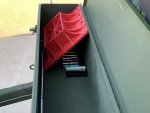
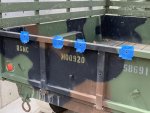
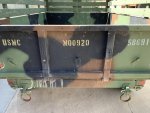
I used four 3/8" grade 8 bolts through existing holes in the rack to bolt directly to the top-most outer lip of the trailer's tailgate (that I painted after drilling), and then 2 new holes in the rack for a pair of 3/8-16 nutserts lower on the tailgate support ribs. It's a tight but good fit. I think the pioneer tool rack looks perfectly at home there (like it does on the M37 tailgates)! Fortunately, I make my own pioneer tool straps ;^) I also still need to get a mattock for it and clean the rust off the shovel I bought a while ago from the Army Surplus Warehouse in Idaho Falls, ID.

The axe is an old axe that my family had decades ago even when I was little that I have now inherited. I believe it may be old military surplus (it appears to have a couple residual green paint splotches left on the head). It seems to fit well enough in this rack. It is a True Temper, made in USA axe head that I've had to replace the handle on a couple times. Those hickory axe handles have gotten expensive, $37 from CAL Ranch this year. I sanded off the dumb factory lacquer and then smoothed it down with 180 grit and sealed the wood and head with boiled linseed oil. Hand sharpened with nice bastard file. It feels really nice.

I won't store the tools in the rack, but inside the garage and will put them on the trailer when I head out for camping/firewood.
2023-09-03 13.20.10.jpg 2023-09-03 14.17.50.jpg 2023-09-03 14.51.05.jpg
2023-09-03 15.00.06.jpg2023-09-03 15.01.31.jpg2023-09-03 15.03.46.jpg

November 2023 Update:
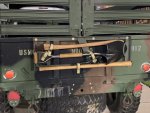
Here's how the tool rack looks on the back with the full set of restored tools and my own Pioneer Tool Rack Straps:
2023-11-10 18.35.33.jpg
 
Last edited:

Valence

Well-known member
Steel Soldiers Supporter
2,135
605
113
Location
Davis County, UT
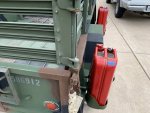
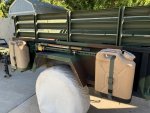
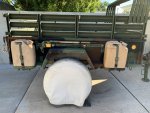
This project to add 4 jerry can mounts to my M101A3 took me about 4 times longer than I anticipated, but it is my fault as I'm sure I over-complicated it, and I over-built the mounts. I'll start with the finished pictures and then you can keep reading further down if you want all my boring details. ;^)

2023-09-08 18.50.28.jpg 2023-09-08 18.50.37.jpg 2023-09-08 12.16.08.jpg 2023-09-08 12.17.00.jpg 2023-09-08 18.45.30.jpg

2023-09-09 18.08.59.jpg 2023-09-09 18.09.09.jpg 2023-09-09 18.10.27.jpg 2023-09-09 18.24.12.jpg 2023-09-09 18.24.56 - Copy.jpg

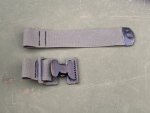
The mounts stick out about 3" past the fender, so they do make the trailer about 6" wider, or about 89.5" wide in total (~7ft and 5.5 inches). I made my own jerry can straps, of course, but I reused older, but perfectly functional buckles that had green CARC over-spray on them.

Description of the mounts to hold the jerry can mounts:
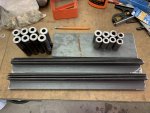
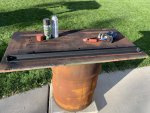
I decided I would have a pair of 1-1/4" wide x 1/8" thick angle iron (~17-15/16" long - basically two 6ft pieces from the store, each cut into 4 equal length pieces) attached to the underside of the cargo box to support the bottom of the jerry can mount. Then, I would bolt the jerry can mount to the outside of the cargo box, directly on the lower lip, and then for the upper two bolts I would use DOM tubing to span the 4" gap to the cargo box body. The DOM tubing would also span the 2" gap on the underside of the cargo box to the angle iron. Most of the DOM tubing I had on hand was 1" outer-diameter and just under 1/2" inner-diameter (I didn't quite have enough of it, so some of the 2" pieces are "only" 7/8" o.d.). I did not perform any welding (but there could have been). Everything is just bolted together with grade 8, zinc yellow bolts (I love how they look with camo paint and I buy them by the pound so it's not really that much more expensive).

2023-08-28 17.09.40.jpg

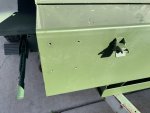
I also thought about how the jerry can straps are easier to handle when they are "pinched" in place by something on the bottom of the mount. I had a length of 4" wide x 1/4" thick plate, so I cut that into 12" long strips and drilled the holes near the middle for the mount. Due to my error, some of the holes did burst out the side of the plate but it won't matter because the 1/4" plate is not a structural piece in the slightest. It is just there to maybe help protect the jerry can mount, and immobilize the strap.

2023-09-02 18.22.35.jpg

I have a number of jerry can mounts I've collected over the years and they would have been fine to use as-is, but with this much effort already into the project, I wanted to clean them up a bit more and a wire-wheel wasn't going to cut it. I had been sitting on a well abused Harbor Freight sand blast cabinet that my brother had given me for free a number of years ago.

I ordered a new siphon feed spray gun (Campbell Hausfeld AT122601AV) (had to shorten the hose by about half)
https://www.amazon.com/Sand-Blaster-Foot-Blast-Wrench/dp/B0007D30DO/
51QcVQ3UY8L._AC_SL1200_.jpg

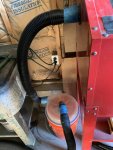
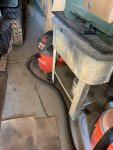
And also I bought a Dustopper Cyclonic Dust Separator that hooked up perfectly to my wet/dry shop vac:
(one of the reviews said to put about 1" of water in the bottom of the Dustopper and your shop vac to really collect the dust and not clog your vacuum filter at all. Doing so seemed to work really well for me!)
https://www.homedepot.com/p/Dustopp...with-2-High-Flow-Sweep-Elbows-HD12B/322662836
dustopper.PNG 2023-09-05 18.30.47.jpg 2023-09-05 18.37.04.jpg

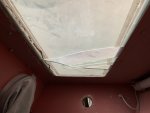
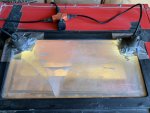
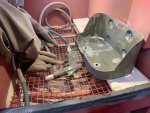
Despite the broken, and nearly impossible to see through window (I added a temporary layer of clear packing tape to the inside to hold the rest of the glass in place and attempt to keep the worse of the dust from collecting between the inner glass and outer clear plastic window), I was able to clean up the rusty parts of the mounts.
2023-09-02 09.25.36.jpg 2023-09-05 18.33.08.jpg 2023-09-05 18.30.29.jpg

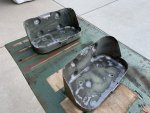
I will say though that the glass bead media I used was NOT abrasive enough. It does not like to remove CARC, but I had better luck with the older painted (probably with lead) jerry can mounts, though it was still incredibly slow. The mount pictured above came from a 1960s M103 generator trailer.

Primer 'n paint!
2023-09-05 19.14.25.jpg 2023-09-06 19.29.37.jpg 2023-09-07 17.29.34.jpg

My "old-man" outdoor working setup with my, as my friend calls it, "only fan". :ROFLMAO:
2023-09-08 09.23.48.jpg

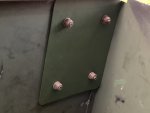
I used 3/8" rivnuts to attach the two lower (back-side) holes of the jerry can mount to the outside lip of the cargo box. I also used rivnuts to attach the angle iron to the cargo box underside support rail. The 3/8" rivnuts surprised me at how much arm strength and force was needed to crimp them into place via the Marson 325-RN! I was only able to crimp the 3/8" rivnuts into place by using my hip and two hands on the opposite bar. I couldn't easily use that technique under the trailer, so for where the angle iron attached to the cargo-box support, I used 1/4" rivnuts. I'm sure it'll still be plenty strong enough.
2023-09-09 18.11.44.jpg 2023-09-09 18.11.53.jpg
 
Last edited:

Valence

Well-known member
Steel Soldiers Supporter
2,135
605
113
Location
Davis County, UT
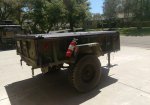
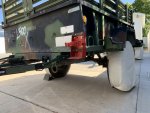
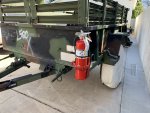
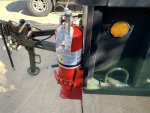
With the additional fuel carrying capacity, I wanted a fire extinguisher mounted on my trailer and I have a couple extra fire extinguisher mounts I've collected. I considered placing the mount on top of the passenger fender, but with my extinguisher being so tall, I didn't have a good feeling about it so high up where it would experience large back and forth movements off-road. The fire extinguisher was also too tall to be placed between the passenger front jerry can mount and the fender (it would be in the way of the front gate from latching all the way opening).

I searched around trying to see what other people might have done and came across this photo of placing the mount on the back side of the fender vs on-top. Unfortunately, that wouldn't work for me as I wanted the extinguisher on the driver's side, and the hing/arm of the mount that I had was on the left side, which would then jut out from the trailer and, knowing me, I'd constantly run into it and hurt myself.
9c20239bc67fafd9112f6f776f825da7 - Copy.jpg

I then found this photo of an M101A1 where, I believe, they were used as generator trailers (fuel tank underneath, fill neck visible on the passenger side) and the stock fire extinguisher bracket was mounted on the front of the cargo box above the driver's side frame rail:
1694970110269.jpeg

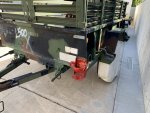
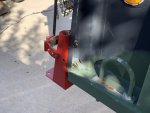
Well, I still plan on mounting a small toolbox on the tongue so the fire extinguisher bracket couldn't go in the exact same spot as above, but there was room outside of the park brake handle. Yes, the extinguisher may be more subject to trail/road dust/debris here vs the fender, but I think it'll be fine.

2023-09-16 11.12.30.jpg 2023-09-16 11.12.48.jpg 2023-09-16 11.13.00.jpg 2023-09-16 11.14.17.jpg

2023-09-16 11.13.22.jpg 2023-09-16 11.13.31.jpg

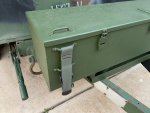
I had to drill two new holes in the left side of the mount for the bolts to miss the side-rack pocket, but I think that is a small compromise. The bracket arm/hinge does partially cover a small part of the dataplate, but that dataplate is largely illegible anyway.

I will concede that a superior fire extinguisher bracket would have the extra security pin over the bracket latch.
1694971397221.jpeg
 
Last edited:

Valence

Well-known member
Steel Soldiers Supporter
2,135
605
113
Location
Davis County, UT
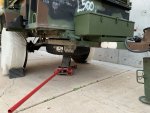
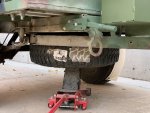
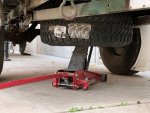
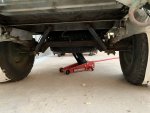
Now, I do have spare tire for this trailer (that I still need to mount, but that's for later) but I thought a Hi-Lift jack would be the most useful jack to use with this trailer.

Locally, I found someone selling a like-new (green!) Hi-Lift "Signature Edition", Model PJ-485 (48" long) that I purchased for only $65.
https://hi-lift.com/hi-lift-jacks/pj-harrah-jack/

I browsed a lot of different Hi-Lift jack mount/mounting systems and, after I found it, I felt like the Hi-Lift 4XRAC would be most suitable for my needs:
https://www.amazon.com/Hi-Lift-4X400-4XRAC-Mounting-System/dp/B000CMHNY2/
71gtX-HuOnL._AC_SL1500_.jpg

When it arrived, the powder coating was less than optimal and the stickers were 1/2 falling off, but that was okay as I wanted to remove the stickers anyway and I have plenty of flat-black paint.
2023-09-19 16.37.47.jpg

For me, I felt like I could mount the jack in one of three places:
  • On the front of the trailer
    • I rejected this idea because I felt like it'd force me to mount the toolbox further forward than I wanted.
  • Inside the trailer
  • On/Above the passenger fender
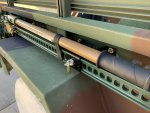
Obviously, with some measuring of the rear gate and jerry can clearance, I opted for exterior mount above the fender. It is 3" from the top of the bed to the top of the mount bracket. I think it fits really well here. Yes, it'll get in the way of the cargo cover a bit on the side, but mine has always been plenty loose on the side anyway. I am a little bummed to cover some of the stenciling, but well, that's how it goes. I also used my own grade 8, 1/4" x 1” bolts for the good looking zinc plating and the extra strength doesn’t hurt.

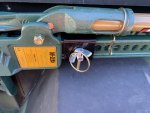
The 4XRAC jack mount bolts have 1/4" holes in them that some say is great to put a lock on to "secure" your Hi-Lift jack. I don't think a lock that small would be worthwhile so I placed two 1/4" linch pins as a guarantee against the wing nuts coming lose and losing the jack.

No, I won't store the jack here while the trailer sits outside. I'll mount it when I go to use the trailer as it's very quick and easy.

2023-09-23 18.47.18.jpg 2023-09-23 17.34.47.jpg 2023-09-23 17.06.23.jpg 2023-09-23 17.06.14.jpg 2023-09-23 17.05.53.jpg

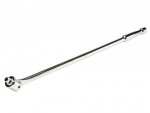
Also, this weekend Harbor Freight had a 30% off coupon for any regular priced item under $20, so I bought a 1/2" drive, 25" long breaker bar and a set of deep sockets (just for the 7/8" socket) as my "lug wrench". Total cost with tax, $27.00

https://www.harborfreight.com/12-in-drive-25-in-breaker-bar-60819.html
60819_W3.jpg

https://www.harborfreight.com/hand-...lor-coded-deep-socket-set-10-piece-61294.html
61294_I.jpg
 
Last edited:

Valence

Well-known member
Steel Soldiers Supporter
2,135
605
113
Location
Davis County, UT
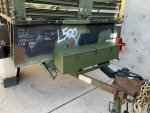
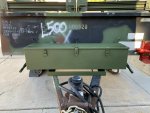
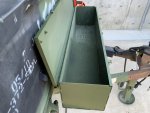
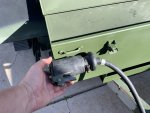
I had a tan toolbox I kept from a previous 3kw generator trailer that I had sold. I painted the exterior with Rapco 383 green substitute. I then cut off the 'U' storage mount for the 12-pin military trailer plug, and painted the section of frame rail.

(I still need to find a new location where to secure either of the trailer's plug when not in use, which will most likely be this 12-pin plug. I'll probably use some bolt-on footman loops and webbing to achieve this.)

I then secured the toolbox to the frame rails with four 1/4" nutserts and grade 8 bolts.

The rear of the toolbox is 3" from the cargo box and I was able to bolt it directly to the frame rails. I used a 2" x 2" x 1/8" x 24" long piece of angle iron to bolt to the trailer and toolbox. Bonus points was I already had the piece of angle iron in my small steel pile.

2023-09-25 18.10.13.jpg 2023-09-25 18.10.25.jpg 2023-09-25 18.10.46.jpg 2023-09-25 18.14.23.jpg
2023-09-25 18.20.18.jpg 2023-09-25 18.22.12.jpg

So far, the only things I have to store is the breaker bar, aka my lug wrench (and left over sockets), plastic foot/base for the Hi-Lift jack, and the military trailer jack handle. (Until my driveway gate is finished, I actually won't store anything in the box when not in use).
 
Last edited:

Valence

Well-known member
Steel Soldiers Supporter
2,135
605
113
Location
Davis County, UT
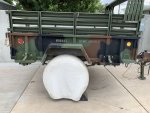
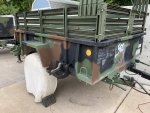
Now, a rather important subject: Where to put the spare tire.

The spare would have fit very well in front of the cargo box on the tongue (where I put the toolbox); such as how this fellow on Facebook did his:
1696219421046.jpeg

However, without a specially designed mount, the spare tire would been in the way of the cargo cover, as it is in the away of the fellow's tarp above. Also, due to the tire's height, it would have prevented use of the front gates.

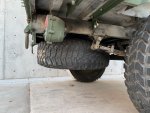
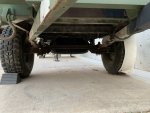
I'm considering under the body, between the frame rails and use a hand crank hoist to hold it in place (like what is on my truck for its full size spare tire). Either in front or behind the axle. I'm well aware of being sure the trailer maintains "enough" tongue weight, but I am also concerned with "too much" tongue weight as the front jack doesn't exactly have wheel for easier movement by hand.

I didn't take any photos of the tire staged behind the axle, but it does look pretty good in front of the axle. Granted, ground clearance is lost, but the trailer would still have more clearance than what I usually tow it with (my 2001 Dodge Dakota at the time of this writing).
2023-10-01 19.02.05.jpg 2023-10-01 19.01.51.jpg 2023-10-01 19.02.00.jpg

Spare tire in front of the axle, as seen from the rear:
2023-10-01 19.02.31.jpg 2023-10-01 19.02.28.jpg

So far, this is the best hoist for this application that I've managed to find:
https://www.amazon.com/JSD-52058707-Spare-Hoist-1994-2002/dp/B07L3FFWS5/
"JSD 52058707 Spare Tire Hoist for Dodge Ram 1500 Spare Tire Winch for Dodge Ram 2500 3500 1994-2002"
1696220402626.jpeg 1696220414230.jpeg
 
Last edited:

Mullaney

Well-known member
Steel Soldiers Supporter
Supporting Vendor
7,347
19,032
113
Location
Charlotte NC
Now, a rather important subject: Where to put the spare tire.

The spare would have fit very well in front of the cargo box on the tongue (where I put the toolbox); such as how this fellow on Facebook did his:
View attachment 907162

However, without a specially designed mount, the spare tire would been in the way of the cargo cover, as it is in the away of the fellow's tarp above. Also, due to the tire's height, it would have prevented use of the front gates.

I'm considering under the body, between the frame rails and use a hand crank hoist to hold it in place (like what is on my truck for its full size spare tire). Either in front or behind the axle. I'm well aware of being sure the trailer maintains "enough" tongue weight, but I am also concerned with "too much" tongue weight as the front jack doesn't exactly have wheel for easier movement by hand.

I didn't take any photos of the tire staged behind the axle, but it does look pretty good in front of the axle. Granted, ground clearance is lost, but the trailer would still have more clearance than what I usually tow it with (my 2001 Dodge Dakota at the time of this writing).
View attachment 907165 View attachment 907163 View attachment 907164

Spare tire in front of the axle, as seen from the rear:
View attachment 907167 View attachment 907166

So far, this is the best hoist for this application that I've managed to find:
https://www.amazon.com/JSD-52058707-Spare-Hoist-1994-2002/dp/B07L3FFWS5/
"JSD 52058707 Spare Tire Hoist for Dodge Ram 1500 Spare Tire Winch for Dodge Ram 2500 3500 1994-2002"
View attachment 907168 View attachment 907169
.
Only other thing you need to consider it that the air filler (valve) needs to be facing DOWN so you can check it before each trip. And just know that a flat tire gets your trailer down pretty close to the ground. Now what do you do when you lower the tire to the ground? Is there enough rooom to reach under there and over the tire so you can remove the hanger?

I am sure you know that you won't want to be under that trailer with it jacked up - and on uneven ground - trying to drag out your spare.

Not that you haven't already considered it, but just in case.
 

Valence

Well-known member
Steel Soldiers Supporter
2,135
605
113
Location
Davis County, UT
.
Only other thing you need to consider it that the air filler (valve) needs to be facing DOWN so you can check it before each trip. And just know that a flat tire gets your trailer down pretty close to the ground. Now what do you do when you lower the tire to the ground? Is there enough rooom to reach under there and over the tire so you can remove the hanger?

I am sure you know that you won't want to be under that trailer with it jacked up - and on uneven ground - trying to drag out your spare.

Not that you haven't already considered it, but just in case.
Certainly quite valid points I haven’t considered. However, these HMMWV tires have runflats so the wheel doesn’t have quite as far to “fall”. Even if so, I don't think it’ll be too hard to find/stack something to drive the flat tire onto for needed clearance to access the spare.

Interestingly, this scenario does support putting the spare in the rear, as it’s less trailer to crawl under.
 

Tinstar

Super Moderator
Super Moderator
Steel Soldiers Supporter
4,256
1,708
113
Location
Edmond, Oklahoma
Looking at your pictures, you've done quite a bit.
When you mounted your Jerry cans and Jack, did you use a backing plate for the bolts? Or just the metal of the trailer?
Where those are mounted, they will be taking quite a beating, vibration wise.
Metal Fatigue will be a factor unless the mounts are prepped for it.
Using backing plates will stop or dramatically slow it from forming cracks and eventual failure.

One of my A2's was from an EOD unit.
They had several mounting brackets on the inside walls of the trailer.
They used backplates on everything. Floor included. Zero cracks.

Just a suggestion.
 

Valence

Well-known member
Steel Soldiers Supporter
2,135
605
113
Location
Davis County, UT
Looking at your pictures, you've done quite a bit.
When you mounted your Jerry cans and Jack, did you use a backing plate for the bolts? Or just the metal of the trailer?
Where those are mounted, they will be taking quite a beating, vibration wise.
Metal Fatigue will be a factor unless the mounts are prepped for it.
Using backing plates will stop or dramatically slow it from forming cracks and eventual failure.

One of my A2's was from an EOD unit.
They had several mounting brackets on the inside walls of the trailer.
They used backplates on everything. Floor included. Zero cracks.

Just a suggestion.
Yes, all bolts are directly to the metal of the trailer. Great suggestion. I'll have to do that for the spare tire hoist and, at minimum, for the Hi-Lift jack, as I see those mounts as the most susceptible. The jerry can mounts probably wouldn't hurt, but I do see those as less likely as they're held on by 8 bolts in total which would do a lot to spread out the weight (but only 4 of those bolts could I put backing plates on because the other 4 are rivnuts).
 

Valence

Well-known member
Steel Soldiers Supporter
2,135
605
113
Location
Davis County, UT
I have added 8"x4"x1/4" backing plates for the Hi-Lift jack mount. I suppose this shows that the front mount is slightly crooked. :shrugs:

2023-10-06 19.12.54.jpg 2023-10-06 19.13.01.jpg

An unrelated note, in the first photo you can actually see that the hue of the left plate (painted with Rapco 383 Green substitute) is an exact match, even if the overall color doesn't quite match. While the hue of the flat black plate on the right is not quite as dark as the black CARC.
 
Last edited:

Valence

Well-known member
Steel Soldiers Supporter
2,135
605
113
Location
Davis County, UT
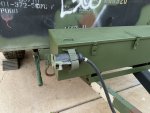
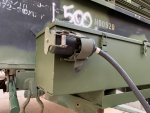
I have relocated the military 12-pin plug to be strapped down via a pair of footman loops on the toolbox. I used 16 gauge steel backing plate on the inside of the aluminum toolbox.

2023-10-22 16.01.22.jpg 2023-10-22 16.04.02.jpg 2023-10-22 18.20.10.jpg
2023-10-22 18.10.37.jpg 2023-10-22 18.31.15.jpg
2023-10-22 18.33.18.jpg 2023-10-22 18.33.50.jpg

Perhaps I should have put the footman loops towards the bottom of the box, but this works too.
 
Last edited:

Valence

Well-known member
Steel Soldiers Supporter
2,135
605
113
Location
Davis County, UT
I have had other projects that were far more labor intensive (such as restoring my deuce's wooden troop seats and bows, or installing the cab reinforcement bracket), but this spare tire hoist sure wore me out and took 3 times longer than it should have and I broke 2 hoists.

2023-10-29 18.09.29.jpg 2023-10-29 18.08.05.jpg 2023-10-29 18.09.04.jpg 2023-10-29 18.10.14.jpg

Lessons learned, when the hoist says "don't lift above the red line", it means it (hoist #1 exploded), and when the tire wobbles, don't try to just cinch the hoist tighter, it'll break internally (hoist #2).

I did end up going with the hoist I linked earlier:
https://www.amazon.com/JSD-52058707-Spare-Hoist-1994-2002/dp/B07L3FFWS5/
"JSD 52058707 Spare Tire Hoist for Dodge Ram 1500 Spare Tire Winch for Dodge Ram 2500 3500 1994-2002"
81vfRdn2iEL._AC_SL1500_.jpg 8121wnX0EXL._AC_SL1500_.jpg
Note: Hoist takes M8-1.25 bolts. I used 20mm length in the front and 30mm length in the rear (I had 1/2" of steel above it to go through). The front length doesn't really matter, but too long of ones in the rear will run into the body of the hoist. And 3 trips to the hardware store for me! *sigh*

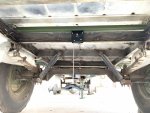
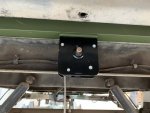
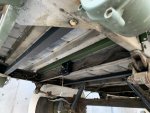
My solution required three 4ft x 1/4" thick x 1-1/2" angle iron bars.
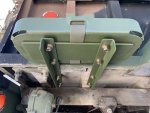
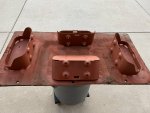
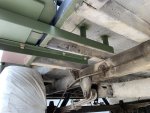
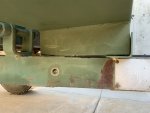
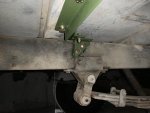
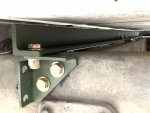
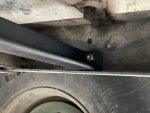
One in the middle, on top of the frame rails, to bolt the back half of the hoist to, while the front 2 bolts are in the original cross member. Since I did not have a small enough drill to drill into the top of the frame rail, I attached this bar via a pair of brackets on the outside of the frame rail, These brackets match the existing brackets on the M101, and were from a 1960 Pioneer Tool Trailer that I parted out and scrapped.

2023-10-19 18.17.21.jpg 2023-10-19 18.18.21.jpg 2023-10-17 19.37.32.jpg 2023-10-19 18.16.59-copy.jpg

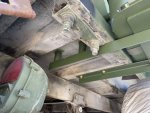
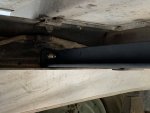
The other two angle iron bars (painted black) are simply for the tire to brace against when it is hoisted up. I thought one bar would be sufficient, but the tire would rock easily. The rear-most bar was simple to bolt to the reinforcing gussets, but the front most bar required ends to be welded on, to form a "box" (because the leaf springs were in the way and I, again, didn't have a small enough drill + bit to fit between the leaf springs to drill a hole in the frame from below).

2023-10-29 17.04.53.jpg 2023-10-29 17.51.10.jpg 2023-10-29 17.51.15.jpg 2023-10-29 17.58.26.jpg

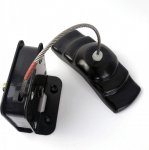
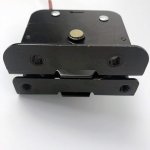
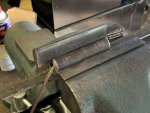
Also visible above is the 3-1/4" spacer I welded onto the bottom of the hoist cable. This hoist was designed to be mounted higher than I had room and would max out before the tire was fully secured (how I broke hoist #1). The spacer is 1" wide DOM (Drawn Over Mandrel) tubing with 1/4" sidewalls. I cut a 1/4" slot lengthwise to insert the cable, and then welded in a 1/4" filler piece to close the tube back up. I thought this would be the simplest, safest solution instead of trying to somehow shorten and resecure the cable.

2023-10-29 16.37.00.jpg

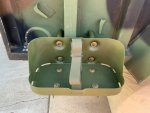
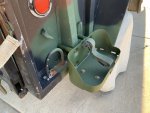
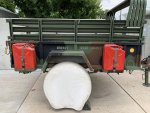
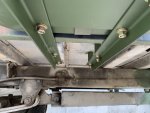
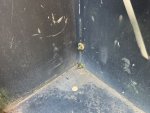
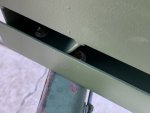
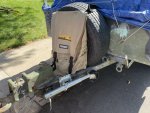
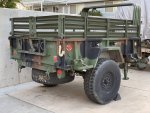
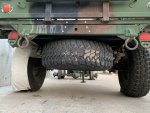
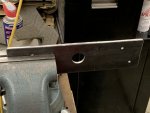
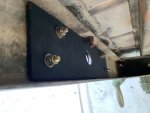
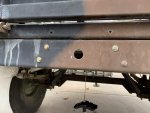
I chose to put the tire on the rear of the trailer because it would be much easier/safer to reach the tire and hoist. However, this did require me to cut a 1-1/8" hole in the rear frame rail for the hoist tool. In an (probably over) abundance of worry about the strength of the frame, I cut a 12" long piece of 1/4" plate steel and bolted it to the inside of the frame, with off-set holes. As seen in the third picture below, the unused holes above (in the cargo body) used to be for a license plate and I just filled with 1/4” bolts for appearance reasons.

The trailer is still far from tipping backwards, or being rear heavy, as I can stand in the rear-most part of the cargo box and still not lift the tongue off the ground.

2023-10-27 21.29.24-copy.jpg 2023-10-28 12.14.53.jpg 2023-10-28 12.14.43.jpg

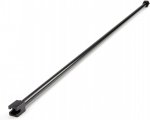
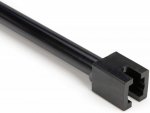
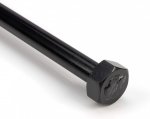
The following hoist tool fit this hoist perfectly, and it also had the same 7/8" hex head as the M101/HMMWV lug nuts require!
"Steelman 12mm Slotted Square Head Spare Tire Tool for Accessing Cradle-Mounted Spares, 30 Inches Long for Deep Pulleys, Powder-Coated Steel"
71MJkXSvsML._AC_SL1500_.jpg 71SmuY9nACL._AC_SL1500_.jpg 61YTWWdt4mL._AC_SL1500_.jpg
 
Last edited:

Mullaney

Well-known member
Steel Soldiers Supporter
Supporting Vendor
7,347
19,032
113
Location
Charlotte NC
I have had other projects that were far more labor intensive (such as restoring my deuce's wooden troop seats and bows, or installing the cab reinforcement bracket), but this spare tire hoist sure wore me out and took 3 times longer than it should have and I broke 2 hoists.

View attachment 909405 View attachment 909403 View attachment 909404 View attachment 909406

Lessons learned, when the hoist says "don't lift above the red line", it means it (hoist #1 exploded), and when the tire wobbles, don't try to just cinch the hoist tighter, it'll break internally (hoist #2).

I did end up going with hoist I linked earlier:
https://www.amazon.com/JSD-52058707-Spare-Hoist-1994-2002/dp/B07L3FFWS5/
"JSD 52058707 Spare Tire Hoist for Dodge Ram 1500 Spare Tire Winch for Dodge Ram 2500 3500 1994-2002"
View attachment 909418 View attachment 909419
Note: Hoist takes M8-1.25 bolts. I used 20mm length in the front and 30mm length in the rear (I had 1/2" of steel above it to go through). The front length doesn't really matter, but too long of ones in the rear will run into the body of the hoist. And 3 trips to the hardware store for me! *sigh*

My solution required three 4ft x 1/4" thick x 1-1/2" angle iron bars.
One in the middle, on top of the frame rails, to bolt the back half of the hoist to, while the front 2 bolts are in the original cross member. Since I did not have a small enough drill to drill into the top of the frame rail, I attached this bar via a pair of brackets on the outside of the frame rail, These brackets match existing brackets on the M101, and were from a 1960 Pioneer Tool Trailer.

View attachment 909401 View attachment 909402 View attachment 909407 View attachment 909423

The other two angle iron bars (painted black) are simply for the tire to brace against when it is hoisted up. I thought one bar would be sufficient, but the tire would rock easily. The rear-most bar was simple to bolt to the reinforcing gussets, but the front most bar required ends to be welded on, to form a "box" (because the leaf springs were in the way and I, again, didn't have a small enough drill + bit to fit between the leaf springs to drill a hole in the frame from below).

View attachment 909409 View attachment 909410 View attachment 909411 View attachment 909412

Also visible above is the 3-1/4" spacer I welded onto the bottom of the hoist cable. This hoist was designed to be mounted higher than I had room and would max out before the tire was fully secured (how I broke hoist #1). The spacer is 1" DOM (Drawn Over Mandrel) tubing with 1/4" sidewalls. I cut a 1/4" slot lengthwise to insert the cable, and then welded in a 1/4" filler piece. I thought this would be the simplest, safest solution instead of trying to somehow shorten and resceure the cable.

View attachment 909414

I chose to put the tire on the rear of the trailer because it would be much easier/safer to reach the tire and hoist. However, this did require me to cut a 1-1/8" hole in the rear frame rail for the hoist tool. In an (probably over) abundance of worry about the strength of the frame, I cut a 12" long piece of 1/4" plate steel and bolted it to the inside of the frame, with off-set holes. The unused holes above (in the cargo body) used to be for a license plate.

The trailer is still far from tipping backwards, or being rear heavy, as I can stand in the rear-most part of the cargo box and still not lift the tongue off the ground.

View attachment 909424 View attachment 909417 View attachment 909416

The following hoist tool fit this hoist perfectly, and it also had the same 7/8" hex head as the M101/HMMWV lug nuts are!
"Steelman 12mm Slotted Square Head Spare Tire Tool for Accessing Cradle-Mounted Spares, 30 Inches Long for Deep Pulleys, Powder-Coated Steel"
View attachment 909421 View attachment 909422 View attachment 909420
.
Looking Good!
 

Valence

Well-known member
Steel Soldiers Supporter
2,135
605
113
Location
Davis County, UT
Little update in the above post for all y'all:

November 2023 Update:
Here's how the tool rack looks on the back with the full set of restored tools and my own Pioneer Tool Rack Straps:
2023-11-10 18.35.33.jpg
Due to age and sidewall cracking, I'd like to replace all my tires on this trailer, but it's a funds thing and to get them shipped from Feltz Tire. Local to me Boyce Equipment's HMMWV tires are all 8+ years old at the time of this writing.
https://feltztire.com/product/37x1250r165lt-gy-enforcer-mt-hmmwv-tires-10-ply-nos/

I believe an old tire here is less worrisome (not without worry, just lesser) as 1) It is a trailer (not as heavy) and 2) They do have runflats so a failure would be less catastrophic. Not that a failure would be very convenient no matter where it happened! (likely on the interstate here as it is the main method I use to get in/out of town). Also, the driver's side tire has a slow leak. It will leak from 50PSI to 35psi in 3 months. I assume the leak is the wheel o-ring.

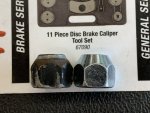
In the mean time, the spare you see in the previous hoist posts, I bought from a friend who got it from GovPlanet that had "BAD" spray-painted on the sidewall. It has very little cracking and seemed in pretty good condition otherwise, and was on a 24-bolt wheel too. Well, I had the thought I should check it for round/balance issues. I removed the passenger tire on the M101A3 and bolted on this spare. One of the lug nuts was a bit messed up, but I was able to easily replace it at the local auto parts store by telling them to look up the lugnuts for a 1995 Hummer.

Doorman 9/16-18, Item #611-052
(original on the left, new on the right)
2023-10-21 17.20.13.jpg 2023-10-21 17.20.24.jpg

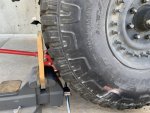
I then used the following setup with a spare vise and and spun the tire. The following video is the result.
2023-10-21 16.33.35.jpg


This spare tire looks to be a bit out of round to me. Folks on a trailer page on Facebook said it had probably been sitting too long, developed a flat spot, and that I should run it and it'd round itself back out. I do not think the trailer would be heavy enough, and my brother's agreed with me. What do you think?
 
Last edited:
swbradley1

Modertator
Staff member
Super Moderator
Steel Soldiers Supporter
14,189
1,534
113
Location
Dayton, OH
I like the thread. I mounted an MRAP toolbox on the front of mine and Gimpy and I put a spare tire carrier under the back almost like yours. I also put commercial lights on it along with two pieces of PVC pipe (1 per side) on the sides to hold amateur radio masts.

(y)
 

Valence

Well-known member
Steel Soldiers Supporter
2,135
605
113
Location
Davis County, UT
I like the thread. I mounted an MRAP toolbox on the front of mine and Gimpy and I put a spare tire carrier under the back almost like yours. I also put commercial lights on it along with two pieces of PVC pipe (1 per side) on the sides to hold amateur radio masts.

(y)
Thanks swbradley1! Great idea for transporting amateur radio masts too!

On Veterans day a week and a half ago, I couldn't pass up yet another trailer load of free firewood (albeit greener and harder to split by hand than I expected) from a small ranch just a couple towns over. The wood consisted of green cottonwood and russian olive (the olive trees had been on the ground for a wile and are still very stubborn to split by hand. Or I'm weak, which is likely).
2023-11-11 12.19.28.jpg

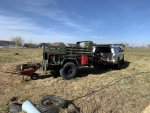
I then stopped by Smith and Edwards in Ogden, UT for the old "Cowboy" burger shop inside (best prices in the state with the best french fries I've ever had, seriously). It'll be a real shame when he retires and closes down in probably just a couple more years. I've been eating there since my grandparents took me here for over 35 years now, even well before I lived in Utah. Sadly, the northern yard that was formerly full of military surplus has now been cleared out. The southern surplus yard was bulldozed at least 5 years ago. Another end of an era.

2023-11-11 14.32.09.jpg 2023-11-11 14.32.43.jpg 2023-11-11 14.35.24.jpg
 
Last edited:
Top
AdBlock Detected

We get it, advertisements are annoying!

Sure, ad-blocking software does a great job at blocking ads, but it also blocks useful features of our website like our supporting vendors. Their ads help keep Steel Soldiers going. Please consider disabling your ad blockers for the site. Thanks!

I've Disabled AdBlock
No Thanks