• Steel Soldiers now has a few new forums, read more about it at: New Munitions Forums!

  • Microsoft MSN, Live, Hotmail, Outlook email users may not be receiving emails. We are working to resolve this issue. Please add support@steelsoldiers.com to your trusted contacts.


Project Off-Grid M109A3 w/w log

ken

Active member
Steel Soldiers Supporter
2,480
24
38
Location
Houston Texas
I found some 24V power inverters the other day. Just google it. It would take less doing with running extra wiring. Might i also sudjest a 100 amp alternator. Mabye one off a M1010. Or a M998 hummvee. This would also help recharging and running the radios. Although running the multi just for power isn't very efficent. Might a also sudjest a "D" turbo and a muffler. Just to help with keeping it quiet in the woods.
 

Green_gator

New member
760
1
0
Location
Tampa, Fl
On the thermostat if it just pegged and even after you let the truck cool down it still shows that it could be a simple fix. On the passenger side front part of the engine is where the wire connects, if it is loose, detached or frayed enough it will tell the gauge to go all the way hot. Had this happen on the way back to Florida with my 109. Was finishing a long hill climb and looked down to see my gauge all the way hot. Pulled over and let the engine cool down so that I could check the water level. After a short nap in the box it was still pegged but I could put my hand on the engine and remove the cap on the radiator. Ended up wasting a few hours on a long trip for that. It may not be the issue but worth checking.
 

timass1

Member
103
0
16
Location
Putnam/Ct
I particularly like the mast mount, if you could shed some details on that. Over all nice setup, it looks like either field day or a weekend hr qso party. Do tell.
 

wsucougarx

Well-known member
6,951
65
48
Location
Washington State
VIC-1 and radios

Yesterday I finally got the last few items needed to complete my military radio/intercom system in the cab of the truck. I added the MT-1898 for the R-442a/VRC tonight. I also tested each VIC-1 station for operational status. Everything is good to go. I have a total of 3 VIC-1 stations set up in the cab of the truck (driver and two passengers). As mentioned previously, I added a third seatbelt to accomodate one additoinal passenger in the truck. More than likely it'll be my son and daughter riding with good ole dad. Anyways, I thought it was only appropriate to allow the 3rd person to have comms. I plan to add another VIC-1 station to the HAM operator in the van. I swapped out the RT-524a/VRC I had in the cab for an RT-246a/VRC that I just got off of ebay. The reason I did this because the RT-246 allows the operator to preset stations into the radio. There is a nice remote control box that allows you to pick these preset stations by turning the dial. I mounted the control box right in the middle of the windshield assy to allow for easy use. Also mounted on each side is a LS-454 for the RT-246 and R-442. I still need to coaxial cables for the radio's and antenna's. At this point I plan on using RG-213 cables. I was thinking about going with a commercially available HAM radio with much for convenience in function and bands. However, it is my desire to keep this truck looking somewhat military. It is really hard to stay a purist when restoring this truck. There are so many civilianized items I want to put on this truck. However, I don't want anything to look too out of place. It just takes that one little bling to draw your attention away from all the hardwork to that one little distraction thing.
As you can see, I added military avitation instrumention lighting for G&C's gauges for night ops (THANKS DAN). All too many times I have caught myself squinting during night time drives, trying to focus on what the gauge readings are. Hopefully this will help.
I also fabricated a toggle switch panel for my switches. That project is still down the road. Plan on adding the following switches: Interior Red Lights, Interior White Lights, Auxillary Driving Lights, Auxillary Side Lights, Spotting Light,

PICS AREN'T WANTING TO LOAD. WILL TRY TOMORROW
 

Attachments

Last edited:

KD0kiq

New member
7
0
0
Location
KS
More of magneto's duece, second photo was taken at field day this summer. The tower system is a hing plate that flips down, you slide the tower sections on, then using ropes haul it vertical, then using two pipes to brace it off the pivot points on the box.
 

Attachments

wsucougarx

Well-known member
6,951
65
48
Location
Washington State
Today my task was to tackle the cooling system issues. Last week when I attempted my maiden voyage, my temp gauge was pegged. I limped her home and waited until today to work on her. One task lead to another task which lead to another. I flushed the cooling system today. It took approx 4 hours time. I ran regular tap water through to do the initial flush of the system....wow, the crap that came out. Next I put 3 bottle of prestone coolant flush in. Ran her for an hour and flushed the system again. Surprisingly, the water wasn't too bad at all. I decided I wanted to replace all the 2 inch radiator hoses. To get to them I ended up removing my radiator. Since I was in there I decided to replace the belts as well....well at least attempted to do so. I was given the wrong belts from OD Iron. Looks like I'll hit my local NAPA up tomorrow morning. I also ended up replacing the thermostat.
I'll post some pics in a couple days. I was amazed at how much crap and rust was inside those coolant hoses. The outside look like there were new, well the inside has a completely different story. Don't trust your hoses because they look good on the outside:-|
Looking at the radiator, you can see there is a mix of Tan CARC and GREEN CARC. Other than the original Forest Green from AM General, the first coat of paint on this truck was Desert Tan CARC (Desert Storm I). Then was painted 3 color CARC.

Projects Completed:
Flushed the system several times (tap water x5,prestone super flush x1, distilled water x3)
Replaced all 2" coolant hoses w/NAPA
Changed out all belts w/NAPA belts
Replaced Thermostat
 

Attachments

Last edited:

wsucougarx

Well-known member
6,951
65
48
Location
Washington State
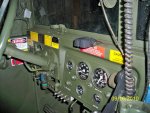
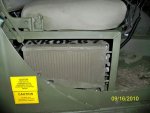
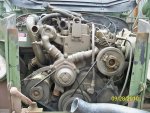
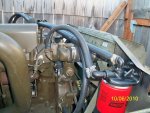
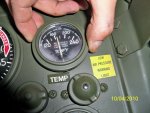
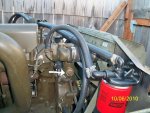
OK, been tackling the coolant issue for about a week and a half. I replaced all the 2" coolant hoses and the 5/8" heater hoses over the past week or so. As stated in a previous thread, I thought I had some overheating issues. Turns out the water temp gauge wasn't grounded to the gauge panel:x. Oh well, at least this prompted me to flush the coolant system out, add a coolant filter, and put fresh coolant in the system. You can see the temp reading differences in the pics. You push it in, it's not grounded. You pull on the gauge so the gauge hold down bracket in the back mades contact with the panel, it's grounded.
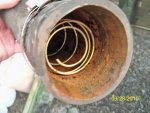
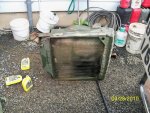
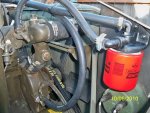
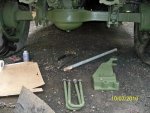
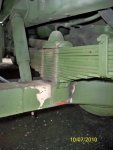
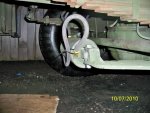
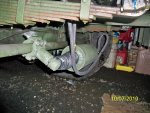
I went through and repacked all the bearings and rebuild all the wheel cylinders. When I cracked open the first hub I noticed fresh red grease...whew, they repacked all the bearings....I thought my work was done, but my gut feeling said to keep going and look everything over. Boy am I glad I did. Every wheel cylinder were the original wheel cylinders that came with the truck...no joke. With only 1200 miles on the truck the insides looked great, however the boots were pretty bad as you can see by the pic. Also found that everyone of the 4 hubs had dragging brake pads. Must have been going on for sometime because the paint on the inside of the hubs were bubbled. Nothing was warped. I also got my WIX 24019 Coolant Filter housing in the mail today ($28 shipped each) and decided to get them on as well. It was pretty uneventful.
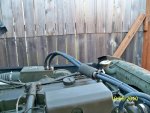
Tomorrow I am planning on installing the Air-O-Matic. Hopefully the install will be uneventful as well:)

Projects Completed:
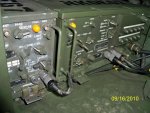
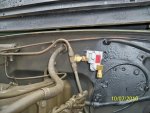
Added WIX Coolant Filter 24019
Replaced all 5/8" heater hoses
Repacked all rear bearings
Replaced all rear inner seals
Rebuilt all rear wheel cylinders
Added tire inflation extensions to rear duals
Put anti-seize compound on lug threads
 

Attachments

Last edited:

wsucougarx

Well-known member
6,951
65
48
Location
Washington State
Today was one soggy, rainy, windy, nasty, and cold day. All these description brought up several excuses of why I shouldn't work on G&C. However, one thought came to mind....Air-O-Matic. I've had this AOM kit from the days brianrbull liquidated all those kits last year. I bought this kit for the M109A3 I didn't have, but knew someday she'd be parked next to my house. Of course that day has come and that got me motivated. I spent 4-6 hours laying in wet gravel and mud puddles...oh the memories of OCS came up w/GYSGT Lewis screaming at us to keep going. The install went pretty uneventful. The toughest part was getting those blasted bearing guards on. If you can imagine two sem-hard rubber bushings being compressed to half their size and then fitted into a sandwich type mount. That alone took about an hour...I ended up cutting one of the bushings in half to make it somewhat tolerable to install. I'm still ticked off by it....I didn't quite finish the install today. I just need to get the regulator mounted and I'll take her out to test it out. Nice to be inside, still drying out.
Next project will be mounting the secondary 50 gallon saddle fuel tank. It's going to go where the spare tire/pioneer rack now resides. More on that project when the time comes.

Projects Completed:
Air-O-Matic except the regulator
 

Attachments

Last edited:

wsucougarx

Well-known member
6,951
65
48
Location
Washington State
Completed the Air-O-Matic install today. It was a challenge drilling though the frame to accodate for the air regulator fittings for a few reasons. Just didn't seem right to put a nice 3/4 hole in the frame. Plus my cordless drill was having some troubles grabbing all that metal. After an hour I of recharging/drilling/recharging/drilling etc I finally got the hole completed to slip the regulator tubing through the frame. I didn't have a chance to test her out yet. At home with my two kids and the wife left this morning for an all day meeting. Plus it seems likes it's monsoon season outside right now. I got my Kats 11619 3/4' block heater in the mail yesterday. Got it off of ebay for $12 shipped. I plan on installing it just above the heater hose return line but it looks like the heating elements are a bit too long to go there. May need to fabricate some pipe/fittings to stand the block heater from the housing. Plans are to install it where the white arrow is pointing. I know it probably should go on the 3/4" hole below it but it makes me a bit nervous having the heating elements in such close proximity to the water pump fins. I opted for this type of block heater because I don't want to mess around with the 2" freeze plugs.
I'm bracing my truck for this so-called record breaking winter we're suppose to have here in the PNW.

Projects completed:
Air-O-Matic kit
 

Attachments

Last edited:

cranetruck

Moderator
Super Moderator
Steel Soldiers Supporter
10,350
74
48
Location
Meadows of Dan, Virginia
.... You can see the temp reading differences in the pics. You push it in, it's not grounded. You pull on the gauge so the gauge hold down bracket in the back mades contact with the panel, it's grounded.
Why not run a ground wire from all the instrument ground terminals and a dedicated ground wire to a solid ground outside the dash, which is in direct connection with the battery (neg) terminal? That's what I have done for a very reliable instrument cluster. I'll post a picture next time the dash panel is taken out.

Appreciate your posts, nive work on the cooling system overhaul.
 
Top
AdBlock Detected

We get it, advertisements are annoying!

Sure, ad-blocking software does a great job at blocking ads, but it also blocks useful features of our website like our supporting vendors. Their ads help keep Steel Soldiers going. Please consider disabling your ad blockers for the site. Thanks!

I've Disabled AdBlock
No Thanks