• Steel Soldiers now has a few new forums, read more about it at: New Munitions Forums!

  • Microsoft MSN, Live, Hotmail, Outlook email users may not be receiving emails. We are working to resolve this issue. Please add support@steelsoldiers.com to your trusted contacts.


No help needed with M109 Restore..

goldneagle

Well-known member
4,426
855
113
Location
Slidell, LA
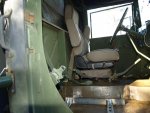
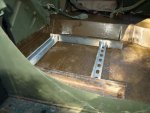
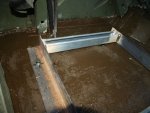
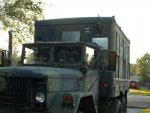
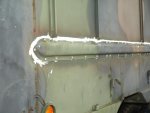
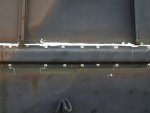
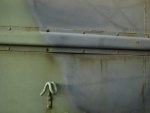
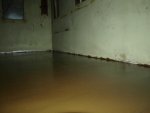
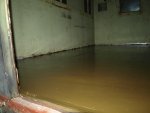
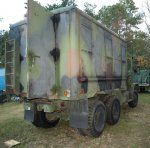
Since I got the floor down I decided to do some patch work on the exterior walls. I wanted to remove some unused items and patch over the openings. First to go was one of the antenna mounts. Had 2 long bolts holding it in. Had 3 holes to caulk over.

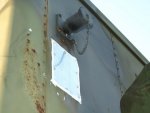
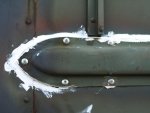
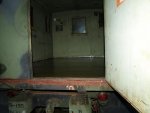
Next I removed one of the exterior plugs that fed the box from a outside power source. It had 4 long bolts and RTV holding it on. This one had 4 bolt holes and a large 2" hole in the center. This one took a 6" x 6" sheet metal patch to cover.

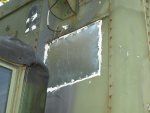
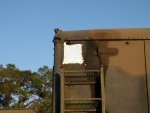
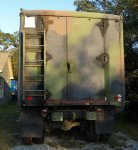
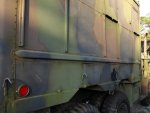
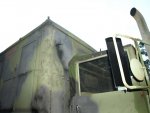
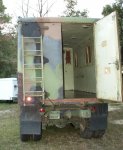
3rd was the 8" x 8" door above the driver side. I have no use for the opening and the door had rust issues. Took it apart and used a 12" x 16" sheet metal patch on the outside. Installed custom cut styrofoam insulation in the hole and cover it with a 12" x 14" sheet metal patch on the inside.

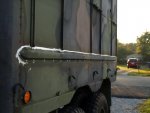
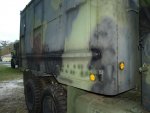
Lats patch was in the back of the box high up on the drivers side. There is a fan mounted on the inside and a flap door on the outside. The flap door was all rusted out! Took the fan housing off and removed the outer shell and flap door. The sheet metal around the opening was rusty. I scraped it out and wire brushed it. Put a coat of Chassis Saver paint on it. Installed a 7" x 8" sheet metal patch on the outside. Filled the void with styrofoam and patched the interior opening with a 7" x 8" sheet metal patch.

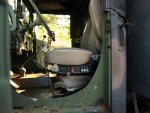
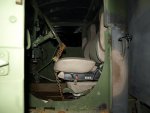
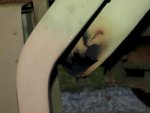
After the patches were done I adjusted the ladder supports so I could store the boarding ladder on the truck.

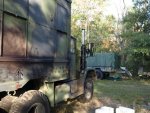
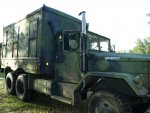
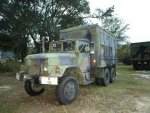
Took the truck out for a joy ride. I visited my mechanic Allen to show him the truck. he and his wife are real MV enthusiast but have not purchased a MV yet. Allen went crazy over the truck! He sent pictures to his wife who was home, sick. She was all bummed that she could not be there to see the truck!. Truck ran really great and lights functioned properly on the way home.

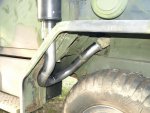
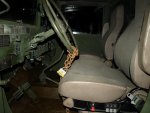
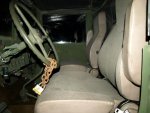
Can't wait until Monday when the J-pipe is scheduled to arrive! I already have a muffler I picked up at NAPA to install as well! Air ride seats are coming next week as well..WOOO HOOO

Pictures coming tomorrow!
 

zout

Well-known member
7,744
154
63
Location
Columbus Georgia
After getting the floor completed it sounds like your having fun buttoning up the little holes and getting the interior cleaned up as well.

So how many times have you looked at that little door in the front left of the box and decide what in the world to do with it rofl.
 

goldneagle

Well-known member
4,426
855
113
Location
Slidell, LA
After getting the floor completed it sounds like your having fun buttoning up the little holes and getting the interior cleaned up as well.

So how many times have you looked at that little door in the front left of the box and decide what in the world to do with it rofl.
I did exactly that! I was contemplating repairing the rusted door and leaving it in. Then I thought about it some more and realized I would have no use for it even in the camper conversion. So I just removed it and patched over the area.

Next project is those side rails this weekend. I may also install some Unistruts on the walls where the heavy angles were attached. i have movable Eyebolts I can use to tie down cargo against the walls. This way I can reuse the bolts already there.
 

goldneagle

Well-known member
4,426
855
113
Location
Slidell, LA
Today's project was to work on the side rails on the box. They had missing rivets and gaps where the sheet metal had pulled away from the rails. I removed the sheet metal screws that were used to temporarily replace the missing rivets. Using an angle grinder i ground off the rivet heads off. I used a punch to knock out the remainder of the rivet and remove the rails. The rails had only some light rust in spots. Same with the sheet metal on the box walls. I scraped and wire brushed the metal pieces as well as the box walls and wiped off the dust.

I primed the inside of the rails as well as the area on the box. Spray painted the inside of the rails and the corresponding areas of the box wall using a rattle can of Rustoleum camo green paint. Once the paint dried I applied a bead of Polyurethane Caulking to the top surface of the rail as well as around the screw holes of the bottom of the rails. I did not apply a continuous bead of caulking on the bottom portion in case water gets into the rail it will drain out instead of being trapped inside and rust out the rails.

I enlarged the existing hole to 1/4" to allow for the installation of MONOBOLTS (super rivets). Using my heavy duty Rivet gun I started to install the MONOBOLTS to re-secure the rails tot the box wall. All went well and I finished the driver's side. Tomorrow I will do the same for the other side. i will take more pictures tomorrow.

I went to Home Depot and picked up paint supplies to paint the Box Floor as well as the wall patches.
 

Attachments

bryan70546

New member
410
1
0
Location
Lake Charles La
No, I bought one on Ebay and it's gonna be here on Monday. Already have the muffler from NAPA so I should have the exhaust system finished Tuesday at the latest.
ok buddy , i have a complete new in box system all i needed was the stack so if you need any parts let me know ok , sorry i did not catch this thread earlier i could of helped you out , did you get rid of your 5ton sir.
 

goldneagle

Well-known member
4,426
855
113
Location
Slidell, LA
ok buddy , i have a complete new in box system all i needed was the stack so if you need any parts let me know ok , sorry i did not catch this thread earlier i could of helped you out , did you get rid of your 5ton sir.
Sold the M820A2 to a fellow member. He will be picking it up early next month. If you need the top stack part I will have 2 of them available after the muffler install.

The muffler I am installing is 30" long -so I have to cut the J-pipe shorter to fit it in. The cut off piece is perfect for attaching to the other side of the muffler and topping it off with a flapper cap to keep the rain out.
 
Last edited:

goldneagle

Well-known member
4,426
855
113
Location
Slidell, LA
Started todays project by removing the other side rail from the passenger side of the box. It was int he same condition as the one I restored yesterday. I refinished it and reinstalled it the same manner as the one I had already installed yesterday.

Once I finished with the rail I primed the first rail and all the new sheet metal patches I had installed. Once the primer was dry I used canned camo paints to blend the new metal to the rest of the truck.

Next I vacuumed the floor inside the box and primed it with really good Glidden Gripper primer. Looks great already! Tomorrow I will apply one coat of Polyurethane Porch Paint tinted to Olive Green.

While I was waiting for the primer to dry i decided to paint the new muffler and flapper cap with Header High heat paint. I could not find it in green so I used the black for now.

What a busy day it was....but I got a lot of detail work done!

Pictures tomorrow!:grd:
 

goldneagle

Well-known member
4,426
855
113
Location
Slidell, LA
Latest update! I painted the box floor with the Polyurethane paint today. Came out nice. Might adjust the color a bit for the 2nd coat. Also touched up the paint on the rail I installed yesterday.

Installed the remote air tank drain valves.

Exhaust J-pipe came late in the day so i will install it tomorrow along with the muffler.
 

Attachments

m109guy

New member
383
27
0
Location
ON
A lot of good work you have done there. Should be good for another 40+ years ;)

Looks like your truck was an old gasser converted to multi-fuel. Probably explains why the engine has so few hours on it and the older drivers box seat.

Good luck fixing her up!
 

goldneagle

Well-known member
4,426
855
113
Location
Slidell, LA
A lot of good work you have done there. Should be good for another 40+ years ;)

Looks like your truck was an old gasser converted to multi-fuel. Probably explains why the engine has so few hours on it and the older drivers box seat.

Good luck fixing her up!
Thank you for the good wishes. i appreciate all the encouragement and support from members.:grd:
 

goldneagle

Well-known member
4,426
855
113
Location
Slidell, LA
As I stated yesterday I worked on the exhaust system today. Took a while to remove the old pipes do to rusty fine threaded bolts. The J-pipe was in worse condition than I thought (see picture).

Once I installed the new J-pipe I cut it about 4" above the opening in the fender. Next I installed the 30" long muffler and attached it to the J-pipe with a stainless steel pipe clamp. Next I took a flat bar and bent it to make a strap to secure the muffler to the same bracket used by the original exhaust pipe. Once I had the muffler secured I cut the flair section from the end of the exhaust pipe I had cut off from the J-pipe. I attached the flapper cap to the end of the pipe piece. Then using a stainless steel pipe clamp I secured the pipe section above the muffler. Last step was to reattach the fender adapter around the pipe.

When I tested the truck it was significantly quieter than it was before the upgrade. Pictures are attached. i will paint it later. I am looking for a green header paint.
 

Attachments

timntrucks

Well-known member
Steel Soldiers Supporter
4,041
116
63
Location
Ponchatoula LA
great job your doing zev.. that is going to be one sweet truck.. and your are :grd: get as much as you can while the weather is nice enough outside to do it.
 

goldneagle

Well-known member
4,426
855
113
Location
Slidell, LA
I was not sure if I should continue this thread due to lack of interest. However I decided to continue for my faithful followers.

My latest update to the truck was installing air ride seats. I bought a matching pair on Ebay for $400 delivered. These were low rider National brand seats.

After removing the existing box and bench seats I started to scrape and sand the floor in the cab. I scraped all the loose paint and some minor rust. Vacuumed the debris off the floor. Primed the floor area with the Glidden Gripper primer. I then painted the floor with the left over paint from the box floor.

I measured and laid out the floor bolt pattern on a piece of plywood. I then placed the seat on top of the plywood and marked some of the mounting holes on the plywood. Once I determined which holes I was going to use i designed an adapter assembly that would raise the height of the seat by 1-3/4" and allow me to reuse the existing mounting holes in the floor. You can see the frame in the pictures attached. All it took was 2 of the 2"x 2" angles and some 14" long Unistrut pieces.

I got the driver's seat installed 2 days ago and installed the passenger seat today.

I used copper 1/4" tubing to feed the seats from the available connection under the passenger side dash. I had some leaking problems with the compression fittings but resolved it.

I also managed to replace the wiper arms and blades. I ordered a set from Erik's Military Surplus. He has good prices and nice quality items.
 

Attachments

zout

Well-known member
7,744
154
63
Location
Columbus Georgia
very nice GE - I have found more keep abreast of what your doing than you realize even if someone does not post - they are watching the progress.

Seats looks great
 

papabear

GA Mafia Imperial 1SG
13,508
2,383
113
Location
Columbus, Georgia
Dang GE!!! That sorta reminds me of an old Ford Motor Company slogan:

"Quality is Job One"!

I'd call that a high quality job Brother!!:)
 
Top
AdBlock Detected

We get it, advertisements are annoying!

Sure, ad-blocking software does a great job at blocking ads, but it also blocks useful features of our website like our supporting vendors. Their ads help keep Steel Soldiers going. Please consider disabling your ad blockers for the site. Thanks!

I've Disabled AdBlock
No Thanks