• Steel Soldiers now has a few new forums, read more about it at: New Munitions Forums!

  • Microsoft MSN, Live, Hotmail, Outlook email users may not be receiving emails. We are working to resolve this issue. Please add support@steelsoldiers.com to your trusted contacts.


What have you done to your 5 ton this week?

tobyS

Well-known member
4,820
815
113
Location
IN
Thanks for the measurement. I wanted to see if there is a standard spline that size. I thought it was the 1.70"-16 tooth so I would have been off.

I've thought of this many times for my trucks. I made a design for a flange and steel air tank cap for the purpose but never carried through. It was a really cheap and light alternative to taking the splines out...permanently. Problem with taking the splines out, is needing 2 spares that may not be easy to come across. It they are, I want a pair.

I'm going to talk to Hub City to see about an inside and outside spline insert. I want to put in or remove the insert key, much like a locking hub, but manual. I expect to have a smooth piece with plain bearing, so the rotation is not direct against the spline, when the key is removed. I take it you don't think you had any rubbing from your heat statement, but I hope you will take it apart to visually confirm the axle spline is not rubbing on the de-splined hub. Does it stay centered, not move around?

Thanks for posting up your info and impressions on how it drives.
 

sandcobra164

Well-known member
2,999
287
83
Location
Leesburg, GA
tobyS, I honestly believe the best way to have a locking / unlocking hub would be to do what I did. Sure, it's a few bolts to undo and replace on each side so it's not quite as easy as the hubs on my M1028 CUCV. Members have made locking hubs in the past and they may be available but I've read those posts and they are way outside of my budget. I passed along contact info for my friend who modified my caps in a message. He's a solid guy and I'm sure he can help you.
 

tobyS

Well-known member
4,820
815
113
Location
IN
tobyS, I honestly believe the best way to have a locking / unlocking hub would be to do what I did. Sure, it's a few bolts to undo and replace on each side so it's not quite as easy as the hubs on my M1028 CUCV. Members have made locking hubs in the past and they may be available but I've read those posts and they are way outside of my budget. I passed along contact info for my friend who modified my caps in a message. He's a solid guy and I'm sure he can help you.
Thanks sandcobra. I'll give him a shout.

Yes, the simplicity of doing it with the entire hub is obvious and like you said, you packed it with grease and have a well thought out "fit" for the (not rotating) axle shaft into the rotating hub. When you have some more miles it would be nice to confirm that you are not getting rubbing and wear on the spline.

I'm wondering if a simple dish would have to have a thrust bearing of some type to keep the axle spline shaft from migrating out. I have a lot of research into the joints and bearings in the axles to do, I guess.
 

simp5782

Feo, Fuerte y Formal
Supporting Vendor
12,095
9,256
113
Location
Mason, TN
Ran about 9000 miles in 14 days actually. Far north of Indiana/Pennsylvania and as far south as Cape Canaveral and san Antonio Had a shifter go bad on the CAT 7155 so i replaced it while on the road. Got home this morning and replaced two leaking service brake diaphragms and a stuck wedge and broken wedge spring. Went ahead and bought Euclid # 7214A which is the brake shoe spring/wedge/seal kit. Changed my oil filter and replaced a wiper blade. She is about to get a bath for a few hours with the sprinkler running underneath her to get rid of all the road chemicals i obtained thru the snow up north.

I ordered new brake shoes and spring kits to do the whole truck. So probably Wednesday I will try to get all my rear shoes replaced. and wedges cleaned and greased up. She just crossed over 107,000 miles since I bought her in September 2015 right off the lot at Ft Riley in new condition. This is GPS verified miles.

Also replaced a set of brake shoes on my M322 trailer this morning.
 
Last edited:

41dodge

New member
4
0
1
Location
Yakima, WA
Work this week.

Finally got my1969 AM General M 817 up and running. Had to replace all the fuel hoses now I'm working on fabricating a new exhaust from the muffler to above the cab out of polished stainless steel. (I'll probably paint it flat black. Saturday I take it to the State Patrol to get it inspected so I can license it.
 
Last edited:

simp5782

Feo, Fuerte y Formal
Supporting Vendor
12,095
9,256
113
Location
Mason, TN
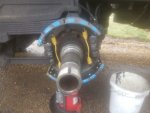
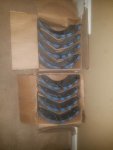
Swapped all the rear brakes out, pulled the adjusters apart and installed new seals and what not where needed. Added grease to the wedges. Took me about 5 hours today. Had one wheel that just everything fought me. Had a broken spring, then it had a stuck adjuster then a seized sleeve in the adjuster. Just a mess. Should be squared away now. I am going to have the old shoes relined for about $20 each so I can replace the front shoes later on and then I will have a spare axle set. Should be good to go. I know not many folks ever replace their shoes as they are hard to wear out. I went ahead and got it out of the way. It was a good price on the shoes at $250 shipped for 4 sets.

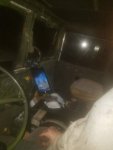
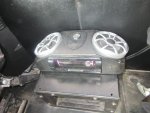
Installed a tablet mount so some of my billing and other crap is easier and my tablet isn't just flopping around the cab. Not as tall as I wanted it to be for me to mount it in another location but the old shifter tower bolts worked well.

Went ahead and ran the grease gun on everything as she has a little trip to run this weekend. She had been neglected as she hasn't seen a grease gun since the beginning of January.
 

Attachments

Jbulach

Well-known member
Steel Soldiers Supporter
2,587
2,041
113
Location
Sunman Indiana
Looks like the pad in the picture had about 30% remaining, where they all about the same and fairly even? I’ve been abusing mine pretty bad lately hauling stone, I need to look into how to get the front brakes proportioned up to take more load.
 

simp5782

Feo, Fuerte y Formal
Supporting Vendor
12,095
9,256
113
Location
Mason, TN
Looks like the pad in the picture had about 30% remaining, where they all about the same and fairly even? I’ve been abusing mine pretty bad lately hauling stone, I need to look into how to get the front brakes proportioned up to take more load.
Pretty much. I had one that had a frozen adjuster and a broken/melted spring. It also broke the clamp that held the upper shoe in place. It was pretty banged up but not much wear on that one. I used the scotch pad and die grinder on the drums to non scuff em up a bit to help with the burn in. I put about 30miles on it. brakes work good. Just trying to get the adjusters set as the spring brakes aren't grabbing fully yet when the parking brake is applied. Will take a few more hard pressure stops to get them to adjust out to the right spot.
 

Ford Mechanic

Active member
1,805
6
38
Location
Edenton, NC
Pretty much. I had one that had a frozen adjuster and a broken/melted spring. It also broke the clamp that held the upper shoe in place. It was pretty banged up but not much wear on that one. I used the scotch pad and die grinder on the drums to non scuff em up a bit to help with the burn in. I put about 30miles on it. brakes work good. Just trying to get the adjusters set as the spring brakes aren't grabbing fully yet when the parking brake is applied. Will take a few more hard pressure stops to get them to adjust out to the right spot.
Hey which I pad stand did you buy, and is it holding up running down the road?

Sent from my SM-G900V using Tapatalk
 

simp5782

Feo, Fuerte y Formal
Supporting Vendor
12,095
9,256
113
Location
Mason, TN
Elaborate please, I only have experience with the s-cam brakes

Sent from my SM-G900V using Tapatalk
He was joking, he has no clue.

Remove your rear covers off the drums. Chock your wheels. Run the truck. Release your emergency brake. This will allow the wedges to be released. You can stick a large screw driver in and pry up on your UPPER shoe first. You can use a chisel to knock the adjuster COUNTER clockwise to put more tension on the shoe. That is if you can lock your screw driver up somewhere to hold the shoe I would not go more than 2 turns though. Then do your lower shoe.

The adjusters should auto tension. Otherwise you have a stuck wedge or a broken wedge spring. The spring is common as it gets pretty rusty.
 

US6x4

Well-known member
Steel Soldiers Supporter
1,181
2,064
113
Location
Wenatchee, WA
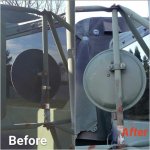
I replaced the sketchy crap spot mirror that came on my truck with a legit military version. Looks much better and has good symmetry...
2018-03-03 19.05.36.jpg
Not sure why I'm concerned with symmetry on a truck with a giant air cleaner on one fender. Maybe my CDO is acting up...
 

74M35A2

Well-known member
4,145
312
83
Location
Livonia, MI
He was joking, he has no clue.

Remove your rear covers off the drums. Chock your wheels. Run the truck. Release your emergency brake. This will allow the wedges to be released. You can stick a large screw driver in and pry up on your UPPER shoe first. You can use a chisel to knock the adjuster COUNTER clockwise to put more tension on the shoe. That is if you can lock your screw driver up somewhere to hold the shoe I would not go more than 2 turns though. Then do your lower shoe.

The adjusters should auto tension. Otherwise you have a stuck wedge or a broken wedge spring. The spring is common as it gets pretty rusty.
You’re using chisels again...
 
Top
AdBlock Detected

We get it, advertisements are annoying!

Sure, ad-blocking software does a great job at blocking ads, but it also blocks useful features of our website like our supporting vendors. Their ads help keep Steel Soldiers going. Please consider disabling your ad blockers for the site. Thanks!

I've Disabled AdBlock
No Thanks