• Steel Soldiers now has a few new forums, read more about it at: New Munitions Forums!

  • Microsoft MSN, Live, Hotmail, Outlook email users may not be receiving emails. We are working to resolve this issue. Please add support@steelsoldiers.com to your trusted contacts.


Bed Liner and Primer Reaction Fail. How to Fix?

UPFINN

Member
229
1
18
Location
Ishpeming Michigan
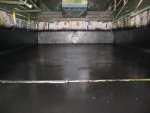
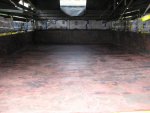
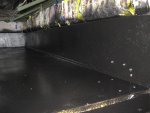
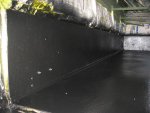
Had a major liner and primer reaction screw up yesterday while bed lining my deuce.

I sprayed rusty metal primer on the bed a few weeks ago after roughing up the paint and rust, like I did with the rest of the truck and had great results with oil enamel paint. I did not sand between the two coats of primer, as it is pretty rough, although when I thinned it more it became shiny and smooth, but you could still see a lot of "pores" in it. I don't know if the primer was supposed to be shiny or dull but I never had adhesion issues with oil enamel over the shiny primer.

Yesterday I sprayed rustoleum truck bed coating in the back. It was cheap and resists scratches better than plain oil enamel. I called customer service prior to this project and they told me putting the liner over the primer would work fine.

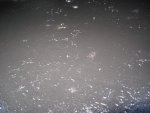
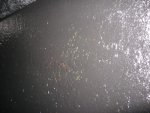
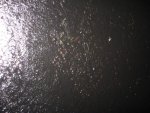
The truck bed coating had a severe reaction with the primer. It began to bubble right after I got done spraying the bed. A had to thin it with acetone to spray and figured that might have done it, but even un-thinned liner bubbles. It bubbles up taking a layer of primer with it. Some areas did not bubble, but the primer was compromised and I could scratch down to the carc.

I sanded the primer and tested, figuring something was wrong with the surface. The bubbling occurred, but seemed less severe.

I sanded right down through the primer into the carc and rust patina, and the liner stuck to that great.

I scraped out the liner as best as I could, and now I am debating if I should attempt to re-coat after sanding the primer, or use a chemical paint stripper to take off the liner and primer and just spray the liner over the carc. I could also prime again, spray the oil enamel, wait a year, and do the liner then after it is cured?

I have been reading about the rusty metal primer and it has mixed results with a liner top coat. A lot of users say it works great for top coating with bed liner, but they waited a few months. Others have problems like me. Since it is technically an oil enamel primer, and it takes months to cure, is it having a reaction with the solvents in the liner? I don't understand. The oil enamel paint I used had xylene in it and it did not bubble the primer even after spraying a day after priming.

If I chemically strip the bed, I might be left with clean metal and rust. What is the best cheap primer I could use for rusty metal that dries fast and could be lined after 24 hours?

I am glad I discovered this Reaction. I was going to prime the cab, then spray over the primer with ceramic sound/heat paint followed by higher quality urethane Al's Liner. I would have wasted $400. I think I might just put the Al's Liner and ceramic paint right over the old carc. There is little rust.

If anyone suggests sandblasting. That will not work. Local shop won't do it and others would cost a fortune. They won't work with carc removal.

12075022_1041310625908759_1392685075732660134_n.jpg12065791_1041310605908761_990518430756222113_n.jpg1472912_1041310615908760_6128179451975220305_n.jpg
 

theeDIZ

New member
Steel Soldiers Supporter
1,010
4
0
Location
Annapolis MD
I used the rust oleum spray can to touch up spots on my shop van roof within a week used herculiner bed coating on top of it , had no adhesion problems.
 

treva2

Member
Steel Soldiers Supporter
53
1
6
Location
ohio
I recently retired from PPG Industries where I worked for 28 years in our Automotive Coatings lab. My entire career involved product development and customer service. Without knowing exactly how you mixed and applied the paint I can only guess at possible causes. First, the glossy finish is usually caused by over reducing the paint system or applying heavy wet coats. The component that causes most paint to look flat or dull is talc. When the paint system is over reduced, this allows the talc to "settle" to the bottom of the wet film and thus show a glossy appearance. Although paint film is very thin, it does have thickness that can be measured. It does have a top, a bottom and a middle. This same thing happens when applying metallic basecoat, even if they are not over reduced the aluminum in the metallic basecoat settles just like the talc. Since the aluminum is lighter in color than almost all the pigments that are used in paints, the color will be darker than desired. The opposite happens when a metallic basecoat is sprayed dry. The aluminum sits on top and the color is lighter than desired.

Now, the bedliner issue. My experience with Rustoleum and other non-catalyzed enamels and polyurethanes may feel dry to the touch in 24 hours. They may actually take 30 days to dry thoroughly – even longer with cooler temperatures. I believe the solvent in the bedliner softened the Rustoleum that was not thoroughly dried. If this was an automotive basecoat/clearcoat system with the lifting issue seen in your bedliner, the proper procedure would be to strip it entirely and start over. They may seem like a great deal of unnecessary labor, but it prevents having to redo it a third time. For our trucks, I believe a reasonable solution, would be to let it dry thoroughly for one to two months depending on the temperature in your area. Here is Cleveland, Ohio, nighttime temperatures are now in the 50s and creeping into the 40s. Paint doesn’t dry at all at 40 degrees. The longer you can wait the better. After that, I would scuff the affected areas to similar texture of the surrounding area, prime it again, wait until it is completely dry and reapply the bedliner.

Nowadays there are so many different coatings available. It is best to buy all the coatings for a project from the same manufacturer. They all have technical phone lines available and they will know the best way to layer different coatings to get a superior finish. I think this should solve most of your problems.
 
Last edited:

UPFINN

Member
229
1
18
Location
Ishpeming Michigan
I think I may have found the problem.

I used the professional rusty metal primer. There is a separate automotive rusty metal primer in a rattle can.

Here is what I found.

From Left to Right: Resin Type, Carrier Solvent, Thinning Solvent, Cleanup Solvent, Category

Products marked in red reacted with each other.

Truck Bed Coating I used: Alkyd Modified Acrylic, Aromatic Hydrocarbons and Glycol Ether, Not Recommended, Acetone, Automotive
sku: 248915

Rusty Metal Primer I used
"High Performance Metal : Modified Alkyd, Aliphatic hydrocarbons, Acetone, Mineral Spirits, Professional
Primer"
sku: 7769402
(This primer works great with Sherwin Williams All Surface Enamel, thinned with xylene)


Automotive Rusty Metal : Modified Alkyd, Acetone and Aromatic Hydrocarbons, N/A, Xylene or Min Spirit, Automotive
Primer Spray
sku: 249330

Automotive Rust : Oil Modified Alkyd , (Acetone, Mineral Spirits, N-Butyl Acetate, Xylene), N/A, Xylene or Min Spirit, Automotive
Reformer Spray
sku: 248658

Rusty Metal Primer : Oil Modified Alkyd, Mineral Spirits, Mineral Spirits, Mineral Spirits, Stops Rust
Stops Rust
sku: 776730

Rusty Metal Primer : Modified Alkyd, (Acetone, Toluene, Xylene), N/A, Xylene or Min Spirits, Stops Rust
Spray Stops Rust
sku: 7769830
 
Last edited:

UPFINN

Member
229
1
18
Location
Ishpeming Michigan
I recently retired from PPG Industries where I worked for 28 years in our Automotive Coatings lab. My entire career involved product development and customer service. Without knowing exactly how you mixed and applied the paint I can only guess at possible causes. First, the glossy finish is usually caused by over reducing the paint system or applying heavy wet coats. The component that causes most paint to look flat or dull is talc. When the paint system is over reduced, this allows the talc to "settle" to the bottom of the wet film and thus show a glossy appearance. Although paint film is very thin, it does have thickness that can be measured. It does have a top, a bottom and a middle. This same thing happens when applying metallic basecoat, even if they are not over reduced the aluminum in the metallic basecoat settles just like the talc. Since the aluminum is lighter in color than almost all the pigments that are used in paints, the color will be darker than desired. The opposite happens when a metallic basecoat is sprayed dry. The aluminum sits on top and the color is lighter than desired.

Now, the bedliner issue. My experience with Rustoleum and other non-catalyzed enamels and polyurethanes may feel dry to the touch in 24 hours. They may actually take 30 days to dry thoroughly – even longer with cooler temperatures. I believe the solvent in the bedliner softened the Rustoleum that was not thoroughly dried. If this was an automotive basecoat/clearcoat system with the lifting issue seen in your bedliner, the proper procedure would be to strip it entirely and start over. They may seem like a great deal of unnecessary labor, but it prevents having to redo it a third time. For our trucks, I believe a reasonable solution, would be to let it dry thoroughly for one to two months depending on the temperature in your area. Here is Cleveland, Ohio, nighttime temperatures are now in the 50s and creeping into the 40s. Paint doesn’t dry at all at 40 degrees. The longer you can wait the better. After that, I would scuff the affected areas to similar texture of the surrounding area, prime it again, wait until it is completely dry and reapply the bedliner.

Nowadays there are so many different coatings available. It is best to buy all the coatings for a project from the same manufacturer. They all have technical phone lines available and they will know the best way to layer different coatings to get a superior finish. I think this should solve most of your problems.
Very good info!

Aircraft paint stripper is quickly taking the bed liner right off along with the damaged primer. It is leaving behind the CARC and any rusty metal primer that is stuck to rust.

I have a few important questions:

1) After cleaning off the paint stripper and damaged liner/primer, can I paint over any primer and carc left behind?
2) If I paint over the primer and carc, should I still wait a few months like you said? I'm wondering if the stripper will re-soften the paint for awhile.
3) In the cab, should I not put primer down and just put the liner over the old carc (it is in relatively good condition)?
4) There are a few rust spots in the cab. Should I grind them down to metal and use self etching primer or spot treat with rust reformer?

I wanted to finish my bed before I haul firewood. If I could strip the icky stuff off and re line right away (few days) that would be awesome.
 

UPFINN

Member
229
1
18
Location
Ishpeming Michigan
I did a quick test. On the surface that I had just used paint stripper a few hours ago, I roughed it up and cleaned with acetone. I let it dry and put a bit of liner on it. So far there is no bubbling. I have a heat lamp on it to keep it warm and dry.
 

rustystud

Well-known member
9,071
2,388
113
Location
Woodinville, Washington
I have also had this issue with Rustoleum primers. There is a difference between the rusty metal primer and the Professional primer. Basically you will need to let it set longer to dry just like Treva2 said. Even using all rustoleum products I have had this bubbling problem if I tried to repaint too soon. I now paint in a sealed room with a temperature of 70 degrees. Then I let it stay for a week before repainting.
 

UPFINN

Member
229
1
18
Location
Ishpeming Michigan
I was outside to put the dog out and decided to take another look.

More liner is bubbling in spots that were good earlier.

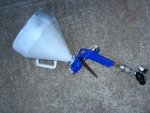
However, the area I used paint stripper and sanded, the liner is drying very well. :naner: It is some pretty tough stuff. Not the best, but better than paint. The paint stripper only took off the peeling stuff, but there still is a thin layer of rusty metal primer and carc left behind. This thin layer is very difficult to scratch or sand. It is almost like the pores and rust in the metal absorbed it. Since this test was successful, tomorrow (today) I will strip the bed down and sand it, then reapply the liner (after a small test area of course). I might roll it on or use a hopper gun. The schutz gun clogs.
 

UPFINN

Member
229
1
18
Location
Ishpeming Michigan
Will this surface be safe to put the liner on after it dries and I rough it up? Paint stripper took liner off and patches of primer. Old carc is showing.
IMG_20150928_230452356.jpg
 

UPFINN

Member
229
1
18
Location
Ishpeming Michigan
I think I found the problem. I talked with customer service and it sounds like I thinned the primer too much. It should not be glossy. I did two coats of primer and maybe they did not adhere to each other properly. I also thinned the liner with acetone, which was not a good idea. The acetone lifted the poorly adhered primer, and softened the rest.


They told me I would need to put a thin layer of paint stripper on to remove the poorly adhered liner and primer, then clean with water and acetone, followed by sanding, then clean with fast drying paint prep, and after a day or two I can roll on the liner. Today I did the stripping. Tomorrow will be sanding and cleaning.


This liner actually has rust inhibitors in it, so they recommended to avoid the primer if possible, and roll it right over the old paint and rust. The primer is meant for oil enamel.


If I use it under latex sound deadener or urethane liner, they said I should only spot prime the rust spots and give enough time to dry.
 

UPFINN

Member
229
1
18
Location
Ishpeming Michigan
Liner attempt #2. Much better than before, but not great. Should be ok for use after a few touch ups.

Over the last week I stripped off the peeling liner and primer, then cleaned, sanded, and cleaned again. This afternoon I used a hopper/texture gun to shoot the liner.

I have never used a texture gun before, and there are many variables that affect the texture. The air pressure, trigger pull, and distance. Since I was practicing some areas came out really smooth and others bumpy enough where I could still see primer and paint between some of the bumps. It almost looks like bubbling, but I do not think it is. I will get a better look tomorrow when I can walk on it. I will have to go back over the bumpy areas when it dries and touch those areas up. Rolling would probably give you a smoother texture, however the gun was fast and I needed practice before spraying urethane and latex sound deadener in the cab.

I really did not notice any peeling/bubbling immediately like the last time, but as it is drying there are a few penny to quarter size spots. Very few on the floor, but several on the sidewalls. The worse area is the tailgate and the bed near the tailgate. That is where I stopped spraying the liner last time and didn't strip it as good.

I noticed by spraying instead of rolling or brushing, you get a thicker coat that dries much slower. I do not know if that is contributing to the problem with a thicker coat holding solvents to the primer and dissolving it. Most roll and bed liners state they can also be sprayed, with a recommended minimum thickness of 31mils (1/32), while using a roller would require multiple passes to get 31mils.

My plan is to wait until the liner is cured in 24 hours, then chip off the bubbled areas, sand, and spot touch them up with the rattle can liner or a brush. I figure that hauling cargo will damage any weak areas and I can just keep recoating as needed :hammer:.

One observation I made with the bubbling is that once is happens, it appears it sinks down and the primer and liner chemically fused. On the cardboard sheet where I mix paint, I had spilled primer over fresh alkyd enamel, then bed liner on the primer. It bubbled horribly, then fused into a solid mass. Strong but messy.

IMG_0273.jpgIMG_0267.jpgIMG_0274.jpgIMG_0275.jpgIMG_0278.jpgIMG_0279.jpgIMG_0280.jpgIMG_0281.jpgIMG_0286.jpg
 
Top
AdBlock Detected

We get it, advertisements are annoying!

Sure, ad-blocking software does a great job at blocking ads, but it also blocks useful features of our website like our supporting vendors. Their ads help keep Steel Soldiers going. Please consider disabling your ad blockers for the site. Thanks!

I've Disabled AdBlock
No Thanks