• Steel Soldiers now has a few new forums, read more about it at: New Munitions Forums!

  • Microsoft MSN, Live, Hotmail, Outlook email users may not be receiving emails. We are working to resolve this issue. Please add support@steelsoldiers.com to your trusted contacts.


M35A2 Aftermarket Radiator Install Thread

jake20

Well-known member
431
839
93
Location
Illinois
Hey all,

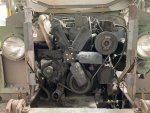
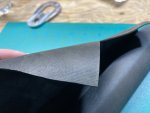
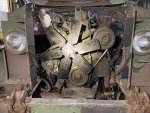
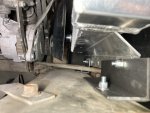
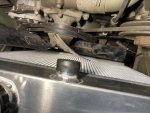
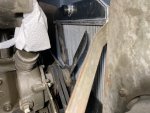
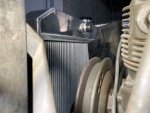
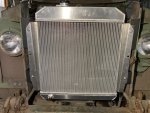
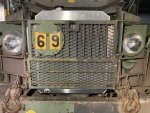
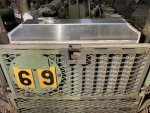
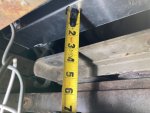
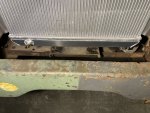
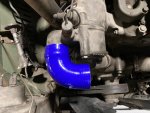
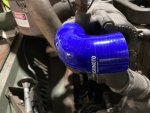
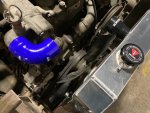
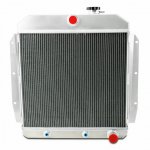
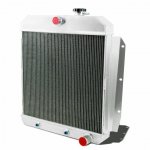
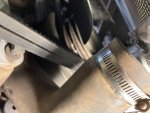
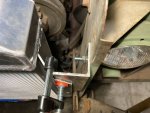
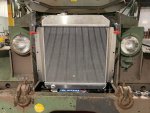
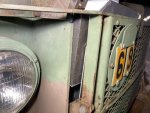
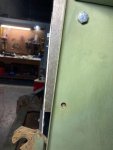
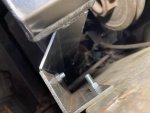
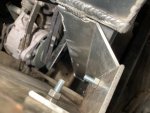
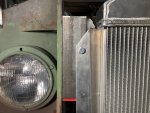
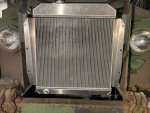
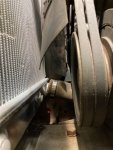
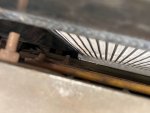
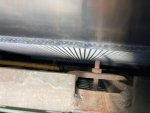
Haven't posted much regarding the deuce in a while, figured I'd make a small tangent thread regarding aftermarket radiators. My truck's radiator finally bit the dust and is cracked in several spots, not worth repairing in my opinion. I've seen that people are using 1955 Chevy truck radiators as a suitable replacement, with only minor fabrication work required. The specific radiator I got is a 4 row, with the only major factor being the position on the top side hose fitting. It's located in the center, as opposed to the side like on the original radiator.

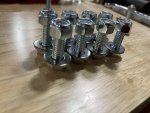
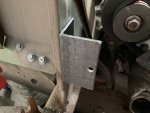
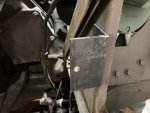
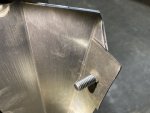
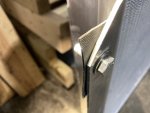
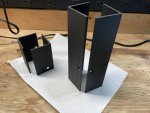
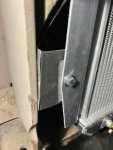
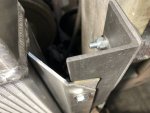
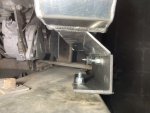
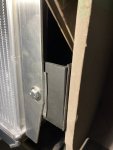
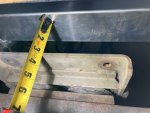
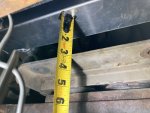
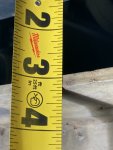
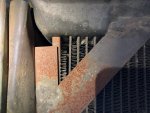
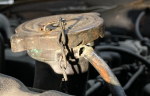
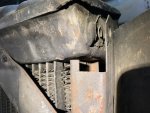
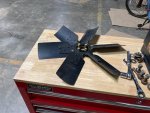
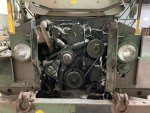
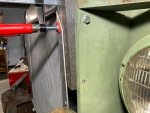
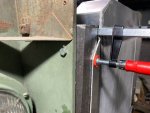
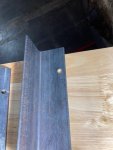
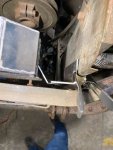
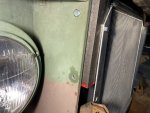
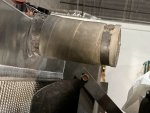
I've attached some pics of my old radiator and the current state of the truck, will show photos as I progress through doing some basic fabrication and getting it all mounted up. Should be some angle iron cutting / drilling at most I think.
 

Attachments

jake20

Well-known member
431
839
93
Location
Illinois
Alright peoples of the forums, finally got around to making some progress on this, did it in a few stages.

First off - parts (short list for now):

- Stainless steel 5/16-18 bolts
- 2x2" angle iron, 1/8" thickness
- The radiator itself
- An assortment of clamps to play with fitment
- Metal cutting jigsaw blade
- Carbide drill bits

Alright so off to the fun, I place the radiator on the old bottom bracket to get a general idea of where I need to put it. It needs to be pretty high up off the original bottom mount.

The rubber flap things that sat in between the headlight/fender piece and old radiator were ripped out, and conveniently, there were plenty of rivets there that held them in place. I drilled out a few of the rivets along the upper part, they were quite literally perfectly placed for where I needed to mount my angle iron brackets.

So next I cut the angle iron to a length that would allow it to be supported by 2 of the old rivet holes, and proceeded to play with clamps, measurements, and fitting for the next while. This specific radiator has a slight angle to the side mount brackets, so my brackets have to match the angle in order to have the radiator perfectly straight up and down. Once I was happy with where they were clamped, I drilled the holes and bolted the pieces in with a single bolt, this would allow them to pivot for me to further play with fitting the radiator

Last step of today was clamping the radiator to the pieces, the main thing I had to worry about was making sure the fan was dead center between the inlet/outlet fittings, it's a fairly close fit. Once happy with the centering, I drilled holes in my previous piece and mounted the radiator on 2 bolts from now.

That's all for today, enjoy the pictures worth a billion words lol
 

Attachments

jake20

Well-known member
431
839
93
Location
Illinois
This seems to be a reasonably easy project for almost any skill level. Thanks for sharing. I know with the cost and lack of reliability with oem radiators if I ever need to replace mine it will be with one of these.
Indeed! The original is bulky, blocks a lot of access to the front of the engine, and is prone to cracks along the top reservoir seam and the sides :( 
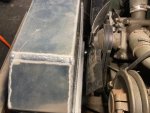
I also wasn’t about to spend $1600+ on a used original one lol

Just finished the bottom brackets, now prepping them for paint and getting the hardware ready. New hoses should be in next week, I’ll detail exactly what I bought and what worked when I get to that point.
 

Attachments

jake20

Well-known member
431
839
93
Location
Illinois
Finalized the mounting of the radiator itself, so now I’m just waiting on the hoses to arrive. Used little strips of rubber I cut out to size to act as somewhat of dampeners as well.
 

Attachments

Hummer Guy

Well-known member
763
701
93
Location
United States Louisiana
Hopefully this is somewhat helpful in that case, feel free to ask if you have any questions heh
Okay, got a few questions, what size hose are you going with? The fitting on the GMC radiator seems to be a bit smaller, are you still going with the 2inch hose and just going to tighten the clamps? Also, how many inches does the radiator sit above the bottom mount? Those are the 2inch L brakcets you used to support the radiator or is those bigger?
 

jake20

Well-known member
431
839
93
Location
Illinois
Yep so I’m not 100% sure the hoses will line up perfectly yet, but here’s what’s coming Monday hopefully:

- 2” 90 degree elbow
- 1.5” 90 degree elbow
- 2 to 1.5” 4” long reducer
- 2” billet coupler
- 1.5” billet coupler

The deuce has 2” fittings on top and bottom: The new radiator has a 1.5” fitting on top, and a 1.75” fitting on bottom

My plan is to clamp the bottom as-is and hopefully the original 2” hose is able to seal to the 1.75” fitting.

The top requires an S shaped bend from the thermostat housing to the center of the radiator, so I’ll be adapting it from 2 to 1.5” using the above mentioned fittings.

The L shaped angle iron is 2” on both sides, I just cut it using a jigsaw to make 4 appropriate sized brackets. The radiator is only supported using those 4 brackets seen in my pics. The original bottom support bracket is 2-15/16” from the the bottom of the new radiator. Good amount of space down there now to access things.
 

Attachments

davidb56

Well-known member
1,020
1,237
113
Location
Bonners Ferry Idaho
Yep so I’m not 100% sure the hoses will line up perfectly yet, but here’s what’s coming Monday hopefully:

- 2” 90 degree elbow
- 1.5” 90 degree elbow
- 2 to 1.5” 4” long reducer
- 2” billet coupler
- 1.5” billet coupler

The deuce has 2” fittings on top and bottom: The new radiator has a 1.5” fitting on top, and a 1.75” fitting on bottom

My plan is to clamp the bottom as-is and hopefully the original 2” hose is able to seal to the 1.75” fitting.

The top requires an S shaped bend from the thermostat housing to the center of the radiator, so I’ll be adapting it from 2 to 1.5” using the above mentioned fittings.

The L shaped angle iron is 2” on both sides, I just cut it using a jigsaw to make 4 appropriate sized brackets. The radiator is only supported using those 4 brackets seen in my pics. The original bottom support bracket is 2-15/16” from the the bottom of the new radiator. Good amount of space down there now to access things.
I bought hose sleeves from Carquest for another project. I think they come in 1/4 in and 1/2 in increments.
 

Hummer Guy

Well-known member
763
701
93
Location
United States Louisiana
Some of the hoses came in today, I've got a better idea of how it'll all come together now. Will need a little longer section of 1.5" hose it seems like, will document once it's all in.

I must say, neon blue in a deuce is quite the sight.
The elbow you had was too short? I kind of connected things together and notice the two elbows I had seem pretty short to fit, but I haven't mounted my radiator just yet
 
Top
AdBlock Detected

We get it, advertisements are annoying!

Sure, ad-blocking software does a great job at blocking ads, but it also blocks useful features of our website like our supporting vendors. Their ads help keep Steel Soldiers going. Please consider disabling your ad blockers for the site. Thanks!

I've Disabled AdBlock
No Thanks