Inaugural trip! A small trip down the road to test out all the systems, not some epic overland adventure...yet.
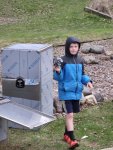
Overall it went very well. The boys found a random girl and played with her for hours so that was all they needed to be happy. Beds are a little firm so putting some memory foam toppers on them for next time. Shower worked awesome, all 4 showered and total gray water volume used was 12-13 gallons (all uses for the day). Really glad I went with the 1/4" ID supply lines as the shower heats up within a few seconds - very little water waste.
Used the cartridge toilet for just pee this time, so not a full test with that thing but was about 1/3 full (it's 4 or 5 gallon capacity) - there may have been some beer drinking so that helped fill it faster.
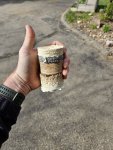
Fresh water tank we used about 1/2 (about 24 gallon capacity). I think quite a bit was used rinsing all the dishes - probably some room for improvement there. Currently filling it using Scepter cans with a siphon hose - works great.
https://jagmte.com/collections/scepter-mwc-accessories/products/water-dispensing-siphon-kit
Temps were mild - average of 70 so not a ton of power went to heating/cooling. TV had a fair amount of use, along with microwave. Wife used a heating blanket for a while. No solar to speak of with overcast/overnight dark/rain. Battery went from 100% to 70.8% going from 3pm to 10am. by far biggest drain was the water heater for the 4 showers.
Things on the list to work on:
1. Paint the Eco hubs
2. Plumb and wire the Webasto hydronic heater
3. Add external water supply?
4. Secure solar cables on roof
5. Add solar panel guards from branches
6. Awning for rear door?
7. Add a fan to pass through door to be able to cool/warm cab to avoid having to install Red-Dot A/C system, also just to provide path of fresh air in habitat
8. Install 370hp ECM
9. Replace fuel supply, return, vent lines
10. Install more shelving for storage
11. Get a microwave/toaster/oven combo
12. Replace boots on torque rods, alignment rods.
13. Change transmission fluid to ATF
14. Change out 2014 date code tires to newer.
15. Install correct taillight assemblies (not sure why it came with these strange custom ones).
16. Add a bike rack to the front for at least 3 bikes.
17. Design 2" hitch that keeps the pintle for the rear. This is A1R and I want to use hitch with it being extended.
18. Add blackout curtain to sliding door.
19. Add towel racks
20. Add holder for sink sponge/soap etc.
21. Add duckbill drains to storage boxes
22. Install A1 kick panel for diagnostic port (fianlly found one!)
23. Lubricate door locking assemblies, get keys made.
24. Install CTIS assembly on spare tire
25. Install seat with headrest for wife.
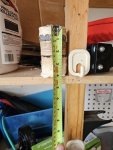
26. Cut hole above fresh water tank to make filling easier. (so jerry cans can sit on the wood and drain into the tank).
27.Weatherproof and add siding to sliding door.
Any other suggestions?
View attachment 924908View attachment 924902View attachment 924903View attachment 924904
View attachment 924906View attachment 924909View attachment 924910
View attachment 924911


 $6500 of batteries sitting there. Your truck will soon be worth 100k
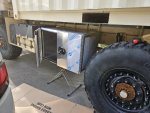


.jpg")


") had a dinner pizza party with the family! After 3 hours of TV, AC, getting Spotted Cow from the fridge, battery was 99.3%. really curious how it will do in winter but summer is no problem for the electrical and solar.
had a dinner pizza party with the family! After 3 hours of TV, AC, getting Spotted Cow from the fridge, battery was 99.3%. really curious how it will do in winter but summer is no problem for the electrical and solar. 


