• Steel Soldiers now has a few new forums, read more about it at: New Munitions Forums!

  • Microsoft MSN, Live, Hotmail, Outlook email users may not be receiving emails. We are working to resolve this issue. Please add support@steelsoldiers.com to your trusted contacts.


923 A2 CTIS Rear Axle Seal Replacement

harleyboy1

Member
51
0
6
Location
Lake City, Fl.
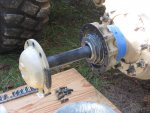
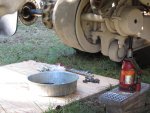
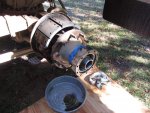
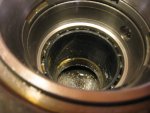
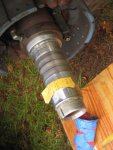
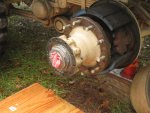
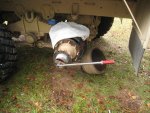
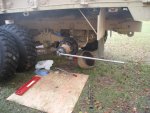
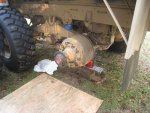
063.jpg065.jpg066.jpg067.jpgMy Pictures 002.jpgMy Pictures 003.jpgI been trying to get my CTIS working on my new toy with the help of many of you guys. I found axle oil dripping on the left rear back wheel. The air valve had popped loose from the nipple that screws into the hub. Took the nipple out,stuck my finger in the hub hole and could feel a seal just floating around. So after much reading on this great site, I decided to make the plunge and repair it myself. Of course the truck would not fit in my shop so I had to set up shop in my side yard. I did not have a axle nut socket 4 3/8 for outside nut or a 4 7/8 for inside nut. I used a brass drift punch to get the nuts off no damage to nuts at all. I used a wonder bar to pop the brake drum loose from hub and did the same for the hub. I found the center seal part number 357974TAO floating around not in its place. Upon inspection i found no damage or anything that looked unusual to me. Things looked like the truck really had only 9000 miles like the odometer says. Please take a look at the pictures and all comments are welcome..... To be continued...Thanks again, Art
 

harleyboy1

Member
51
0
6
Location
Lake City, Fl.
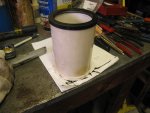
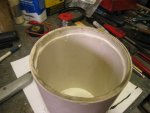
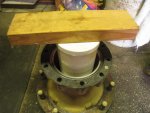
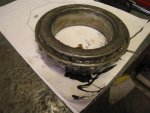
Here's what I got done this weekend. Made a seal driver out of sch.40 pvc pipe you have to cut down the inside where you give clearance to the inter seal lip. The driver works for both CTIS seals. The center seal you just drive till it's seated against the hub sholder. On the outer CTIS seal you have to be very precise because there is no hub sholder to drive seal against just the hub finished surface. I drove the seal even with the lower sholder cut where the split ring fits, this takes some measuring to keep the seal square and a little time. Then install the split ring in the grove. I lightly sanded the three seal mating services with 320 sand paper to be on the safe side. I cleaned everything up, greased the seal lips,axle housing and hand packed the out side bearing. Not sure how good this bearing needs packing because it a wet bearing. Now I'm waiting for my socket to come it from e-bay. Comments5 Ton 001.jpg5 Ton 002.jpg5 Ton 003.jpg5 Ton 004.jpg5 Ton 005.jpgMy Pictures 001.jpgMy Pictures 002.jpg welcome.......
 

RustyM923

Member
332
7
18
Location
California
Great write up!

Was your inner bearing grease packed and your outer oil bathed?

Do you know if the separating (black plastic) sleeve will allow oil to bath the inner bearing?
 

RustyM923

Member
332
7
18
Location
California
Would anyone happen to know if NAPA has axle flange paper gaskets for the rear 923 A2 and yes it would be nice to have part number. Thanks.......
I don't know the part #, but it's the same one used for the M809/M813 trucks. they run about $2 to $4 on ebay.

Gear oil should be 80/90wt (75/90 is also fine)


Those hubs and drums sure are heavy, aren't they! :)
 

harleyboy1

Member
51
0
6
Location
Lake City, Fl.
Two very good questions. With the truck only having 9000 miles on it, I didn't remove the inside seal, bearing or plastic sleave. I could see the bearing had been packed with grease but was soaked with gear oil. I'm assuming that gear oil passes through the tunneled plastic sleeve to the inside bearing. But not 100% sure.
 

harleyboy1

Member
51
0
6
Location
Lake City, Fl.
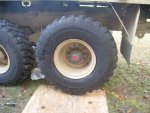
This is what I got done this morning. Torqued first axle nut to 50 ft.lbs. and at the same time turning hub. You can feel the bearing getting tight when turning and torquing to 50#s. I then set the wrench at 3 o'clock and brought it back to 12 o'clock the nut seamed to loose so I went to the right (tighten) two holes in my keeper washer. Then I torqued the outer nut 325 #s. I then turned the hub and it turned free with just seal drag, I could not feel any motion in hub. To make sure I install the brake drum (don't forget to crank up truck to get the brakes to relax or you will never get the drum on but don't step on the brake peddle) and wheel, then checked for hub movement, I felt none so hopefullMershon 008.jpgMy Pictures 006.jpgMy Pictures 007.jpgMy Pictures 008.jpgy it's good.
 

idahosinker

New member
30
0
0
Location
Idaho, Western
Thanks for putting this up. I have one to do. I thing my axel vent was plugged. and the oil came out around the air line. Slow sometimes, not at all, or a little bit more on my 700 mile recovery trip.
 

rtk

Well-known member
Steel Soldiers Supporter
1,181
418
83
Location
Lockport N.Y.
Do yourself and your loved ones a favor and put a jack stand under that axle when you are working around it , man that is scary . Trust me , after doing dumb things myself , stuff happens WAY FAST ! and these toys are heavy !!
 

Plugugly

New member
116
1
0
Location
Iowa
Looks like I'll be following the steps in this thread and doing a CTIS seal on my rear axle. I just wanted to add some part numbers and see if any one had updated advice on the procedure before I started. I found a whole kit for this HERE, but in case that link dies here are the part numbers it includes:

Axle flange gasket: 7346993
Outer rear CTIS Seal: A-1205-D-2162
Inner CTIS Hub Seal: 357974TA0

Hopefully that's all the stuff I'll need.


Last edited:

Plugugly

New member
116
1
0
Location
Iowa
Oops, you're right. The fourth part is in the kit I linked but I didn't list it. The 4591SCR is the hub seal. This image is from Oshkoshequipment.com where I ordered my kit from:
2015-03-30 10.19.14.jpg
 
Top
AdBlock Detected

We get it, advertisements are annoying!

Sure, ad-blocking software does a great job at blocking ads, but it also blocks useful features of our website like our supporting vendors. Their ads help keep Steel Soldiers going. Please consider disabling your ad blockers for the site. Thanks!

I've Disabled AdBlock
No Thanks