• Steel Soldiers now has a few new forums, read more about it at: New Munitions Forums!

  • Microsoft MSN, Live, Hotmail, Outlook email users may not be receiving emails. We are working to resolve this issue. Please add support@steelsoldiers.com to your trusted contacts.


W3AZEL's crew cab build

w3azel

Member
229
0
16
Location
Waipahu/HI
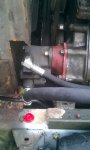
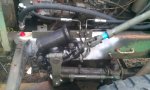
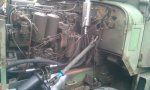
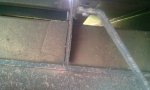
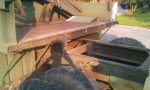
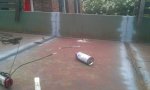
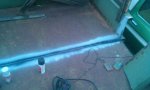
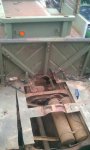
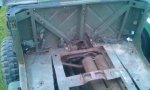
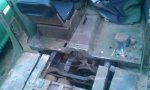
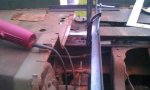
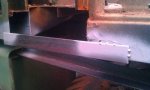
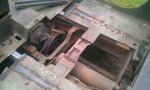
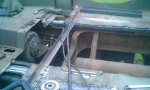
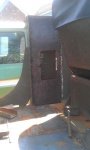
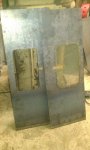
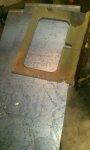
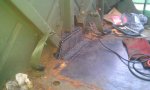
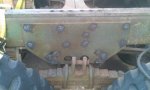
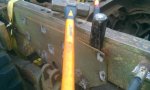
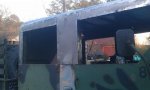
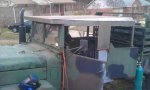
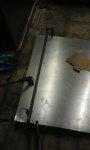
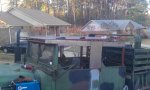
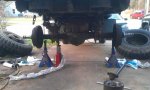
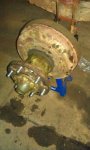
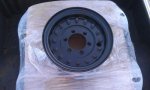
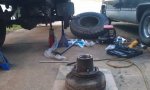
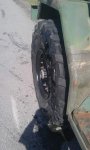
Ok so to give a little back story I purchased this truck with no intentions of doing anything crazy other then to just own a deuce. That didn't last long with the help of you guys. I have no training when it comes to welding, metal work, mechanics, body work, or really anything that has to do with building this. All the work has been done by myself with no other help lifting or moving things. The only part I did not do was mounting the driveshaft. I planned on a lot more pictures and I'm sorry I failed in that. Most work was finished up at night so pics didn't come out or I was to tired to remember. This is now my daily driver project and all I have here in Ft. Leonard Wood.

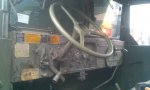
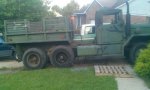
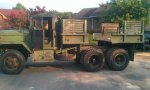
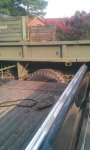
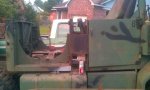
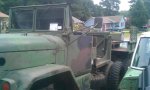
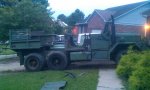
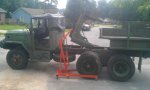
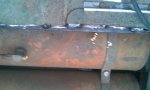
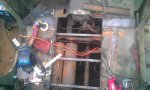
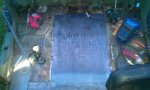
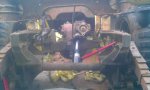
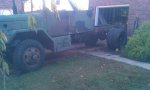
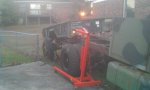
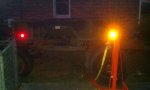
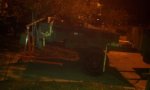
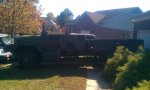
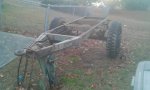
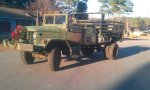
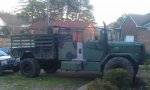
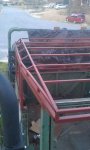
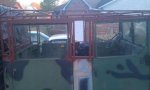
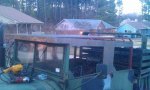
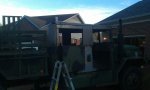
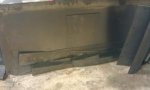
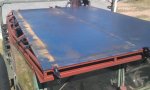
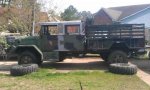
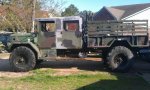
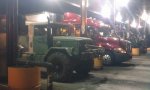
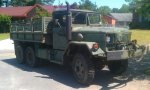
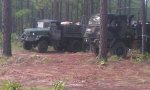
Here the truck when I first brought her home and took her out to the field to help move stuff. These are the only two pics I have of the truck before SURGERY!!!:twisted:
 

Attachments

w3azel

Member
229
0
16
Location
Waipahu/HI
The first modification I did to the truck was add power steering. It completely changes how the deuce drives and handles on the street. Traffic and inner city driving become no problem. You can also maneuver around parking lots without making your arms burn. The kit I purchased is from Waterloo Specialties. Excellent kit with everything you need. I'm not very good with written directions so I also used Hanksdeuce.com to help with some of the questions I had. He has an excellent install photo journal. The only issue I ran into is even with the trimming I did have to remove the top radiator hose and loosen the bolts underneath to give me that 1/2" I needed. Also drilling all those large diameter holes is a total pain if you are using cheap Lowe's bits.

I mounted my steering column as upright as I could. It gave me more room and I always liked my steering wheels more horizontal then vertical. Gives it more of the big truck feel.
 

Attachments

Last edited:

w3azel

Member
229
0
16
Location
Waipahu/HI
My technique for cutting the bed might not have been the best and now that I've worked with metal more I would use a jig saw instead of the sawzall or just a cutting wheel on a grinder. My initial plan was to do a 6x6 crew cab with a shortened bed. However after I thought more about it and discussed it with the wife I felt turning it into a 4x4 would drastically help its resell if I ever chose to get rid of it. Also it gave me the couple of extra inches I needed to make a really spacious cab area. The bed weighs a ton and to help get it apart I used straps and my pickup to pull it apart. If you chose to shorten your bed I would say make your cuts as clean and straight as possible. The effort you do now will save you when you have to weld it back together.
 

Attachments

Last edited:

w3azel

Member
229
0
16
Location
Waipahu/HI
OK so here is the part where I messed some things up and wish I could go back. With how heavy the second cab was I decided to cut as much off as I could to help me move it around. If I was to do it again I would leave almost the entire side of the original cab instead of just leaving the little piece for the air vent. The way I did it allowed it to flex to much and I was never able to get it back perfect. Plus it just added more work I had to do with getting the two cabs together. You will also see I cut the rear of the cab because I had this crazy idea of having the mounting point under the cab instead of behind it. Then I could bring the bed closer to the back of the cab. This proved to be more of a pain then it would be worth so I ended up closing it off, lesson learned.

For this Id say the saw zawzall was my best friend. With the long blade I could cut multiple layers and keep things fairly straight. I tried at first to use a plasma torch but it didn't do well in the thick parts and forget about multiple layers. I couldn't believe how much stuff was hiding under the sheet metal in some parts. Again most of this is solved by just not cutting up the sides of the second cab.
 

Attachments

Last edited:

w3azel

Member
229
0
16
Location
Waipahu/HI
Lining up the two cabs can be quite the chore. First off make sure if you have a 5 ton second cab like I did you remove the body lift blocks or you'll never get things straight. After I took those out I found 2x4 blocks and some shims got me close enough. Now here is where I again messed up and should have paid more attention. The uprights for my rear cab doors were bending back and in slightly. If I had been smart enough to weld in supports or at least remount the doors I would notice this was happening but I wouldn't find this out till it was to late. I still tried to keep things as straight as possible but it would later affect everything from door gaps to how I built the roof and had to use different measurements for each side.aua

Id also like to mention that when cutting, make sure you don't go to far and cut the copper lines running underneath. I just nicked one spot, but it was enough to have to repair the section. I hate working on copper piping so this wasn't fun for me. Also I don't like having a pointless hump on the floor so I decided to just cut out the cross member and use 1x1 tubing to replace it. Its plenty strong and made putting a floor in that much easier.
 

Attachments

Last edited:

w3azel

Member
229
0
16
Location
Waipahu/HI
At this point I had learned about the nice little tool called a jig saw. SO MUCH better at cutting sheet metal. You just have to pay very close attention to make sure your lines are straight. I tended to go just a little big and then use the grinder to take off that little extra. Worked well enough. I also found how much welding sheet metal sucks. I had only ever tig welded before this and with my mig I was blowing through the 16ga I was using like crazy. Don't even get me started on the sides. I eventually just cut strips and put them behind the joints and welded through the skin to them. Still wasn't able to completely get the wrinkles out but I messed that up long before. For the floor I switched to just doing a ton of spot welds. Id space them out and keep coming back till it was all connected. Worked well enough for me. The inside vents for the kick outs were easy enough. Just used a cutting wheel to start them and then switch to a jigsaw. Touch up with the grinder but next time I won't have to make them at all.
 

Attachments

Last edited:

w3azel

Member
229
0
16
Location
Waipahu/HI
If you don't have a strong back or really big tools I would just start and say get someone else to do this. This part is the most straight forward but your best friends are a huge breaker bar and a big hammer. I only have a 1/2" impact and that didn't work for these size nuts. It all came down to my 165 lb body and a 42" breaker bar. After the nuts are removed from the dog bones use a wedge and wood blocks to press the threads out. As you drive the wedge it with your sledge hammer it will push against the wood and the dog bone threads till they finally pop out of the mounts. After the dog bones are gone your hallway home. Only need to remove the axle brackets and get that huge hunk of metal out of the middle. I used my plasma torch to wash the rivet heads off and a little into them to relieve outward pressure. This will ruin a couple of tips but its quick and easy. A regular torch would probably work better. Then after the side plates are gone and the rivets underneath are gone you can use a bottle jack to separate the suspension from the frame. The leafs would NOT come off until I dropped it off the back of my truck at the scrap yard, figures.

You will notice I used wood block on the front axle to support the frame. I don't have jack stands tall enough and I live on a slope. This worked fine till I needed to relocate the rear axle. Then I switched to my cherry picker on the rear and a tall off road jack I borrowed from my jeep buddy. I used front suspension parts to mount everything. It all went together fine and I didn't have any issue with drilling holes to mount them. They aren't perfectly spaced like the front but that was because it was easier to use some pre-existing holes instead of being 1/2" off of them.
 

Attachments

Last edited:

w3azel

Member
229
0
16
Location
Waipahu/HI
The m105 bed is heavy. I don't know how heavy but I can tell you it messed up my back for a while so Id stress be careful. To help mount I dropped the trailer tongue down and back the truck over it. Then I used wood boards to create a slope and slowly work the trailer bed up onto the truck a little at a time. I should have removed the trucks rear lights cause I broke one in the process but was able to glue it back together. The beds mounts won't work on the deuce if you keep the wood slats like I did, but they do keep it straight on the frame so I didn't cut them off. I used long 1/2" bolt that went through the bed and frame. I kept the mounting points inside the distance of the rear leaf spring mounts. This should allow the bed to stay on tight to the frame but allow the frame to still flex. Also I think I have like 1/8" space between the bed and the cab mount. Its very close and looks great compared to the huge gap some trucks have.

Ill also add my new rear driveshaft I had put on. The mount for the carrier bearing is just the cross member behind the air tanks flipped upside down. Now I knew I was going to run big tires and add power to this beast. It already has lockers front and rear and chrome moly axle shafts in the rear. Talking to the driveshaft shop I agreed or got suckered into, getting a very beefy rear driveshaft. The old "little" driveshaft is on the ground for comparison. It was a 1510 U joint. Now it has 1550 Solid U joints and the tube is 3.5" .095 tubing. Here is where a little work needs to be done. Most guys don't mention it on here but I know from experience on jeeps this is a problem. The driveshaft angle is WAY out of line if you keep the front perches for the rear. Most shops want a 1-2* angle change at each joint. Mine had 15*, to help, the driveshaft actually goes up and then back down. I was going to do a lift so I haven't fixed it but is something to think about. Leaving it out of whack leads to vibration and u joint damage or as I've experienced on a lifted jeep complete failure.
 

Attachments

Last edited:

w3azel

Member
229
0
16
Location
Waipahu/HI
It took me a while to decide how I wanted the roof to look on my truck. I really don't like the curvy big bubble look of the stock deuce roof especially when you stretch it for a crew cab. I also wanted a built in sun visor. As my creative juices went along I narrowed down my design and put this together. I used 1" square tubing for the main frame sections and then above that 3/4" for the very top. I could have done 3/4 all around but I just felt more comfortable with the 1" because it doesn't flex as much even with the thinner walls then the 3/4" Now that big sun visor section is actually where I plan on putting all my electronics and radio. It also gives the truck a very mean demeanor and gives almost a chopped top look even though the windows are normal height. You can also see how the flex in the body messed up things up top. Every tube is just slightly different to help fit the windows. I'm not proud of it but its not as noticeable once I put the skin on.
 

Attachments

Last edited:

w3azel

Member
229
0
16
Location
Waipahu/HI
For the skin of the roof I chose to use two different thicknesses. I have 18ga for the top and angled sections along with the front sun visor section. This is because of low hanging braches and hail. For the sides I just used 20ga. The back curved corners are replacement sections for the rear of the cab from a local vendor and the very top corners....are still duck taped cause I cant figure out how to shape the metal for them. Id like to thank Rick = Bigginstactical for advice on how to put the skin on. I used my plasma torch and a guide to cut everything first. Then I used clamps and self tapping screws to mount them. Come by with my giant sanding wheel to get the edges together. I tacked the edges and then removed the screws and welded the holes shut. It created a very strong weld and skin that doesn't have any issues with the truck flex. After 2 hours of sanding I came back with a product I have learned to love to fill the gaps. Its called All Metal by US chemical. Its an aluminum bondo like material that is easy to sand and still flexes. It also doesn't trap moisture and you put it on bare metal.

Id also like to add a safety message for when your welding. At this point I have welded for probably hundreds of hours. I've learned a lot but I also have missed some things like having a fire extinguisher around. While I was doing the roof I started to smell something burn. I had some left over oil on the metal from drilling so I though it was just burning off. When I lifted my helmet I looked down to see smoke rolling out of the cab. I ran to my garden hose, but when I turned on the water the hose from the house just blows off. The plastic had become brittle. Then I run to the garage for a bucket, don't see it so 32oz cups from the kitchen become my only option. I was very lucky the fire didn't spread and I could put it out with two cups of water. I now have a fire extinguisher near me while welding and I also make sure to remove or shield flammable objects in the area.
 

Attachments

Last edited:

w3azel

Member
229
0
16
Location
Waipahu/HI
I have always been a big ford fan and one of the reasons is because of their seats. Especially the fold down console seat. Now the F-150 series seats are probably a better fit for this truck because they are a few inches narrower but a big truck deserves big seats so I got a set for a crew cab super duty. To mount them I had to get creative. For the front I cut the bottom of the mounts flat and notched them for the center console to sit in. Then they are mounted onto 3"x3" tubes. Except for the rear feat of the center console that are on 2.5" x 2.5" blocks. I haven't done the rear but I plan on doing something similar except using 2.5"x2.5" tube instead. Id also suggest tacking everything with the welder then coming back with a drill and using a single bolt that goes through the chair mount, tube, and body. That way they don't wiggle or move on you. Also the parking brake had to move over to fit the chairs. Its a tight fit to grab it but its worth it if you ask me.
 

Attachments

Last edited:

w3azel

Member
229
0
16
Location
Waipahu/HI
Flipping the hubs is a very easy and straight forward job it just requires the right tools. For one I have a torque multiplier that makes taking the tires off a breeze. For every 64 rotations at the handle I get 1 at the socket. I think my truck had its rear rebuilt recently because everything looked clean and new. I do want to know if Timken bearings are stock cause that's what I have. The seals even looked brand new so I kept them. Ill swap them when I do a disk break conversion. An impact also makes this job easier and for getting the old studs out and putting new ones one I would say do it exactly how they do on this website. I tried using a press and ruined one of my studs because of it. Went and used the tool from harbor freight took me 2 mins to press the old one out and get a new one in when I used my impact with it. http://www.xm381.com/xm381/How_To/Pages/Hub_Flip.html

For the rims I went to Stazworks and got their modified HEMTT rims. The craftsmanship on these rims is outstanding and I am more then happy with what I got. If you do order from them though do not plan on getting your rims for a while. The gentleman who owns the shop is really backed up on orders so its going to take a while but its worth the wait. On the tires I did 14.00s I really wanted 16.00s but now that they are on there I think I made the right choice. Not to mention I hate moving them around as is I can't imagine an even bigger tire. Mounting is no problem especially if you buy bead sealer and use bead locks. A 3/4" impact would have been nice but I got away with my 42" breaker bar and 1/2" impact. Just use LOTS OF SOAPY WATER!!! and make sure you put the valve stems and o rings on. or you'll be like me and have to redo 2 tires. aua Once together I got away with just a normal tire hose and my 60 gallon compressor. I did also put a litter of coolant to balance the tires but Ill talk about that later.
 

Attachments

Last edited:

w3azel

Member
229
0
16
Location
Waipahu/HI
So this project took about a year. For the last two weeks I have been working on this truck from the moment I woke up till I went to bed because I am being stationed at Ft. Leonard Wood for 1 year. No leave time except for Christmas but I will have some free time. To me that's a lot of wasted time I could be using on my truck. So I had to work my tail off to get it road ready and up here before my report date. I was successful in my journey but I had to cut some things off the to do list and learn a few hard lessons.

Mountains: The truck did very well in the mountains, I do not have a EGT mounted yet for the fact I didn't have time. I wish I did but I think my fuel is turned pretty low. I can keep her at 1800rpms in 4th up the steep grades no issues. My odometer reads 35mph but I think its actually 40-45. I didn't have to use my brakes much and just down shifted for the steep down hill slopes. I also listened very closely to the engine and NEVER floored it. With these techniques I was getting passes but I was able to keep up with the loaded down rigs so I don't think I was hindering traffic any more.

TIRES: 14.00 Michelin tires are rated for 55mphs. Now two of my tires were brand new. Another two were clean just older and the last is good on tread of has cracking on the sidewall. That was my spare. 300miles into my 950 miles trip I had a blowout on my front driver tire. One of the older clean tires. Up to that point I was pushing the truck to 60-65mphs and making good time. The coolant I used inside the tires was steaming out and the rubber was very hot. I was lucky I only lost one tire and that the tire started to thump before it went so I could slow down before she finally went. You don't know nervous till you realize you have 650 miles to go on a tire that has cracking all over and you just lost what you thought was a good one at 300 miles. I then kept the truck at 50mphs and stopped more often to check the tires and let them cool. I also changed most of my driving to at night. After that I had no other issues but I have learned my lesson. I also found out the importance of bringing the tools to change your tire and get your rim back. Im not saying I left a huge hunk of rubber on the side of the road but I sure didn't lift it 5.5' into the back of my truck. I had to use my 3lb hammer, a wood crate to post the rim on and some motor oil to get the rim off. Would have cost me a rim if I had been missing even one of those.

Besides that I average 10mpgs and had a great time. I used my laptop to charge my phone cause I didn't have my 12v installed yet and absolutely LOVED my new seats. It made the trip enjoyable when I had a reclining seat and a cup holder. It was boring at times because I didn't listen to music for fear Id miss an important sound from the truck.

The one pic is the deuce at her new home. I don't have a garage but I can still tinker and work on her. Ive had quite a few people come up to me to talk about the truck and check her out. Nothing better then answering the question "So where did you buy this" with "I built it". Makes all the hard work worth it and I drive her every day just like a regular truck. ..I still get nervous around the MPs but so far so good.
 

Attachments

Last edited:

w3azel

Member
229
0
16
Location
Waipahu/HI
Thanks guys this has been a lot of work and I hope my pics can help inspire others to do the same. I have a ton more work to do and it seems like this truck will never be 100% but that's just part of the project. Ill post progress at I continue. I took a 3 month break in the fall and I think I might take another break. I just can't keep working on the truck non-stop. It gets mentally and physically taxing. Have to play with the toy a little before I get back into the working phase.:driver:
 
Top
AdBlock Detected

We get it, advertisements are annoying!

Sure, ad-blocking software does a great job at blocking ads, but it also blocks useful features of our website like our supporting vendors. Their ads help keep Steel Soldiers going. Please consider disabling your ad blockers for the site. Thanks!

I've Disabled AdBlock
No Thanks