• Steel Soldiers now has a few new forums, read more about it at: New Munitions Forums!

  • Microsoft MSN, Live, Hotmail, Outlook email users may not be receiving emails. We are working to resolve this issue. Please add support@steelsoldiers.com to your trusted contacts.


Rumblin Wreck Build

748
5
18
Location
Woodstock, GA
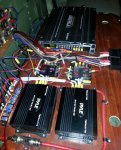
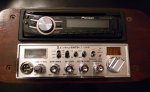
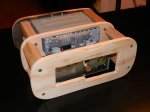
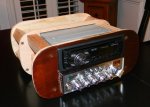
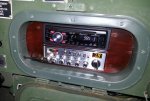
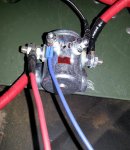
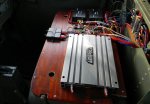
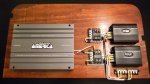
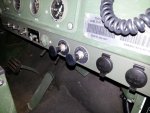
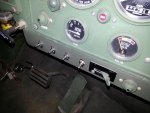
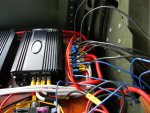
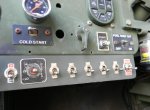
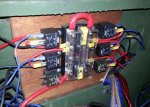
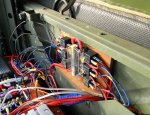
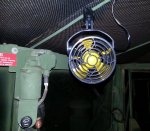
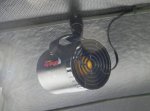
I wanted to start a thread to show some of the modifications that I have made to my M35A3. So far most of the modifications have been electrical in nature but as time goes by and I complete the mechanical projects I will post updates.

Background:
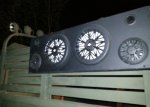
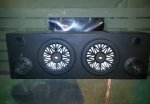
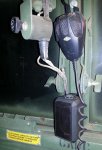
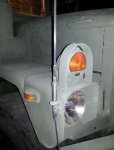
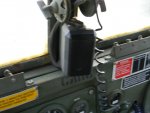
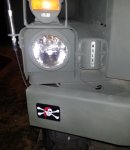
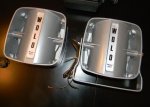
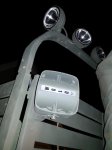
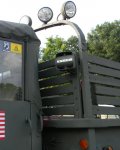
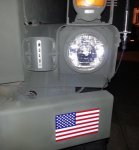
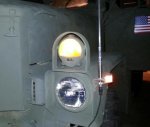
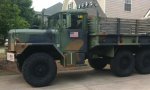
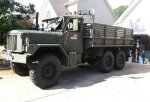
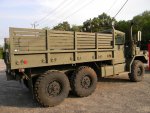
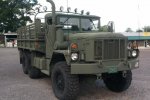
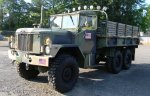
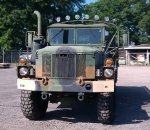
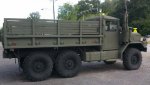
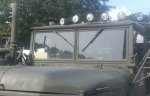
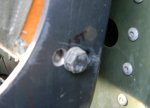
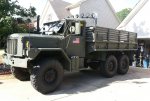
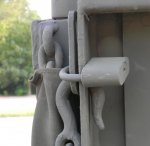
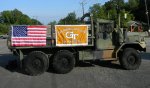
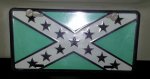
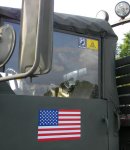
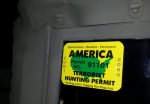
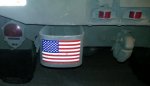
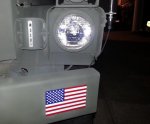
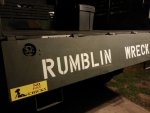
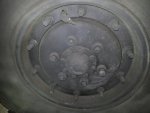
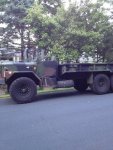
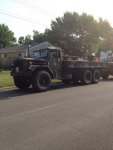
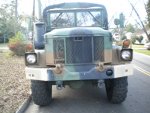
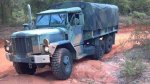
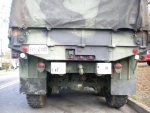
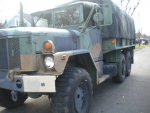
I traded a bobbed M35A2 for my M35A3 this past January. I got into MV's because I wanted to have the coolest truck at the tailgate come football season this fall and I wanted something to do some serious tinkering with. The truck is called the "Rumblin Wreck" because that is a play on the Georgia Tech mascot car the "Ramblin Wreck" (see avatar).

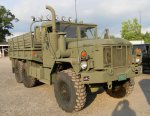
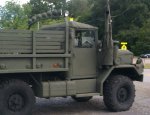
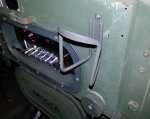
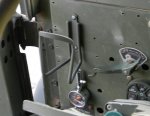
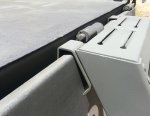
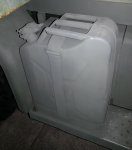
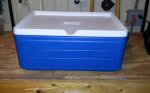
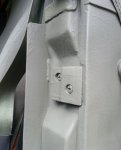
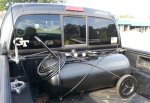
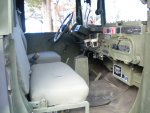
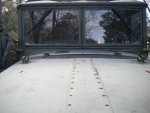
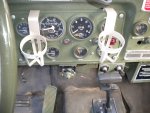
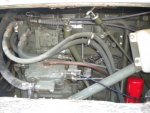
This first set of pictures were provided by the seller; so they show the truck as it was when I got it. Not a bad looking truck at all but I see it as a blank canvas and couldn't hardly wait to start working on it.
 

Attachments

Last edited:
748
5
18
Location
Woodstock, GA
Stereo & CB Radio - Map Box Install

The first project I took on was the installation of the stereo, CB radio, speakers, power converters, and amplifier. I think these pictures speak fairly well for themselves. I can go into further detail if anyone wants.
 

Attachments

Last edited:
748
5
18
Location
Woodstock, GA
Amplifier, Antenna, Power Converter & Speaker Box Install

These are more pictures of the stereo install. The two black boxes with rotary knobs are volume controllers so that I can adjust my PA's and sub woofers independently of each other and independently of the interior speakers. I used marine speakers in the speaker box and coated the box with bed liner. I also designed the box to be able to hang at different locations. All of the auxiliary power is switch at the 24volt solenoid. Since the CB is mounted in the map box I ran an external CB speaker and mounted it between the windshields. The dual CB antennas are mounted on the headlight assemblies and I have a splitter that pull AM/FM signal to the stereo.
 

Attachments

Last edited:
748
5
18
Location
Woodstock, GA
Distribution Blocks, 12volt Accessory Outlet, & Dash Switch Install

Here is some more stereo stuff. From an earlier picture you can see where I had intended to keep the wiring very clean and organized but I as I added more and more the wiring got sloppier than I would have liked. In the future I will probably redo all of that with larger buss bars. I added two 12volt accessory outlets into a bracket that I built and I rearranged all of the stock controls that were in that area. Three of the new switches are high amp, 4 circuit, 8 pole switches that I can use to zone the different sound components. Basically I can completely turn on and off the sub woofers, front PA's, and Mid PA's. This is helpful because the re-verb from the mid PA's, when using a mic, is horrible so you have to isolate them. The other new switch is a momentary switch that I plan on using in the future for an electric windshield washer.
 

Attachments

Last edited:
748
5
18
Location
Woodstock, GA
PA Speaker Install

Here are some pictures of my PA's. They weren't necessarily cheap but they sure get the job done without taking up much space. I had originally looked at a pair of PA's from some Denver outdoor sports arena but even I realized that they wouldn't be practical as they were 5' long. I have these 4 PA's running off of two channels of my four channel amplifier; the sub woofers are on the other two channels. I also have a 12 pole, 4 circuit, On-Off-On switch that I use to switch the PA speaker output between Stereo, Public Address, or Off.
 

Attachments

Last edited:
748
5
18
Location
Woodstock, GA
Off Road Lights, Dash Switches, & Relays

After the Stereo stuff, the next big project I took on where the off road lights. I got them for very cheap at HF and converted them to 24volt. Then I painted them so they weren't chrome. Shinny chrome doesn't look very good on a MV. The lights are all properly fused and relayed. I ran them in pairs so that 1 switch controls two lights. I have left myself 2 extra relays and some extra switches in case I decide to add floods to the front and or additional floods on the back (I say "floods" because the lights I added are spot lights and I could more close range lighting). You can see the switch bracket that I built for the light switches. This bracket also holds the PA switch on the far right and the all auxiliary switch on the far left (this is the switch to the 24volt solenoid). The button labeled "Start" is actually the push button switch for my train horn. Hopefully if anyone ever tries to steel the truck they will end up giving themselves a heart attach instead. One of the most arduous tasks was running the wiring through the bow. Some cuss words were said that night. I also changed out both bulbs in the each of the front turn signals with LED's and I had to replace the driver's side headlight.
 

Attachments

Last edited:
748
5
18
Location
Woodstock, GA
Train Horn

This is the aforementioned train horn. It is a Wolo Siberian Express and is 152db. I had to remove the windshield washer tank in order to mount the horns but when I go to install my electric windshield washer I can re-mount the tank on the other side of the steering column. I also had to relocate the signaling horns and the flasher relay box. I did keep the signal horns hooked up in case I need to honk at somebody without scaring them to death.
 

Attachments

Last edited:
748
5
18
Location
Woodstock, GA
New Paint

These are some pictures showing the new paint job and contrasting it with the old paint. Basically I used a pressurized tank sand blaster to work on any rusty areas (very little on this truck). You can see where I brought the hood hinge back to life (this is a common rust area on these trucks). I have a HVLP paint gun but decided to go with shaker cans as I determined that it would be cheaper and the paint would be more readily available. Overall I am very pleased with the results. There are a few areas that I want to spend some more time on. I also want to spray the bed with bed liner.
 

Attachments

Last edited:
748
5
18
Location
Woodstock, GA
Ladder, Wipers, Cup Holders, & Jerry Can

Here are just some miscellaneous things I did. I added a jerry can. I also added cup holders and and replaced the dust hose on the muffler (the old one was rotted through). I modified the brackets on the boarding ladder I just received so that it holds onto the tailgate better. I adjusted the door latch so that it shuts securely and doesn't bang around while driving. I should be getting a locking door handle for the driver's side this week and I will add to the thread once it is installed. The cooler is the biggest, hard sided, cooler that I could find that would fit underneath the passenger bench. The air hose pic shows the glad hand that came with the truck but I added this awesome air chuck. It locks on from both sides and actually stays on without having to hold it. Sometimes I use the 25 gal air tank in the back of my truck in conjunction with the deuces's system to air up the tires a little faster. The last picture shows how I changed the resting position of the wipers, but I still need to fine tune it a bit.
 

Attachments

Last edited:
748
5
18
Location
Woodstock, GA
Cab Fan, Seat Recline, & Tailgate Lock

Here is some more miscellaneous stuff I did. I struggled with the fan install for awhile. The fans I bought were too big to really mount without obstructing my view. Luckily I found this fan at a Pilot station. It puts out more air than you can imagine and I can rotate it 360 degrees and it has variable speed. I also mounted it so that I can slide it forward and backward along the roof support. I drilled extra holes in the seat back brackets so that I could recline the seat a few degrees. Man what I difference that makes! The tires are not new but they look like it in picture I took after I treated them. In that same picture you can kinda see where I adjusted the wipers to have a more aggressive look in the home/off position. I decided to install a tailgate lock (very simple, works great). The picture with the flag and GT banner is when I was fooling around trying to see what it would look like when I am tailgating. Pictured last is a 30,000 lb snatch block I found online for cheap.
 

Attachments

Last edited:
748
5
18
Location
Woodstock, GA
Cosmetics and Asthetics

Here are just some cosmetic things that I did.
 

Attachments

Last edited:
748
5
18
Location
Woodstock, GA
CTIS Removed

I didn't mention this earlier but it was probably evident anyway; I removed all of the CTIS equipment from the wheels. I still have the controller and other components installed and hopefully one day I will get it all working again but that is probably the last thing on my list. The truck sure does ride better without all of the CTIS stuff on the wheels.

I also removed the canopy from the back but that was probably obvious as well.
 

Attachments

Last edited:

panshark

Member
544
11
18
Location
Idaho Falls, ID
Wow, that's a sound system. I like how you hid it in the map compartment. Any chance your amps could get damaged from rain coming in the back window?

Only thing it looks like you're missing is the PA!:-o
 

Hoefler

Active member
1,096
20
38
Location
White Bear Lake,MN
Nice looking install. I put the exact stereo in my A3. Mounted it to a plate then secured up right on the side of the shift column. Yours looks better and less prone to theft. Money well spent on an A3 is for a set of lockouts-truck will steer and handle a little better. Set of Goodyears will also make her better.
 

Attachments

748
5
18
Location
Woodstock, GA
Wow, that's a sound system. I like how you hid it in the map compartment. Any chance your amps could get damaged from rain coming in the back window?

Only thing it looks like you're missing is the PA!:-o
You didn't give me enough time to finish. Look now, the PA information has been added in.
 

caliber1

New member
995
8
0
Location
Elcho, Wisconsin
Wow dude, you're as picky about your wiring as I am. LOL Nice truck!! Did you install an equalizer, or a 24-12 converter? Your handle should be there tomorrow, I hope. USPS being what it is.
 
748
5
18
Location
Woodstock, GA
Wow dude, you're as picky about your wiring as I am. LOL Nice truck!! Did you install an equalizer, or a 24-12 converter? Your handle should be there tomorrow, I hope. USPS being what it is.
I installed two 24 to 12 volt 720 watt converters. That is why I went 24volt on the off road lights, didn't want to overload the converters. I would like to eventually install a 12 alternator and do away with the converters but they will do for now. I look forward to the lockable handle! Currently I use the combat locks and have to climb up on the fender and pull out the windshield to unlock the door.
 

caliber1

New member
995
8
0
Location
Elcho, Wisconsin
LOL, never thought about doin that. I just told my neighbors I would shoot them if I caught em near my truck. I live out in the country though. I have a Vanner 100 amp EQ I am gonna install in the near future. Have a converter under the dash at the moment, just to run the CB. Really nice build, look forward to more pictures.
 
748
5
18
Location
Woodstock, GA
LOL, never thought about doin that. I just told my neighbors I would shoot them if I caught em near my truck. I live out in the country though. I have a Vanner 100 amp EQ I am gonna install in the near future. Have a converter under the dash at the moment, just to run the CB. Really nice build, look forward to more pictures.
Yeah, When I looked at EQ's they were more than I wanted to pay, although they would have done a better job perhaps. I found the converters on sale on ebay for only $26 each I think.
 
Top
AdBlock Detected

We get it, advertisements are annoying!

Sure, ad-blocking software does a great job at blocking ads, but it also blocks useful features of our website like our supporting vendors. Their ads help keep Steel Soldiers going. Please consider disabling your ad blockers for the site. Thanks!

I've Disabled AdBlock
No Thanks