• Steel Soldiers now has a few new forums, read more about it at: New Munitions Forums!

  • Microsoft MSN, Live, Hotmail, Outlook email users may not be receiving emails. We are working to resolve this issue. Please add support@steelsoldiers.com to your trusted contacts.


HanksDeuce: 8" Lift, Bobbed, External Cage, A/C and more Project!

HanksDeuce

Well-known member
1,080
238
63
Location
Prairieville, LA
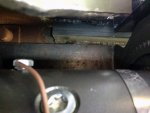
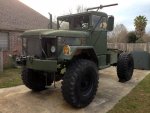
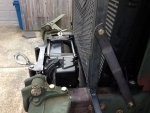
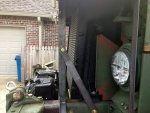
Put the original transfer case back in and topped it off with just under 7 quarts of Traveller SAE 80W-90 lube from Tractor Supply. Drove the truck 10 miles to my buddy's house to finish the brush guard installation. Hit 50 mph on some back roads and it never popped out of high gear.

Link to the lube: http://www.tractorsupply.com/en/store/travellerreg%3B-multi-purpose-gear-oil-80w-90-2-gal

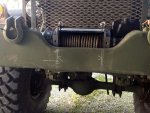
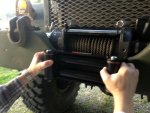
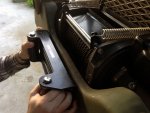
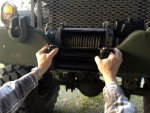
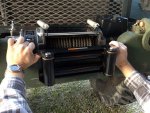
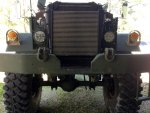
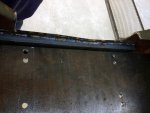
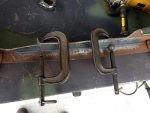
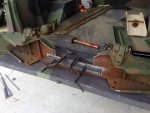
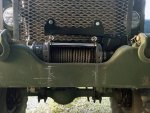
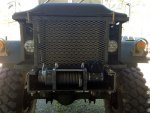
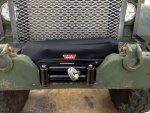
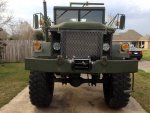
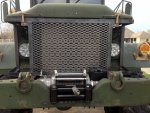
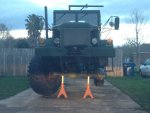
Mounted the frame extensions and winch mounting plate. Final fit-up of the brush guard, winch and bumper now. Updated pics soon!
 
Last edited:

HanksDeuce

Well-known member
1,080
238
63
Location
Prairieville, LA
Time for some people here to voice an opinion on mounting the roller/fairlead to the Warn 18k winch.

2 options:
1) Mount the roller/fairlead to the bumper. To do this the roller/fairlead would be much lower than if mounted directly to the winch. Shown in first 4 pics.
2) Mount the roller/fairlead to the winch and notch the bumper for clearance. Shown in last pic #3893.

Pros/Cons:
- If I mount the roller/fairlead to the bumper (lower) then I risk catching the cable on the top lip of the bumper at the worst time (Murphy's law).
- If I notch the bumper to mount the roller/fairlead to the winch then I will need to weld a brace inside the bumper for support.
 

Attachments

Jeepsinker

Well-known member
5,341
329
83
Location
Dry Creek, Louisiana
Don't do either of those. Bolt the fairlead right to the bumper and cut the rectangle out behind it that it needs. I wouldn't notch it, and you certainly don't want the fairlead out of line with the natural path of the winch line.
 

welldigger

Active member
2,602
15
38
Location
Benton LA
Notch and reinforce the bumper. That will be the cleanest looking way to install it along with the benefit of not snagging the winch cable.
 

HanksDeuce

Well-known member
1,080
238
63
Location
Prairieville, LA
Don't do either of those. Bolt the fairlead right to the bumper and cut the rectangle out behind it that it needs. I wouldn't notch it, and you certainly don't want the fairlead out of line with the natural path of the winch line.
I can't bolt the fairlead directly in front of the winch. You can see the holes don't line up. If I lower the fairlead and mount it on the bumper it will have to be several inches lower than it would be if it was mounted directly on the winch. My concern is if I put the fairlead that low and only cut out a window for the cable to pass through then the cable could possibly snag on the upper bumper lip. The angle changes as the drum diameter gets bigger or smaller depending on winch out or in.
 

HanksDeuce

Well-known member
1,080
238
63
Location
Prairieville, LA
What about my suggestion? Flip the bumper.
Jeff, the top section of the bumper was already coped out to account for the front of the winch. If we flipped it over we would have to cope out again. I made the executive decision to cut out for the roller/fairlead. The inside bottom section of the bumper will be reinforced to replace the area that was removed. Pics will be posted tonight.
 

Csm Davis

Well-known member
4,151
376
83
Location
Hattiesburg, Mississippi
Okay what about cutting the bottom of the bumper and adding an extra flat piece so that the bumper is flat across the top and bottom and then you can put the hole where it needs to be and then french the fairlead into the front so the cable can't touch the bumper but the fairlead is set back far enough to prevent damage if the bumper is bumped.
 

HanksDeuce

Well-known member
1,080
238
63
Location
Prairieville, LA
Well, don't say I never offered to help.
Don't take offense to us getting the job done yesterday. I sure didn't mean any. The mechanical work should be completed in a week or so. Then I will hit you up for paint of the deuce + M105A2 trailer.

Jeff, the winch work is now complete. When I have more time this afternoon I will post the final pictures.

Thanks guys for all of the suggestions throughout this entire build.
 

HanksDeuce

Well-known member
1,080
238
63
Location
Prairieville, LA
I had to break up the winch install into 2 separate posts because I took 15 pictures. Each post can only have 10.

Notes:
1) Steve6x6x6 made the 10 inch bumper extensions and inner frame pieces. Yes I know some bolts are missing.
2) Reinforced inside of bumper at the bottom with angle for strength.
3) Coped angle to match large dent in middle of bumper.
4) The custom brush guard looks better in person. Internet trolls might poke fun at it, but who cares.
 

Attachments

HanksDeuce

Well-known member
1,080
238
63
Location
Prairieville, LA
Here is winch install post #2.

Notes:
1) The brush guard is bolted to the top of the frame as well as to the side supports. It doesn't move AT ALL.
2) I still have minor sheet metal and some rubber sheeting to do around the headlight buckets. Air through the intercooler/radiator not around.
3) Winch is not wired yet.
4) Ordered more Grade 8 frame bolts (supplier ran out!).
5) Call Warn and ask them for the neoprene cover for the Warn 24v 18k winch. I don't have the part number handy.
 

Attachments

Jeepsinker

Well-known member
5,341
329
83
Location
Dry Creek, Louisiana
Looks pretty good for amateur work!:mrgreen:
Seriously though, it all looks pretty good. I'll only comment that you will need to move your headlights forward. You are going to lose a lot of light with them that far back.
 

rustystud

Well-known member
9,071
2,388
113
Location
Woodinville, Washington
I think your grill guard looks just fine ! It will keep out those nasty little branches that can get past most guards with there large gaps. After having a stupid little branch go straight through my radiator ( I mean little like 1/4") , I can appreciate a good brush guard.
 

HanksDeuce

Well-known member
1,080
238
63
Location
Prairieville, LA
Spent a few hours this afternoon after the rainstorm changing out the driver side axle boot. The silicone boot lasted since December 2012. Ran out of daylight, but I'll finish it tomorrow morning.
 

Attachments

Top
AdBlock Detected

We get it, advertisements are annoying!

Sure, ad-blocking software does a great job at blocking ads, but it also blocks useful features of our website like our supporting vendors. Their ads help keep Steel Soldiers going. Please consider disabling your ad blockers for the site. Thanks!

I've Disabled AdBlock
No Thanks