• Steel Soldiers now has a few new forums, read more about it at: New Munitions Forums!

  • Microsoft MSN, Live, Hotmail, Outlook email users may not be receiving emails. We are working to resolve this issue. Please add support@steelsoldiers.com to your trusted contacts.

New M1009 Owner

BigRix

Member
104
0
16
Location
Tucson, AZ
More horse tradeing netted me a TH400 with 208 transfer case.

And a 14 bolt rear and 8 lug 10 bolt front. Both are 4.10 gear ratio.

They need some work but I don't think they are too bad. Broken axle on the right front but I can use the parts out of my 10 bolt. No reverse on the trans but after opening her up I find the rest of the trans looks great. Transfer case sounds bad but I believe the one behind the SM465 is the same.
 

Attachments

BigRix

Member
104
0
16
Location
Tucson, AZ
Got the case cleaned up and had an unpleasant surprise. Case was broken at one time and the weld is cracked. Needs some more work or a new case. Also the output shaft is twisted from what I speculate was a locked up transfer case. This would explain the burned up low/reverse band.
 

Attachments

BigRix

Member
104
0
16
Location
Tucson, AZ
More craigslisting and I found a good 2wd case that I'm converting to 4wd. It was from a 1 ton Suburban and is more heavy duty than the 4x4 case I originally had. Also sourced the correct output shaft. Looks like I had the correct governor all along. I'm starting a new thread about the conversion to document the process for future reference.

Turns out someone welded a 700r4 output shaft to the 400 shaft and used a 27 spline 208 transfer case. The t case broke and locked up. It twisted the shaft and smoked the low/reverse band.

As soon as the trans is built and my other t case is resealed I will get them stabbed. I still need to find the correct crossmember, or build one. Make cooler lines and get her on the road.

Can someone post a picture of the support brackets that go from the trans to the engine? I need to build some and can't for the life of me find where they would attach on the engine.
 

Attachments

BigRix

Member
104
0
16
Location
Tucson, AZ
Got the trans stabbed but still working on finding a crossmember. Hoping someone has a picture of the engine to trans support brackets. Were these used on the M1009? The brackets I have are off a gas engine and include three hole brackets that sandwich under the motor mounts. Not sure yet if I can use them yet.
 

BigRix

Member
104
0
16
Location
Tucson, AZ
Update:

Thansmission is in and it is moving under it's own power. I had some shifting probs and it would sometimes start in second, then I lost third. Traced it to a stuck governor. I freed it up and it stuck again. I will get that sorted out when I get back from vacation. The one thing I didn't reseal on the transfer case leaks (case halves) so it will have to come out. Had to track down the proper adapter u-joint and bolts and retaining straps.

I was almost ready to throw all these autos away and put the SM465 in but I'm glad I went with the TH400.

Need to sort out some front end probs and I will be searching the sight for "Death Wobble" as that simply has to go. I have never experienced such a violent shake in my life, and I work on cars for a living. I'm really not feeling the lift and if I could I would go back stock height, I would, but that is for further down the road.

My friend at work who is into Blazers keeps giving me a hard time about turning it into an "Old Man" car. I'm ok with that.

I could see this thing with stock springs, 3/4 ton 4.10 axles, and M1008 wheels and tires.

More sleepless nights await, I am sure, but that is half the fun.
 

1984M1009

New member
106
0
0
Location
Phoenix, AZ
Rick if you want the stock front springs I have them but they are shot IMO

it had a front end sag when I bought it

With the death wobble did you air up all the tires because they all only had like 10psi in them.

I would probably replace all the steering components because there no doubt shot being 25 years old
 

BigRix

Member
104
0
16
Location
Tucson, AZ
Aired up to 30 psi but that's it. I need to go through the front end for sure but this was just a thrash to get it driving before I took the fam to Disneyland.

Many firsts for me with this vehicle.
First diesel.
First lifted truck.
First Chevy truck.
First military vehicle.

Love the challenge of new things though.

I've been a professional mechanic for 25+ years and have worked on all these kinds of trucks but never owned them. I'm hoping to daily drive this soon as my current ride gets 10 mpg. I'm sure I can beat that with the M1009 and the price of diesel is dropping to boot.
 

BigRix

Member
104
0
16
Location
Tucson, AZ
Drove home tonight and things went pretty well. Found some loose front end parts that need to be addressed and the wobble should be gone. Need to finish plumbing in the trans cooler and run it to the exhaust shop. Yep, glass packs are too loud or I'm too old.

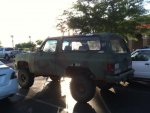
Any suggestions whether I should run the duals out the back or out the sides like stock? Any way to run it so I can drive with the back window down and not fill up the interior with fumes?ImageUploadedByTapatalk1339593006.906718.jpgImageUploadedByTapatalk1339593023.075453.jpg

I have been through the 34-p TM and can't find the these engines used the strut bars that go from the torque converter cover to the motor mounts. Looks like they used one of the bolts for a cooler line bracket. Correct?
 

BigRix

Member
104
0
16
Location
Tucson, AZ
Got the pipes and mufflers installed today. Sounds great. Found a smaller speedo driven gear and now the speedo is only off by 8 mph. Couple ball joints on the drivers side and the front end is doing better. ImageUploadedByTapatalk1340156966.774984.jpgImageUploadedByTapatalk1340156982.484935.jpg
 

BigRix

Member
104
0
16
Location
Tucson, AZ
Straightened out the tie rod and installed a new stabilizer shock. 1/8" toe in measured with a tape measure and it is driving MUCH better.

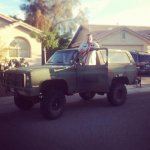
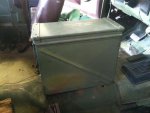
Couldn't resist snapping a pic out front of the local surplus store. Stopped in to pick up an ammo can to use as a center console.

ImageUploadedByTapatalk1340240047.041192.jpg
 

BigRix

Member
104
0
16
Location
Tucson, AZ
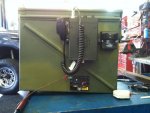
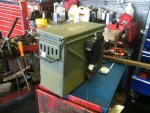
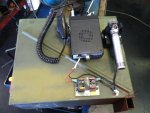
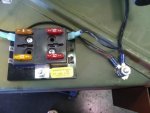
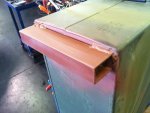
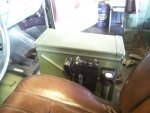
Worked on the center console today. Modified one end so I can lift the lid up all the way. Attached the CB and my old Stinger flashlight. Took the fuse block that I had removed from under the hood and hung it in there too. Made a ground lug and wired it all up. Welded a piece of tubing to the bottom rear so it would sit flat and temporarily screwed it down. I like it. Cup holders next.ImageUploadedByTapatalk1340326946.966581.jpgImageUploadedByTapatalk1340326969.171266.jpgImageUploadedByTapatalk1340326986.008411.jpgImageUploadedByTapatalk1340327002.075402.jpgImageUploadedByTapatalk1340327017.956562.jpgImageUploadedByTapatalk1340327035.523561.jpgImageUploadedByTapatalk1340327051.272070.jpg
 

CycleJay

New member
1,433
7
0
Location
Marietta, Ga
re; New M1009 Owner

Worked on the center console today. Modified one end so I can lift the lid up all the way. Attached the CB and my old Stinger flashlight. Took the fuse block that I had removed from under the hood and hung it in there too. Made a ground lug and wired it all up. Welded a piece of tubing to the bottom rear so it would sit flat and temporarily screwed it down. I like it. Cup holders next.View attachment 340054View attachment 340056View attachment 340057View attachment 340058View attachment 340059View attachment 340060View attachment 340061
Hello BigRix,

Your console looks good. I would like to do the same.
But I have yet to find a 20mm ammo can. I have looked everywhere.

Anyway, what are the dimensions on the tubing? so if/when I find a 20mm can,
I can do the same, so mine to will sit flat.

And the power going to the little fuse block you put on the can,
where did you get the power from? did you run a line straight from the front battery?

Good night,
 

BigRix

Member
104
0
16
Location
Tucson, AZ
Just found the tubing laying around out behind the shop. 1.5"x1.0".

Plenty of 20mm cans at my surplus store. Stacked 4' high. $25.99 plus tax. Picked out the nicest one. Most were kinda rough.

I ran a wire to the ign terminal on the fuse block. Will reconsider that if I add much more stuff to the box. Will probably end up with two fuse blocks. One ignition fed and the other batt fed.

Exhaust was 2 1/4" to match the stock pipes. Everyone, including myself was afraid to take the head pipe bolts loose for fear of breaking them. So he attached to the best part of the pipes that were left. He had some nice used take off mufflers that looked brand new to me. Muffs and pipes sat me back $180 out the door. Now the family will at least ride in the truck with me, although begrudgingly.
 

BigRix

Member
104
0
16
Location
Tucson, AZ
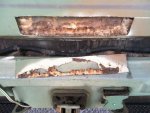
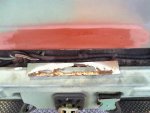
Took the plunge and attempted my first rust repair. Decided to work on the tailgate first.

I'm sure some of you have seen something like this before.

ImageUploadedByTapatalk1340759501.656379.jpg

Jumped in and went to town with the die grinder.

ImageUploadedByTapatalk1340759566.131012.jpg

A couple of hours later and it's ready for a skim coat of bondo. Just a series of tack welds cooled off with compressed air from the blow gun. Very tedious but after two Mondays in a row this week it was the perfect theropy.

ImageUploadedByTapatalk1340759764.130064.jpg
 

BigRix

Member
104
0
16
Location
Tucson, AZ
After having a couple no crank problems that almost left me stranded, I decided to do a 12 volt conversion.

I traced my problem to a faulty starter so it made sense to do it now.

Picked up a 28MT from the local parts house where we buy all our parts for work. The counter guys there really bend over backwards for us so I know warrantees will never be a problem down the road. New bolts and the bracket from my local Chevy dealer.
Needed a new batt cable to connect positive to positive and so far so good.

Still trying to find the proper torque converter cover so if anyone has a spare to sell cheep, let me know.
 

BigRix

Member
104
0
16
Location
Tucson, AZ
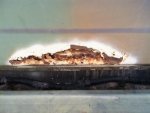
Tackled the rust holes in the rear as they were the biggest eyesore.

Welded in some steel behind the holes and did my best to tack weld them in place. A couple coats of bondo and things are coming along.

ImageUploadedByTapatalk1343399003.268181.jpgImageUploadedByTapatalk1343399018.252183.jpg
 

forest522

Member
308
4
18
Location
Bernalillo, New Mexico
BigRix - Very well done sir! Rust repair can be very frustrating, but, like marraige, very rewarding too! :mrgreen:
I applaud your decision to do the 12 volt conversion. It has helpee me to unravel numerous issues.
Looks great sir!:beer:
 
Top