• Steel Soldiers now has a few new forums, read more about it at: New Munitions Forums!

  • Microsoft MSN, Live, Hotmail, Outlook email users may not be receiving emails. We are working to resolve this issue. Please add support@steelsoldiers.com to your trusted contacts.

UPFINN's Deuce Build

rustystud

Well-known member
9,071
2,389
113
Location
Woodinville, Washington
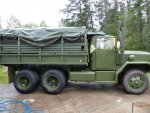
Sure is turning out good, great color choice. It's looking like a brand new truck. I like the roll up sides on the cargo cover. Are they all like that?
You can roll up any deuce's side canvas, and Yes your truck is looking great ! I also really like that color ! Reminds me of when I first went into the Marines before all the trucks went Camo.
 

UPFINN

Member
229
1
18
Location
Ishpeming Michigan
You can roll up any deuce's side canvas, and Yes your truck is looking great ! I also really like that color ! Reminds me of when I first went into the Marines before all the trucks went Camo.
The color seems a bit darker than 383 green. Seems like it is in between the Vietnam era olive drab and 383.
 

UPFINN

Member
229
1
18
Location
Ishpeming Michigan
This month has been busy, and since today was a rainy day I finally had time to upload some pictures.

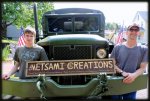
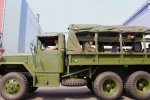
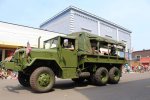
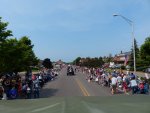
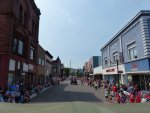
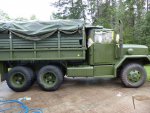
Here are some pictures of the deuce in the Ishpeming 4th of July parade. Everyone loved it. There has not been a deuce in the Ishpeming parade for years.

P1090694.jpgP1090695.jpgP1090701.jpg11013539_758007967654557_3554840036517162559_o.jpg11313181_655885804542546_462110091284303002_o.jpg11539036_655885741209219_4054616426612038787_o.jpg11717509_655885707875889_1898936488615493025_o.jpgP1090718.jpgP1090713.jpgP1090719.jpg
 

Attachments

UPFINN

Member
229
1
18
Location
Ishpeming Michigan
Yesterday I did the last coat of paint on the deuce. I got rid of all the thin spots where you could see a little primer, and it made it a darker green. However, it looks horrible compared to what it did before :sad:. There are white cloudy streaks at the edge of the spray passes. They did not appear until the wetness of the paint flashed off minutes after spraying. It looked like I got an even coat at first, but then the streaks appeared.

Has anyone had this problem?

The only thing I did differently was to increase the amount of paint coming out of the gun to paint faster. Maybe I there was too much over spray? The whiter areas seem a bit rougher compared to the solid green areas. The problem is even more noticeable since I sanded to 320 grit before the last coat instead of 120 like the previous, so it is much more glossy.

It is going to rain all this week, but Monday will be dry. I plan on setting the hvlp gun to spray less material like before and do a 4th coat. That is all I can do. I do not want to risk more sanding as it keeps getting smoother and glossier and I do not want that.

P1100104.jpgP1100106.jpgP1100105.jpg
 

muthkw25

Well-known member
Steel Soldiers Supporter
439
481
63
Location
Sayre, PA
What color paint did you end up going with again? Maybe it's the angle but the paint seems to be much brighter than 383 green that's on my truck.
 

UPFINN

Member
229
1
18
Location
Ishpeming Michigan
What color paint did you end up going with again? Maybe it's the angle but the paint seems to be much brighter than 383 green that's on my truck.
The paint is 34094 or "383" green. All surface oil based enamel from Sherwin Williams. When I got it mixed they said the color may have been a little off.
 

UPFINN

Member
229
1
18
Location
Ishpeming Michigan
Under closer examination it seems the streaks in the paint are areas that were not overlapped very good. Can I just paint it again carefully and it will look ok?

I am a perfectionist who doesn't know what to do :hammer:
 

UPFINN

Member
229
1
18
Location
Ishpeming Michigan
**Update**

Yesterday I set the hvlp gun to a smaller pattern and overlapped the passes better and went slower. I tested it out on the tailgate. The paint came out nearly flawless! The real challenge will be duplicating this feat on the hood! I will finish the whole truck tomorrow.

I have been researching DIY spray on bed liner options for coating the inside of the bed, cab, hood, and fenders. I think I will go with Al's Liner over Al's heat and noise reducer for the hood, firewall, and cab. Inside the bed I will likely use rustoleum truck bed coating. It is cheap and a bit thin, but the texture is nice. Plus I won't worry too much if I scratch it up since re coating once in awhile is no big deal.

My big question is, is it safe to spray bed liner or latex acrylic sound deadener over oil based paint or rustoleum rusty metal primer?

I read that putting a bed liner or latex based sound deadener over oil based paints/primers will peel off over time. Oil based paints/primers will off gas as they cure, lifting any polymer coating off of them, or the coatings will flex too much over the brittle oil based paint/primer and cause it to peel off. I called customer service for the Al's Liner and was told that I would have to experiment, and that the safest way to apply it is to rough up the old CARC without priming and then spray.

When I line my truck I will have to put the liner over old CARC, new oil enamel, and rustoleum primer.

I have been reading you need to let rustoleum rusty metal primer cure for a few weeks before painting to avoid peeling, but I have painted 24 hours after and have had no problems. The primer is pretty rough and a pain in the a$$ to remove, so I don't see why bed liner would peel it off.
 

UPFINN

Member
229
1
18
Location
Ishpeming Michigan
Last evening I did the last coat of paint and it turned out pretty good, however overnight we had heavy dew.

I get up this morning to find the fenders and doors turned cloudy from dew. I could see water rings. :mad: I assume the dew collected on the fenders more than any other part of the truck and the doors were sprayed last right around sunset. The doors also had two coats of paint done withing two hours. It says to wait 24. At least the hood is ok.

I am going to lightly scruff the doors and fenders and redo them this afternoon. I am loosing track at how many coats of paint I put on this thing. Something goes wrong each time, either operator error or nature. The paint keeps getting more glossy with each re coat and the mistakes get more noticeable.
 

UPFINN

Member
229
1
18
Location
Ishpeming Michigan
**Update**

Paint job on the outside of the deuce is pretty much squared away. I spent most of August cleaning and sanding the bed, axles, battery compartment, and tool box.

Today I sprayed the primer in the bed and started spraying the axles before it got dark. Tomorrow I plan to finish the first coat of primer on the axles with a second coat on Saturday.

On Saturday I hope to be able to start pulling the wheels off to adjust brakes, grease bearings, and repaint rims and drums.

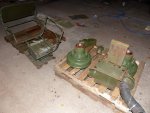
While I wait for the primer and paint to dry on the wheels I will start to clean off the oil undercoat inside the engine bay on the hood and side panels. I will be spraying sound deadener and bed liner. After lining the engine bay I will need to pull the seats from the cab and reupholster them. The cab will be sanded, primed, and coated with bed liner and fresh paint sprayed on the dash panel.

After all this I can finally change all the fluids and filters. I may need to also replace a few coolant hoses and a fuel line. The truck should be done just in time to collect firewood. :driver:
 

gimpyrobb

dumpsterlandingfromorbit!
27,785
747
113
Location
Cincy Ohio
**Update**

Yesterday I set the hvlp gun to a smaller pattern and overlapped the passes better and went slower. I tested it out on the tailgate. The paint came out nearly flawless! The real challenge will be duplicating this feat on the hood! I will finish the whole truck tomorrow.

I have been researching DIY spray on bed liner options for coating the inside of the bed, cab, hood, and fenders. I think I will go with Al's Liner over Al's heat and noise reducer for the hood, firewall, and cab. Inside the bed I will likely use rustoleum truck bed coating. It is cheap and a bit thin, but the texture is nice. Plus I won't worry too much if I scratch it up since re coating once in awhile is no big deal.

My big question is, is it safe to spray bed liner or latex acrylic sound deadener over oil based paint or rustoleum rusty metal primer?

I read that putting a bed liner or latex based sound deadener over oil based paints/primers will peel off over time. Oil based paints/primers will off gas as they cure, lifting any polymer coating off of them, or the coatings will flex too much over the brittle oil based paint/primer and cause it to peel off. I called customer service for the Al's Liner and was told that I would have to experiment, and that the safest way to apply it is to rough up the old CARC without priming and then spray.

When I line my truck I will have to put the liner over old CARC, new oil enamel, and rustoleum primer.

I have been reading you need to let rustoleum rusty metal primer cure for a few weeks before painting to avoid peeling, but I have painted 24 hours after and have had no problems. The primer is pretty rough and a pain in the a$$ to remove, so I don't see why bed liner would peel it off.

When I had a professional do the bedliner in one of my trucks, he said he used like 30 grit to rough up the bed and remove paint. He said it was best if it went on metal and not paint. Ymmv
 

UPFINN

Member
229
1
18
Location
Ishpeming Michigan
When I had a professional do the bedliner in one of my trucks, he said he used like 30 grit to rough up the bed and remove paint. He said it was best if it went on metal and not paint. Ymmv
I just roughed up the old paint and rust in the bed and sprayed the primer over it. This week I am going to put the liner over it. Hopefully it works. I was thinking of just painting it, but the oil enamel takes so long to dry it would not be ready in time before I need to haul anything. The paint is still soft on the truck, but it is getting better.
 

UPFINN

Member
229
1
18
Location
Ishpeming Michigan
I ran into a bit of a problem with the 1 1/8 anchor pin jam nuts. I am getting ready to adjust brakes. I have two TM's that mention different ways to loosen and tighten them. One TM says to tighten to 80-110 ft lbs which requires using a socket, while the other TM says to use a box end wrench to tighten them with no torque specified.

The TM on this thread says to torque the nut to between 80 to 110 ft lbs: http://www.steelsoldiers.com/showthread.php?26011-Deuce-brake-adjustment-TM

TM 9 - 2 3 2 0 - 2 0 9 - 2 0 - 3 - 2 does not specify any torque and requires use of a box end wrench, however an average box end wrench won't fit.

The big issue is that using a socket does not let you hold the 1/2 in pin from turning, however while using a breaker bar and socket I don't THINK the pins were turning while I loosened the nuts.

My 1 1/8 box end wrenches do not have enough offset to go over the nuts because the backing plate blocks them. I can use an open end wrench, but it is rounding off and nut and I can not get enough leverage.

My other problem is that on the front axle the boot guard blocks you from using a socket and breaker bar or a torque wrench. Would it be safe to remove the boot guards? I would have to take out two bolts on the bottom and top of the steering knuckle along with the grease fitting.

To summarize everything: The jam nuts are tight as h@!!, I am using a breaker bar to loosen them and both the nut and pin may be be moving, my box end wrenches do not have enough offset, open ended wrenches are rounding the nuts off, and I am not sure if the nuts need to be torqued or hand tightened because I have two TMs.

I think I might need a wrench called a "deep offset box end wrench". Were would I get one of these without buying a set? I can not really find any online.
 
Last edited:

UPFINN

Member
229
1
18
Location
Ishpeming Michigan
Build Update!

I'm making slow progress on the project, but it is starting to pick up. I have mainly been working on servicing the bearings and brakes, cleaning and sanding to prepare for bed liner, and spraying paint on the drums, axles, and rims.

Had a big fail with the rustoleum truck bed coating. I put it over the rusty metal primer and it peeled up. I talked to customer service and they said that I thinned the primer too much when I sprayed it, as it was a bit glossy. I also thinned the liner with acetone to spray (kept clogging shutz/undercoat gun), which was not recommended. The high performance rusty metal primer was mainly made for oil enamel paint. It will work with the bed liner if it is fully cured. The primer can be top coated quicker if only a thin coat is used followed by sanding for best adhesion.

They told me the best course of action would be to use paint stripper on the peeling liner and primer, scrape peeling coating, clean with water and acetone, sand, clean with a fast drying paint prep, then wait a few days for any residue to evaporate the soft paint to cure before re-coating. If possible it was recommended to spray the liner directly over old paint or rusty metal without a primer. The liner has rust inhibitors built in.

User error with the primer was evident, as it only happened in patches, either were the primer or liner was thinned too much. Where it stuck, it stuck good. I will be happy with the liner when I can get it on correctly.

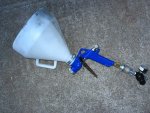
I will attempt to spray the liner in the bed again tomorrow. This time with a hopper/texture gun. I was going to roll it, but spraying is nice.

In my tool box I used the primer, and was planning on putting the lining over that, however I think I will just paint it, then line later.

If anyone ever gets in a situation like me, do the following.
1) Wait for primer to cure (long time)
2) Top coat primer with paint (looks better), sand after cured, then top coat with liner.
3) Apply light coat of paint stripper to primer to remove any uncured and loose primer, clean, sand, let dry a week, then apply liner.
 

UPFINN

Member
229
1
18
Location
Ishpeming Michigan
I also have finished servicing and repainting the rear tandem.

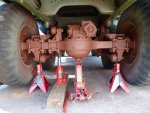
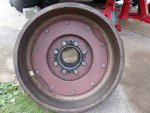
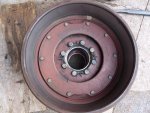
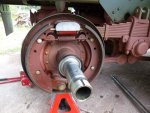
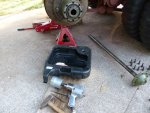
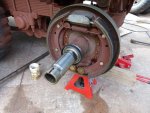
The wheel bearings and brake shoes looked almost new! I cleaned and re-packed the bearings, cleaned and painted the drum and wheels, and adjusted the brakes.

The brake adjusters were tricky. Instead of .020in at the top, and .010in at the bottom, I split the difference to .015in. I tried my best to get the feeler gauge to slide evenly on all four measuring points, but it is not perfect. Also, when tightening the jam nut on the lower adjusters, it is very hard not to move it out of adjustment somewhat. I just tried getting it as close as possible and called it good. I moved the upper adjusters a little to make up the difference.

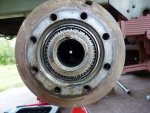
When I took off the wheel bearing nuts, they were completely loose! I did not even need a breaker bar or wrench to turn them. I was able to twist the socket by hand and they spun right off. The lock ring with the tabs was also not installed properly. Only a few tabs were bent. I also found that the wheel bearings had very little grease on them. it is like it was washed off. No wear could be seen though.

When I reinstalled the wheel bearings and drum/hub, I tightened the inner nut until I thought the hub was binding, then loosened it 1/8 a turn. The binding while turning the drum was hard to notice, It would still turn even with the nut as far as I could tighten it. I installed the lock ring, then torqued the outer nut to 130ft lbs. I also made sure the cork piece was in the keyway to block oil. When I reinstalled the axle flanges, the gaskets broke. I will need to take them back off to put on new ones. I also realized I forgot to bend down the lock tabs on the outer nut.

I am currently working on the front tandem/middle axle. Everything is going the same as the previous. When I reassemble it I will make sure to have new axle flange gaskets and not forget to bend down the lock tabs. I am reading that if it is difficult to judge inner nut tightness, you can torque to 50lbs then back off 1/8 turn?
 

UPFINN

Member
229
1
18
Location
Ishpeming Michigan
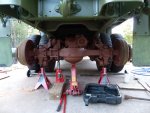
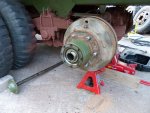
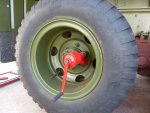
Here are some pictures. Brakes look like new! Really lucked out on this truck, everything is near new or freshly serviced except for the electrical system.

This was the rear axle. The middle looks just as good and the front is probably ok too.

P1110535.jpgP1110551.jpgP1110550.jpgP1110549.jpgP1110548.jpgP1110547.jpgP1110544.jpgP1110540.jpgP1110536.jpgP1110552.jpg
 

UPFINN

Member
229
1
18
Location
Ishpeming Michigan
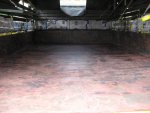
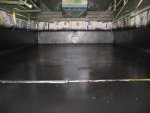
Here are some pictures of the Rustoleum Truck Bed Coating I sprayed in the bed. It turned out ok. I used a hopper/texture gun for the final attempt. For the first attempt at spraying the liner, I used a shutz gun, which clogs unless you thin with acetone and that is not recommended, which I did with poor results. This product is really meant to be rolled or brushed on, but the texture gun will work as long as you be careful to apply light coats, which I did not.

I put down rusty metal primer several weeks before the truck bed coating, and the primer had a reaction with the coating and peeled off. I also thinned the primer too much and it became shiny. This combined with the acetone thinned liner caused it to peel. I had to use paint stripper to take off the bad lining, then clean, sand, and clean again. I then re-sprayed with a texture gun.

Word of advice, if you used rusty metal primer and want to coat it with bed liner, let it cure several months. The other option is to top coat it with alkyd enamel, wait a few months, scuff it up, then apply the liner.

If you must put liner over the primer right away, you will need to use paint stripper to take it down some and sand it.

IMG_0267.jpgIMG_0273.jpgIMG_0286.jpg
 

UPFINN

Member
229
1
18
Location
Ishpeming Michigan
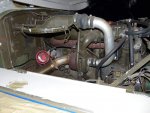
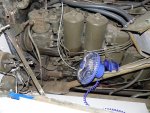
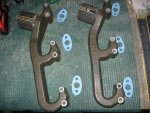
I also had to replace the coolant hoses on top of the engine, and while removing the water manifold tubes all of the gaskets broke. I had to cut out new ones since I could not find any to order online.

Now I need to find the torque of the bolts that hold the manifold back on.

IMG_0265.jpg
 

UPFINN

Member
229
1
18
Location
Ishpeming Michigan
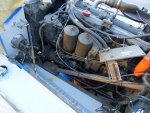
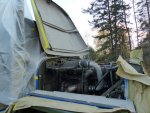
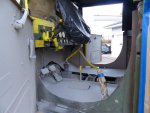
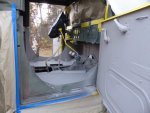
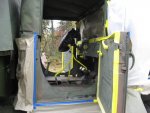
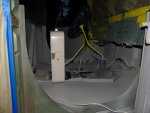
This week on Sunday I sprayed Al's Heat and Noise reducer in the cab and engine bay. It was kind of tricky to apply. It is a latex elastomeric ceramic coating similar to the much more expensive Lizard Skin. The directions said to spray with the hopper/texture gun for best results, which I did. However the directions stated to do one thick coat at 31 mils, or 1/32nd (no thicker than 32 miles, or 1/16). I found this was was a bit thick and I had some runs. Perhaps I did not have enough practice with the gun.

The strange thing is that Lizard Skin says to do two light coats several hours apart to get the full 31-40mils. Al's HNR says to apply a second coat after 24 hours. According to that logic if you were to brush it on in multiple light coats it would take several days.

Fortunately the day I sprayed it was in the 70s, and at night it was in the 50s. The next day it was 85F, and I brushed the Al's HNR on the engine bay side panels. Brushing was tricky. It was hard to lay it on as thick in one coat as with spraying. I did not want to wait 24 hours between coats so I brushed it thick, and I ended up with some runs, thick spots, and brush streaks. The thicker spots in the coating ended up skinning over and shrinking, leaving rifts in the coating. Peeling was not an issue.

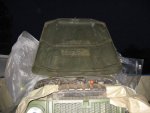
I ran two (later just one) box fans in the cab, and two small fans in the engine bay to aid drying. Today since it has been a few days drying I decided to sand the runs out of the hnr coating. To level out imperfections, I sprayed a light coat in the cab and under hood, then brushed the side panels. The light coat dried much faster and hid some of the defects. It was in the 50s while I was spraying. I should be ready to spray the green tinted Al's Liner this Sunday.

If I were to do it again, I would spray/brush on two light coats several hours apart after testing this method. If I did not test, I would spray/brush two light coats, waiting 24 hours like the directions say. I would make sure it is at least in the 70s for several days and dry, even though the directions say it can be applied above 40F. A shutz gun might work in the engine bay since it is smaller than the hopper gun.

Overall it took two gallons to coat the cab, doors, hood, and side panels.

I am happy with the product. It really took the ring out of the metal when you bang it. It has a duller sound now. I do not know how good the adhesion is. I can did my finger nails into it and pull chunks up with effort. I made sure to properly sand the old paint though before applying. I can even pull chunks off on areas with a rough base coat. I don't know if this is due to it being applied too thick, or just the nature of elastomeric latex coatings.

The softness does not bother me, as it will be top coated with Al's Liner like recommended, however I am worried about possible lifting of the liner/hnr. Only time will tell.
IMG_0292.jpgP1130308.jpgP1130307.jpgP1130306.jpgP1130303.jpgP1130300.jpgP1130298.jpgP1130297.jpgIMG_0297.jpgP1130311.jpg
 
Top