• Steel Soldiers now has a few new forums, read more about it at: New Munitions Forums!

  • Microsoft MSN, Live, Hotmail, Outlook email users may not be receiving emails. We are working to resolve this issue. Please add support@steelsoldiers.com to your trusted contacts.

What have you done to your HMMWV today/lately

jake20

Well-known member
433
846
93
Location
Illinois
Cleaned out the catalytic converter on my M1151A1. Turned it intake end down in a 5 gallon bucket to catch the mess. LOTS of BB-sized carbon granules fell out before even starting the process. Used a very concentrated solution of Simple Green followed by a 5 gal bucket of scalding hot water. After donning safety glasses, I then sprayed an entire can of carb cleaner followed by a high pressure water hose rinse. I used a leaf blower to dry with very little restriction in flow noticed at the output. Using the AL sunshine to finish drying up any residual moisture.

Before
View attachment 899868

View attachment 899869

After
View attachment 899870
I suppose given the heat levels it’s normally exposed to, could also just leave a heat gun pointed into it at full tilt for a bit lol

Curious how well this’ll work for ya, might give it a try on mine. For now I just robbed a cat from another truck, so the clogged one is sitting on a shelf.
 

Gastrap

Active member
328
158
43
Location
Central Iowa
Found some 6T to group 34 Optima adaptor bases, and installed red tops with a NOCO 5X2 charger. I originally bought the NOCO to extend the life of my Hawkers since one was failing and always low, but I'll leave it in there for the occasional balancing charge. I've had a pair of 34 Optima red tops in my 1950 Cummins truck since 2014 still going strong, and have a 6 volt red top in my Model A going on 6 years. Hopefully these Mexican made Optima's work as well.

I installed a new GEP balancer, CDR valve, and transfer pump, and an AMG fuel sender, tank plug, air intake horn, and belts. Also installed the rear center radiator hood seal that was missing, and resealed the leaky oil filter adaptor using HPG's kit.

The Centramatic balancers work really well, I didn't pre balance the wheels at all and the new MT's run smooth.

I bought a new radio shelf, reflectors, and grabbed some 686 tan yesterday at the MVPA convention, so I can finish painting my green hood to match the truck.

Next I'll probably be going through the geared hubs . I have seals and lock rings on hand. I had to tighten one when I got the truck, and I've just been jacking it up and checking them occasionally for now. I can hear a little howl from the rear like a pinion bearing, but the pinion is tight and there's no metal on the differential magnet. Maybe it's just hub gear noise from the straight cut gears.
 
Last edited:

OBX

Well-known member
Steel Soldiers Supporter
117
379
63
Location
Moyock, NC
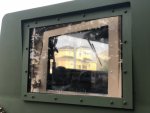
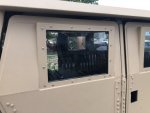
Fabricated fixed position windows and frames for my rear doors this weekend. Used 1/2” polycarbonate and 1 1/2” aluminum angle, 3/16” holes, 1/8” flat rubber for a seal on both sides of poly. Front doors have operable windows also made from 1/2” polycarbonate.
Doors and door jambs are still a work in progress for this 1152A1 conversion to 4 doors, utilizing a modified 1114 hardtop and custom fabricated 1/2” aluminum doors.

3B889B4A-10EB-4DB2-A78E-5E8057C23B9B.jpeg6D14E9E4-3BA8-42DF-84CB-29E09F9E988D.jpeg
 
Last edited:

Autonomy_Lost

Well-known member
673
1,510
93
Location
Pennsylvania
Fabricated fixed position windows and frames for my rear doors this weekend. Used 1/2” polycarbonate and 1 1/2” aluminum angle, 3/16” holes, 1/8” flat rubber for a seal both sides of poly. Front doors have operable windows.
Doors and door jambs are still a work in progress for this 1152A1 conversion to 4 doors, utilizing a modified 1114 hardtop and custom fabricated 1/2” aluminum doors.

View attachment 900041View attachment 900042
Looking really good! Almost reminiscent of an uparmored humvee. Cant wait to see the final result.
 

BruDogGA

Member
38
73
18
Location
Georgia
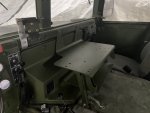
Painted doghouse and radio tray I installed. Also fabricated this aluminum arm to hold this mount that will serve to hold my cell phone. Apparently this was used to hold GPS devices in vehicles. Iphone 12 with case fits in it perfectly. Found a document storage box to go with radio tray, but of course it doesn't fit. One day:p I will get around to installing my bulkhead divider and new seatbelts. Tried to install a black 3 lever light switch, but apparently ruined the threading on 3 of the holes and the nut of 4th one came out entirely. Not sure how to save the $100 purchase.


1687362142904.jpeg
 

Mainsail

Well-known member
Steel Soldiers Supporter
1,487
1,640
113
Location
Puget Sound, WA
You had me at “my walk through the HMMWV junkyard…”. That’s sounds… well, that sounds awesome.
Well, I really don't know what to call it exactly. It's a parking lot with a collection of USN and USMC armored vehicles, mostly HMMWVs. My guess is they're awaiting demil to get all the armor off. Some don't look so good, minor collision damage and/or fuel tanks open to the air, one or two look pretty good. Several have rear hydraulic winches, others have one of the brackets for the Rhino tire carrier but no other parts. Most have fire suppression with most of the parts still there. Some have cammo pattern seats- like the green ones in mine but cammo, and look almost new.

Most of the HMMWVs were security forces vehicles, they have add-on strobes and NMO antenna mounts (no tactical vehicle antennas or mounts).

I keep hoping someone will see me poking around and come out to talk to me- I'd like to know the story, but so far not.
 

M1165A1

Well-known member
410
857
93
Location
The High Country, CO
Details?
I’d love something louder, but I’m not going to be that guy with a Train Horn.


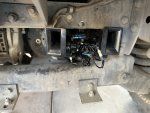
Just wired up a simple harness to hook it up. HMMWV stock horn is set up with two Packard connectors. To wire the new horn, disconnected those two and then wired in two identical "Y"s - the base of the Y is a Packard connector to the existing wire from old horn and the arms are terminals to each of the two horns.

A very inexpensive project - $25 for the horn, I have Packard connectors and heat shrink connectors on hand already, and six bucks at Ace for screws and a metal angle iron to mount.
 

Coug

Well-known member
Steel Soldiers Supporter
2,953
4,297
113
Location
Olympia/WA
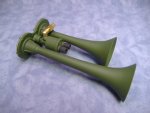
Finally upgraded the road runner horn to something audible.
View attachment 900346
I have the exact same horns (your amazon link told me I purchased them 3 years ago)
I ended up bolting mine, one on either side, to the top grill.

Mine are also wired in parallel to the stock horn, with a packard Y fitting.

d853d684a81eaa624aa11ea0122380cdbe6dd793-1.jpg
It doesn't look as clean as your install, but I don't have to crawl under the truck to disconnect them for different events. (the stock horn is good for a laugh when you're in a parade with 5 tons blasting their air horns, and you come along going "meep meep". If anyone asks, I just tell them "it's tactical")


Here's a source for the packard splitter wye


M1165A1

Well-known member
410
857
93
Location
The High Country, CO
I have the exact same horns (your amazon link told me I purchased them 3 years ago)
I ended up bolting mine, one on either side, to the top grill.

Mine are also wired in parallel to the stock horn, with a packard Y fitting.

View attachment 900349
It doesn't look as clean as your install, but I don't have to crawl under the truck to disconnect them for different events. (the stock horn is good for a laugh when you're in a parade with 5 tons blasting their air horns, and you come along going "meep meep". If anyone asks, I just tell them "it's tactical")


Here's a source for the packard splitter wye


I tested my new horn with the stock horn using some alligator clips. I wasn't impressed that the stock horn added anything.

I did have to remove the front bumper, that took some time, but I am putting in a winch later this week so needed to anyway.
 

belted_guns

Active member
70
169
33
Location
Prosper TX
Built and installed my interior lights for my 1151A1. there is a light over each door, and then two in the hatchback area, one facing forward when the hatch is down, and one facing aft when the hatch is down. each have individual buttons to control on/off, red, blue, green, white. and then I have a front master switch panel.
 

Attachments

Top
AdBlock Detected

We get it, advertisements are annoying!

Sure, ad-blocking software does a great job at blocking ads, but it also blocks useful features of our website like our supporting vendors. Their ads help keep Steel Soldiers going. Please consider disabling your ad blockers for the site. Thanks!

I've Disabled AdBlock
No Thanks