solder job complete
Well the solder off/ solder on job is complete...not too hard for a green horn like myself.
The steps:
1) Bought Wagner 4863-1 bulbs off internet w/o pigtails $17.50
2) Pulled back rubber boots on old headlights and picked off sealant with fingernails.
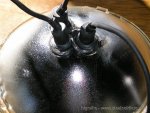
3) Heated metal ring with soldering gun on old bulb while lifting slightly on pigtail. Pigtail and ring come off quickly.
4) Placed ring and pigtail on new bulb aligning on metal nipple/connector.
5) Heated ring and pigtail while sitting on metal nipple/connector. When solder melted by touching it to bulbs connector (so you don't get a cold solder), applied solder filling metal ring. Note: there is nothing to hold pigtail to metal ring so an extra hand helps greatly.
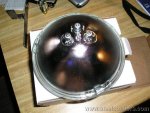
6) After cooled, squirt 3/8" ball of high temp form a gasket just above soldered area.
7) Push down and rotate rubber boot at same time to even out sealer.
")
Grin at your fine work.


 61.4 KB Views: 523
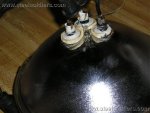 50.4 KB Views: 523