Monster Man
New member
- 884
- 1
- 0
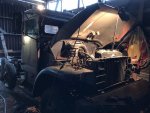
sick and tired of crouching down under your deuce to drain each tank individually? Sick of muddy shoulders and strained backs? Me too, but I wasn't keen on the remote drains I've seen, mainly because of cost. Hey, I'm REALLY cheap!
so I made my own:

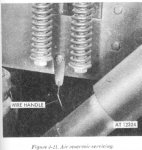
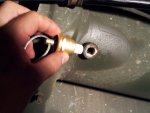
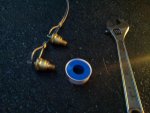
I first took out each petcock (make sure tanks are drained first). Then I cleaned off all the 40 years of gunk on them, and got to work. They will need to be in line with each other, but instead of opening front to back they will now open side to side. So, be sure to drill your hole in the right spot. Grind off a flat face on each drain handle (to facillitate drilling), and throw it in the drill press, with about a 1/8" bit
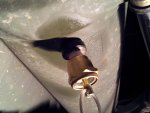
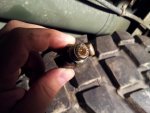
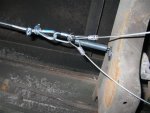
Get the holes drilled, the bend up your rod however you see fit. Mine ended up a little short because I put a loopy bend on the end, so it's best to start long. It's just plain old 3/8" round stock. Grind a flat on each spot you want to drill a hole through and center punch it. The holes will line up with the tank drain holes in the off position. So, once those holes are drilled you can stick your pins through- As said I'm super cheap so I used some nails, obviously not the best choice. A machine screw with a nylock would work better, hell, anything would work better! You just want to attach the rod to each handle securely, and still allow it to pivot in each direction.
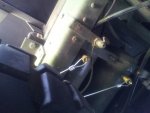
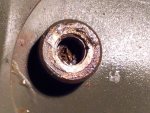
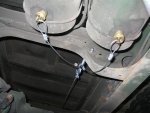
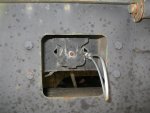
Put some new teflon sealant on the petcocks and reinstall them in the tanks, being sure they are inline with each other and not overtightened.
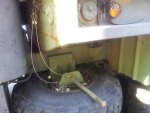
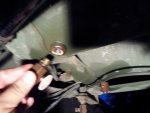
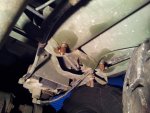
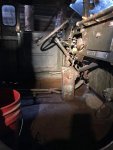
Put the rod on and pin it all together and figure out how you want the rod to route. Mine rests on the spare tire when not in use.
Then when it's time to drain the tanks, you simply pull the handle, and it opens both drains, push it and it closes them. Easy as pie, and cost about $2!!!
Be sure to paint it so it doesn't rust, it will get a lot of road debris.


so I made my own:
I first took out each petcock (make sure tanks are drained first). Then I cleaned off all the 40 years of gunk on them, and got to work. They will need to be in line with each other, but instead of opening front to back they will now open side to side. So, be sure to drill your hole in the right spot. Grind off a flat face on each drain handle (to facillitate drilling), and throw it in the drill press, with about a 1/8" bit
Get the holes drilled, the bend up your rod however you see fit. Mine ended up a little short because I put a loopy bend on the end, so it's best to start long. It's just plain old 3/8" round stock. Grind a flat on each spot you want to drill a hole through and center punch it. The holes will line up with the tank drain holes in the off position. So, once those holes are drilled you can stick your pins through- As said I'm super cheap so I used some nails, obviously not the best choice. A machine screw with a nylock would work better, hell, anything would work better! You just want to attach the rod to each handle securely, and still allow it to pivot in each direction.
Put some new teflon sealant on the petcocks and reinstall them in the tanks, being sure they are inline with each other and not overtightened.
Put the rod on and pin it all together and figure out how you want the rod to route. Mine rests on the spare tire when not in use.
Then when it's time to drain the tanks, you simply pull the handle, and it opens both drains, push it and it closes them. Easy as pie, and cost about $2!!!
Be sure to paint it so it doesn't rust, it will get a lot of road debris.


")