- 3,657
- 27
- 48
- Location
- Dallas, Texas
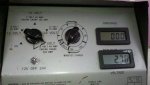
I did this over the weekend. For the 12/24V switch, I used a big knife switch, since I did not have a more 'normal' 25 amp switch laying around. It cost me about $3 for the rectifier and I suppose a SPDT switch for 25A would run about $5.
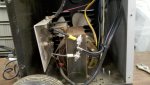
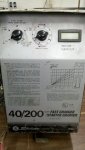
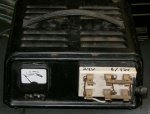
I try to explain how the charger's component parts work for those who are not electronically inclined. This is an old Sears 25-amp charger, about the size of a lunchbox, which is not a regulated type of charger, just an old-school one. I bought it from a pawn shop 'as-is' for $5 and found the rectifier diodes to be shorted out. I bought a bridge rectifier of 50A/100V rating from a surplus store and wired it back like the original, using only half the bridge. The mounting was simple because the monolithic block the rectifier is built into is insulated and just mounts with one screw through a hole to the rear wall of the charger to dissipate heat. I used some silicon grease to help the heat to be conducted away. Later I decided that since the voltage was available from the transformer due to the full wave center tap arrangement, I could go with a full bridge and get 24V for charging the deuce on occasion.
Most people would prefer a heavy duty toggle switch for the 12/24V selection, but the switch I used was already on hand, and is also effective in preventing people from wanting to borrow the charger! Only low voltage is exposed, not really a concern.
Attachments
-
 10.9 KB Views: 718
 -
 13.5 KB Views: 740
 -
 31.9 KB Views: 692
")