OK; locker is fully installed in the front axle!
I have installed lockers on quite a few different vehicles, so I do have a bit of experience with this procedure. I would rate the rockwell as being easier than most, as far as technical difficulty. Lockwire pliers and some lockwire were the only special tools needed (I did use my dial indicator as a "double check", but it isn't necessary). However, the weight of the 3rd member makes this a bit more difficult than your average gear/locker swap.
I had a pair of "donor" axles, so my plan was to pull the 3rd member out of one of the donors, install the locker into that 3rd, and then swap it into my truck. This would minimize the time my deuce was up on jackstands in my shop.
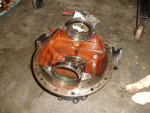
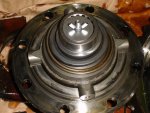
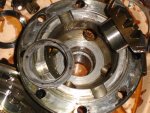
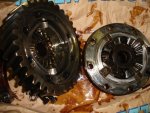
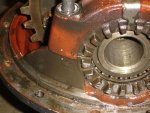
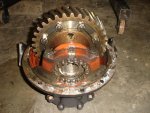
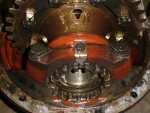
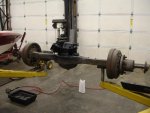
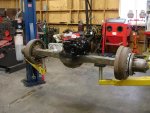
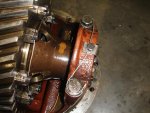
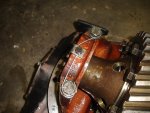
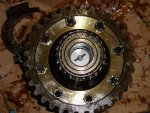
I used my shop crane to pull the 3rd out of the donor axle, so that wasn't too bad. The tip that spicergear provided was excellent; I stacked 2 washers on top of the nuts that were under the driveshaft flanges and it easily lifted the 3rd out of the axle housing as I backed the nuts off. The factory lockwire job wasn't very good; it certainly got the job done, but it wasn't the quality work I am used to seeing (see pics). I used a punch to mark the location of the bearing caps and the setting of the bearing adjusters (see pics). I also counted the number of threads showing on the adjuster nuts, and checked gear free play with a dial indicator (to make sure everything matched after I re-installed everything). Then, I cut the lockwire and removed it from the bearing caps and the bull gear. I pulled the carrier out of the 3rd member, being careful to keep the races with their respective bearings. I removed the bolts that held the 2 case halves together, and separated the case. I removed the spider gears and side gears. I made sure to also remove the thrust washers with the side gears; they cannot be left in place with the new locker. Then, I dropped the locker into place and left the bolt/wing nut/washers in place that held it together. I bolted the 2 case halves back together, and then removed the bolt/wing nut/washers. I ran lockwire through all of the bull gear bolts the same way it was from the factory; conventional lockwiring isn't needed here since the nuts are castle nuts. I'm fairly certain that cotter pins would work fine here too. I dropped the carrier back into the 3rd member, and put the bearing caps back in place finger-tight. Then, I moved the bearing adjusters back to their original positions (based on number of threads showing and the punch marks I made). I verified that free play matched with my dial indicator, and then torqued the bearing cap bolts down. Then I lockwired the cap bolts together (see pics). The donor 3rd member was now ready to go into my deuce.
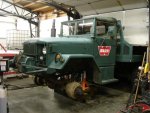
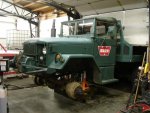
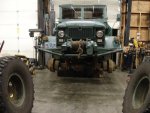
Once I had the locker installed in the donor 3rd, I pulled the deuce into the shop and put it up on jackstands and began the process of pulling its front 3rd member.
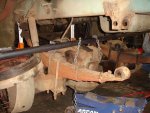
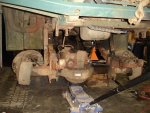
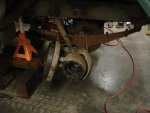
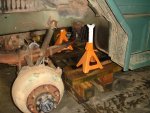
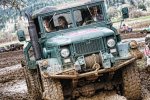
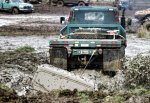
I chose to leave the front axle installed in the truck during the swap. I don't think I'll ever do that again! The idea was to avoid having to disassemble my hydraulic steering setup, but I don't think that the time saved was worth the effort it took to swap the 3rd members out with the limited clearance. I pulled the hubs/spindles/backing plates/front axleshafts, and then removed the pins from the front of the springs and swung the axle down to give me some more space to lift the 3rd member up. I ended up chaining the 3rd to a piece of DOM tubing so that we could lift it up from outside the truck; it turned out to be too difficult to try to handle it from underneath the deuce. After it was out, I cleaned out the inside of the axle housing and put about 6 quarts of fresh gear oil in (easier to dump it in now and top it off with 1 or 2 quarts through the filler hole later). I chained the donor 3rd member to the piece of DOM, and we lifted/jockeyed/shimmied/swore it into place. Then I reassembled the front axle.
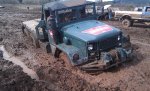
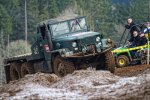
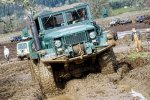
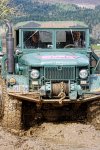
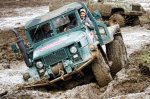
Initial impressions are great; it doesn't seem to lock up unnecessarily. I can hear it clicking during tight turns, and it locks up as soon as it is under power. I have hydraulic steering, so I can't "feel" when it locks up in the steering wheel, so I can't comment on extra steering effort. Overall I'm pleased! Hoping it will serve me well during Mudfest next month.
One more locker is going in one of the rear tandems next weekend...I expect that one to be easier because of the additional clearance under the bed.
I have several pics of the project; they go in order as the work progressed


 57 KB Views: 53
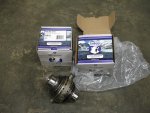 74 KB Views: 55
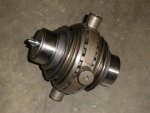 65.2 KB Views: 58