• Steel Soldiers now has a few new forums, read more about it at: New Munitions Forums!

  • Microsoft MSN, Live, Hotmail, Outlook email users may not be receiving emails. We are working to resolve this issue. Please add support@steelsoldiers.com to your trusted contacts.

M66 ring mount installation pics. Warning. A lot of pics.

ida34

Well-known member
4,118
31
48
Location
Dexter, MI
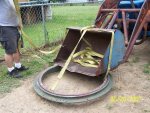
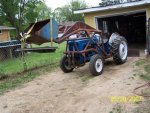
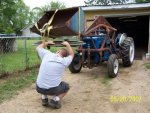
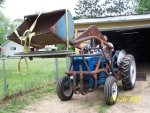
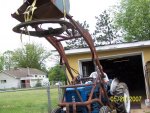
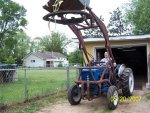
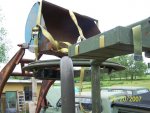
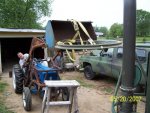
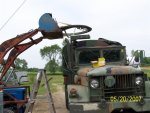
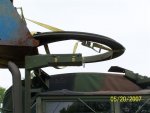
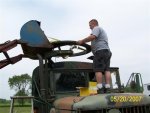
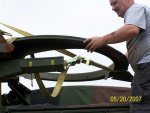
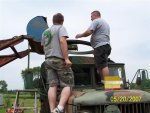
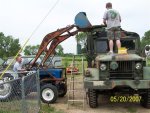
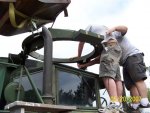
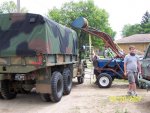
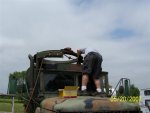
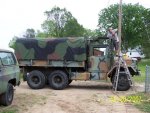
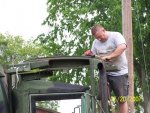
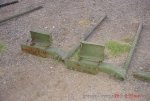
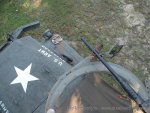
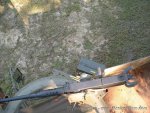
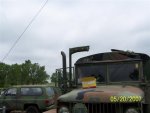
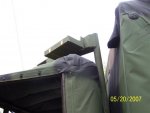
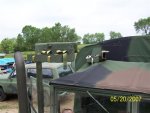
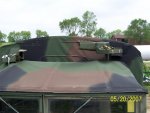
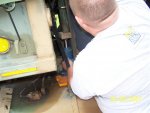
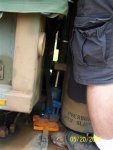
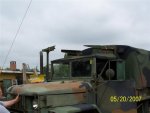
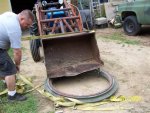
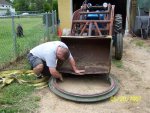
My daughter took plenty of pics while I was installing my ring mount. My son also helped. I put on the legs by myself. I put the back legs and put on the u bolts. I then used the jack to push them up to the proper height. The legs had holes that I put bolts in to hold it in place while I got ever thing else together. I do have the cab reinforcement kit. It came equipped with it from the military. My first attempt to haul the ring up was a no go. The bucket did not get it high enough. I then put part in the bucket and everything worked out. I did have to muscle it around to get the holes to line up and it did fall one time. My son and I muscled it back into place. I did not put on the cradle because I want to make an adapter to put my M1919A4 on it. I will look for a fake M2 for parades and such. I wish I could afford a real one but no money for that now.
 

Attachments

David_4x4

New member
332
0
0
Location
North Texas
RE: M66 ring mount installation pics. Warning. A lot of pics

Awesome.

Hopefully we'll be able to get ours on in the coming weeks.
 

ida34

Well-known member
4,118
31
48
Location
Dexter, MI
More Pics.
 

Attachments

ida34

Well-known member
4,118
31
48
Location
Dexter, MI
Wait for it David.
 

Attachments

nickd

Active member
859
36
28
Location
Newport, Delaware
Nice job. I used an overhead ganrty with an electric hoist and trolley set up so I could drive under the ring and lower it down onto the legs. I also needed to turn the ring to line up the holes.
 

ida34

Well-known member
4,118
31
48
Location
Dexter, MI
I had trouble figuring out the hole alignment and which leg goes where. I figured all my pics may help someone else install. My daughter got out of cleaning her room to take the pics. I told her to take plenty of pics because I thought many would not turn out. She did a good job. Only 4 pics got discarded. One was of my son mowing an the other ones were her taking pics of my son's shoes and his face while he was trying to hide from the camera. The next in my series will be the winch install. I always think about taking pics afterward.
 

sermis

Active member
1,844
17
38
Location
Temple, TX
Can you snap a couple of pic's loking down from the top? How well did it line up. Mine was there and looked good from the ground but never really lined up. I only had one adjustine plate which was on the drivers side leg and could never get all the bolts in on the passenger side rear leg to line up. The back of the ring was over the back of the cab.
 

sermis

Active member
1,844
17
38
Location
Temple, TX
I would like some instructions. When I get ready to remount it I would like to do it once and be done this time.
 

MilitaryRestoration

New member
1,279
1
0
Location
Vancouver/Yakima, Wa
The two you have pictured above in the first picture are both for the passenger front. Usually you only use the straight horizontal style legs on both the back driver side and passenger side. Then I just use whatever plates mount up the best. Hope that helps, anyone correct me if i'm wrong.
 

sermis

Active member
1,844
17
38
Location
Temple, TX
II have 2 sets of legs. One goes back on my truck and the other is going with a ring I have sold.
I am trying to get the correct adjusting plates so I can get them painted and reinstall the ring and be done.
I did not have the front plate before. I had the plate in the 3rd pic mounted on the drivers’ side leg.
The ring just never lined up right no matter how much I moved it. My ring does not have the alignment hole and without the TM I have been guessing.
The plate in the 4th pic just got surplus out. Not sure if it is from a deuce but the leg indicates it was.
 

ida34

Well-known member
4,118
31
48
Location
Dexter, MI
Joe,
Your passenger side rear leg does not look right. Mine does not poke out like that. There should be four bolts for every leg to the ring and it looks like your front leg only has two. It took me a while to figure out the exact set up that allowed the proper four bolts for leg. You might want to try to mess with yours a little to get it just right. I did not have the alignment holes that guys talk about. If anyone needs me to take some close ups to show exactly what holes are used where I can try to get them loaded up tommarow.

Chuck
 

alphadeltaromeo

Active member
1,901
3
38
Location
Alto, GA
Dave_McConnell said:
I have the complete installation instructions/drawings for the m66 ring. They came w/ mine. I just have to find them and could make some copies if anyone is interested.
If you want to scan those or get me some copies I can scan them and make a PDF of how to do the installation so that it can be put on SS as a resource. Just let me know.

Andy
 

Trackiron

Member
43
0
6
Location
Canby, OR
I have never seen picture of how to get into the ring mount once it is installed.
I think you stand on the back of the passenger seat(diamond plate when flipped down - but what about the top? I have the ring mount canvas covers to cover the ring but there woudl be no 'seal' between the roof and the ring.

Do you take the soft top off - do you cut an access hole?

Rick Larson has a WW2 truck with a older ring mount and a hard top - and it had a hole cut in the roof.:?:
 
Top