QUADJEEPER
Member
- 797
- 8
- 18
- Location
- Winter Springs, FL
It's lockable too.X2 on the ammo can setup, probably going to be "tactically acquiring" that idea from you haha
Steel Soldiers now has a few new forums, read more about it at: New Munitions Forums!


It's lockable too.X2 on the ammo can setup, probably going to be "tactically acquiring" that idea from you haha
Good eye Craig, but all is good. Terminals are capped and there is a 2x4 between the two batteries that are close. All three are tight in the box plus the allthread bar keeps them from bouncing up and hitting the floor.Take a look at the side battery posts, in the picture they look very, very close. I'd look for a sheet of melamine or thick plastic to wedge in-between those suckers. Not trying to be negative or take away from your build, it is outstanding. That just looks like a disaster waiting to happen.
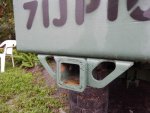
") Is that a Class III receiver?
Is that a Class III receiver?Thanks Mark. Not so sure about the engineering part. Pouring down rain, so no more pics at the moment, try to post more later. Just a little 2" bumper mount receiver I had laying around. No insulation above cab roof plywood, wanted it tight against the reinforcement strips, and they are only about a quarter inch high, so no room. Do have foam sound insulation between the plywood and the headliner cloth. In full sun, no heat gain, so it seems to be good. A few posts back there are two pics of a 24v to 12v converter I have for 100 amp 12v capability. It is connected to the Optima battery. Also have a small converter for the cameras, GPS and power outlets. Pic of that in previous post also. I like simplicity, so no 2nd alternator.I LOVE your engineering. It's so professional!
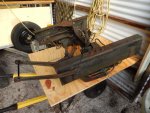
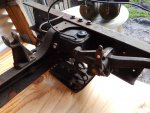
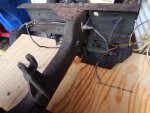
Could you please post more pictures of your vice mount? That looks really cool!
Did you insulate the space between the ceiling plywood and the hard top?
I saw three batteries in the box. I'm guessing two are in series, and the other is separate for your 12 volt hookups. How do you have the charging system set up? Did you add a second alternator for the standalone battery?
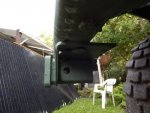
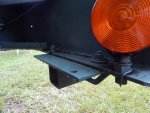
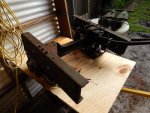
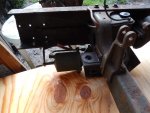
Rain stopped, so here are 3 pics of the vice mount.Thanks Mark. Not so sure about the engineering part. Pouring down rain, so no more pics at the moment, try to post more later. Just a little 2" bumper mount receiver I had laying around. No insulation above cab roof plywood, wanted it tight against the reinforcement strips, and they are only about a quarter inch high, so no room. Do have foam sound insulation between the plywood and the headliner cloth. In full sun, no heat gain, so it seems to be good. A few posts back there are two pics of a 24v to 12v converter I have for 100 amp 12v capability. It is connected to the Optima battery. Also have a small converter for the cameras, GPS and power outlets. Pic of that in previous post also. I like simplicity, so no 2nd alternator.
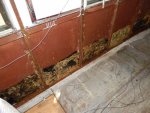
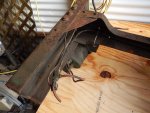
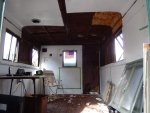
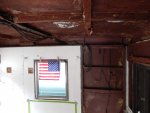
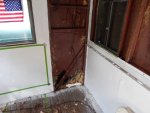
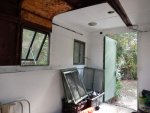
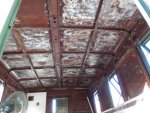
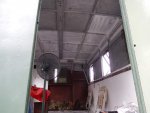
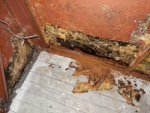
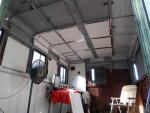
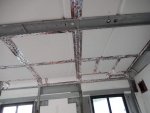
Escape route is a must in my opinion. I plan on a crawl through to the cab. A larger side window works too, but a big drop to the ground. The sheet metal is 18 gauge I believe. Approx. 1.5" space in between. I'm installing foam insulation now. Pics coming soon. I have done automotive wiring for over 35 years as a trade, so not letting the smoke out of circuitry is always part of the plan. In my posts, you can see pics of my breakers and multiple fuse blocks for that purpose. Thanks for your interest 61.I am in the process of trading for a M109 that I intend to modify the box for light camping and other uses. I plan to install a larger side window near the front to serve as possible second path of fire escape from the box. How thick are the metal sides and the distance between the outside and inside wall? I see from pictures that fiberglass batting is between the inner and outer panels. I plan to buy a motor home and shoe horn in some comforts.
I enjoyed your over head console work posts . It looks like the wiring in an ambulance I used to have, gobs and gobs of wires. Do you have good circuit protection to prevent in flight smoke in the cab. Keep up the good posts. You are inspiring me to get my M109 home.
Yes, welded vice to a plate with the male half of a hitch. I also have a BBQ grill that mounts there. ( While parked ).Thats exactly what i wanted to do under my toolboxes. Now your vice permanently mounted on a plate? Because i was trying to think of other ideas for those receiver tubes. Like a table or something
opcorn:

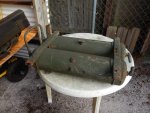
I'm looking for a way to make a rack for my trailbike. It might end up in/on the 105.I used two receiver mounts made form long stock material to build a motorcycle carrier.View attachment 518047View attachment 518046
Sorry for the hijack Scott!

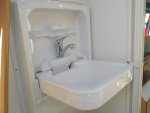
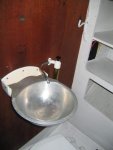
Thanks zout, I have looked nearly everywhere, all that I have found so far is European fixtures. Even tried a general Goggle search for RV and marine sinks.Quad - you probably have already done it so I hope I am not mentioning anything you have resources on - I would get a Camping World catalog or just check their web site for ideas - I would just keep looking at different stuff that finally made the M909 just come together - truck is looking great Bro - keep up the hard work and it will end so you can enjoy it all.