• Steel Soldiers now has a few new forums, read more about it at: New Munitions Forums!

  • Microsoft MSN, Live, Hotmail, Outlook email users may not be receiving emails. We are working to resolve this issue. Please add support@steelsoldiers.com to your trusted contacts.


All 5-tons: Heavy Duty Torque Rod Ends

MyothersanM1

19K M1 Armor Crewman
Steel Soldiers Supporter
1,954
401
68
Location
Culver City, CA
question, ok two questions, one - did you put anything on the rod ends when pressing the new ones in, anti-size etc..? second - Simp-5782 asked about pre-load, first i've heard. i will check the TM, but not sure i understand how the torque rod/bone would be "pre-loaded" - old off, new on. did you do such a thing or is he pulling our dog bone??

thanks
1 - Anti-seize
2 - M939-series TM calls for a "pre-load", but M809-series does not. Same identical suspension designed to handle the same load and handling. You be the judge. I did not preload the M818.
 

Swamp Donkey

The Engineer
Steel Soldiers Supporter
1,450
118
63
Location
Gray, GA
There was a thread a while back that discussed preloading the torque rods. I can't find it at the moment so I'll give a quick explanation again.

Preloading the torque rods is only needed if one of the axles is raised higher than the other when you replace the rods. If the axles are at the same level then preloading is not needed. Basically, if you left the tires on and they're all on the ground when you put the rods back on then no preload is needed.

What does preloading do? The most common position of the suspension is with both axles level. Whether driving or parked, both axles are level most of the time. Articulation, or one axle higher than the other, is a small percentage the suspension sees. If you raise an axle to replace a rod and install without preloading, the bushing will be in a state of stress when the axle is lowered again. This would put the rubber in the bushing in a stressed state when the suspension is in the most common position. This is why replacing a torque rod with all the tires on the ground doesn't require preloading. The rod was installed with the suspension already in the most common position.

This really only pertains to the upper rods due to their location, if following the procedure in the TM. I highly suggest the offset wrench for the upper rods though so this doesn't become an issue. Working on a vehicle with all the tires on the ground is also much safer than working on one sitting on jack stands.

I'll give 2 examples on why preloading is important for rubber bushing life:

1. We have several vibratory feeders at work that feed material from a bin at a constant flow. Each feeder has 4 bushings of basically the same design as our torque rod bushings. When new feeder bushings are installed the manufacturer wants an 8° preload off resting position when bushings are installed. The fronts are preloaded opposite of the rears. The feeder uses the equal and opposite rebound of the rubber to continue feeder movement so the motor isn't constantly working at full load. I can attest to the fact that bushings that are rated to operate for a couple of years will fail in mere weeks without preload. In the feeder instance, the most common position is with the bushings at 8° of rotation when the feeder is either full forward or reverse. The 8° preload puts the rubber in the bushing at rest when the feeder is at the forward or reverse extremes, which are the most common positions.

2. On my Honda 4wheeler, along with some other vehicles, the control arm bushings are fixed. The rubber does not rotate around the inner sleeve. If you loosen the control arm bolts with the front end raised then it must be lowered to the ground before they can be tightened again. This puts the rubber bushings at rest when the suspension is in the most common position. Normal ride height being the most common position here.

Well that wasn't exactly quick but hopefully it explains preloading and when it's needed. Keeping the rubber at rest as much as possible is the point. The longer it stays at rest the longer it lasts. Oddly enough...rubber that is flexed frequently retains flexibility longer than rubber than is not. But that is a whole 'nother conversation because there is a difference between "working" and "stressing". Give that suspension a workout every now and then. Those bushings will last longer.
 

Jbulach

Well-known member
Steel Soldiers Supporter
2,585
2,034
113
Location
Sunman Indiana
In process now. All 6 rods off and 12 link ends pressed out. Offest striking wrench worked, no spring pack disassembly. Put it on and pulled it rearward with the forklift and strap. 2-1/4” end wrench pushed up by a floor jack. This job will make a man out of you, but it is going well with no issue.

View attachment 728075
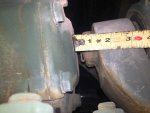
How thick is your wrench after you cut it, and were you able to get it onto the front and rear of the upper rods without taking the axle brackets off?
IMG_4966.jpg
It looks like I only have 1/2” max to get a boxed wrench on mine.
 

74M35A2

Well-known member
4,145
312
83
Location
Livonia, MI
The offset wrench is only for the right side, upper-centers.

All others are done with a standard 2-1/4” combination wrench. In the pic you showed, that is an upper end (not upper center). Have to hit those with an open end wrench only. Nut can’t be pulled out until the taper is broke free and pulled away. I also used a second 2” combination wrench as additional leverage onto the first.

The only thing I took off were the dog bones. Tires, spring packs, and brackets all stayed put.
 
Last edited:

gstirling

Member
Steel Soldiers Supporter
137
13
18
Location
knoxville tn
Ok guys a little input -advice. I have a M936a1, super singles, have successfully removed all four lower bones, have successfully removed the outboard nuts from the uppers. and have successfully pulled one cotter pin out on one center upper nut and one pin I could not remove whole, remains will have to be sheared when the nut comes off.

here's the issue/question - have the offset striking wrench that goes on the nuts and can get a full grip on the nut, but due to the tires and angles, using a 8-10 lbs sledge hammer, I can't seem to hit it hard enough to get either top nut to break free. I believe it is simply the angle and lack of swing area =not enough force. or my fear of wildly swinging a hail marry. but the same tools broke the others free with a few good solid hits.
so is it the obvious answer, take the tire off (PITA so trying to avoid.. LOL) and hope I can get a better swing? looking at it this may or may not allow sufficient room to swing and hit the wrench any better? this is my next plan of attack lacking a better idea.

I have tried several jacks in various configurations but again for one reason or another they too can't apply enough pressure at the right angle (bottle jacks don't work parallel to the ground- dang it or get flush enough to the frame to apply pressure in line with the wrench). On that subject a bottle jack is a much better method at breaking the nuts free than the sledge hammer for the lower bones where you can set the jack on the ground. learned this on the last of the lower bones. back to the issue at hand - any other ideas to apply enough force to the nuts? not sure why these "APPEAR" to be harder to break free, other than lack of applied force.

if removing the tire fails - considering renting a "jaws of life" type hydraulic unit as I think it would generate (like my 8 ton bottle jack) sufficient force and can apply it in line with the wrench to break the nuts free?? any one done this???
last option is to remove the tires and the strong back over the springs (the two u bolts that hold the strong back and springs to the center casting). to allow direct access to the nuts? really - really don't want to do this if at all possible.
any ideas???? better methods?
 
Last edited by a moderator:

gstirling

Member
Steel Soldiers Supporter
137
13
18
Location
knoxville tn
ahhh that would do it.... sadly I have the truck backed in - no way to get a vehicle behind it. I tried that type pull with a 1.5 ton come along - may try it again with a 2 ton come-along and a better strap. thanks
 
Last edited:

CARMAN

Active member
Steel Soldiers Supporter
668
134
43
Location
Broad Run VA
I’m writing this from the Poison concert, so it is going to be short. Use a strap and pull wrench rearward with a truck. That is how I did it.

View attachment 731101
Did not know they were still around. Journey was last night in my hood but had Graduation for my son. Brought the 5 ton and it was a hit as all his friends took a ride to the after party. Pictures soon.
 

silverstate55

Unemployable
Steel Soldiers Supporter
2,068
855
113
Location
UT
ahhh that would do it.... sadly I have the truck backed in - no way to get a vehicle behind it. I tried that type pull with a 1.5 ton come along - may try it again with a 2 ton come-along and a better strap. thanks
If you have a solid anchor point behind the truck, you could attach a snatch block to it and run the cable/strap/chain forward if necessary.
 

gstirling

Member
Steel Soldiers Supporter
137
13
18
Location
knoxville tn
success!!!! - guess I started whining for help to soon. broke free, both turning, now just have to get them out - but that should just be a tediously slow job - used a 2 ton come a long to the back of the truck and a much bigger strap so I could pull with out fear plus a whack or two with the sledge hammer. if that had not worked was looking at the port-a-power hydraulic units northern sells... hummmm.

I noticed that all my cotter pins were at 12 O'clock. did any body else clock their new ends when they pressed them in so the pins were vertical - on some ends if you just randomly press them in, and murphy steps in, there are certain positions that could make inserting the cotter pin much harder?
 

74M35A2

Well-known member
4,145
312
83
Location
Livonia, MI
I oriented 10 of mine in line with the length of the torque rod. The upper centers I did at 45 degree angle to the torque rod length. I used stainless bolts with lock nuts instead of cotter pins.
 

Buffalobwana

Well-known member
Steel Soldiers Supporter
1,392
170
63
Location
Frisco Texas
If you have a solid anchor point behind the truck, you could attach a snatch block to it and run the cable/strap/chain forward if necessary.
Just a quick note. Brick houses are not as strong as the three little piggies might lead you to believe they are. Trees are, and they grow back, unlike houses ... unfortunately.

They just don't build things like they used to.
 

gstirling

Member
Steel Soldiers Supporter
137
13
18
Location
knoxville tn
74M35a2 - just noticed that you thinned down the wrench on the opposite side I did. wonder if the suspensions on the two trucks are different. I even had to think the shaft a bit. and then it will still not allow the nut to be removed. fab'ing up a wrench like in the first part of this thread. also my last upper nut (ok that sounds wrong...LOL) still takes a come along to turn, its one bound up nut.

how did you drive the torque rod ends out in the center uppers? shims and a wedge?

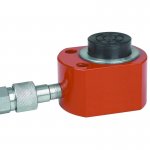
I was looking at this, 4 ton mini ram, 1.5 in tall- should fit. I just hate buying a one use tool. but at 39$ plus the pump which I think I can rent. or buy if all else fails for about another 50$.

mini ram.jpg
 

simp5782

Feo, Fuerte y Formal
Supporting Vendor
12,095
9,256
113
Location
Mason, TN
74M35a2 - just noticed that you thinned down the wrench on the opposite side I did. wonder if the suspensions on the two trucks are different. I even had to think the shaft a bit. and then it will still not allow the nut to be removed. fab'ing up a wrench like in the first part of this thread. also my last upper nut (ok that sounds wrong...LOL) still takes a come along to turn, its one bound up nut.

how did you drive the torque rod ends out in the center uppers? shims and a wedge?

I was looking at this, 4 ton mini ram, 1.5 in tall- should fit. I just hate buying a one use tool. but at 39$ plus the pump which I think I can rent. or buy if all else fails for about another 50$.

View attachment 731192
On a wrecker you have to remove the saddle on the axle to get the upper torque rods off on the axle side or You have to remove the clamp bracket they are on. Wrecker springs also come apart alot easier. Just undo the U bolts and flip the upper beam bar on its side to access the top nuts on the bogie.
 

74M35A2

Well-known member
4,145
312
83
Location
Livonia, MI
I put a wood splitting wedge on the inside of it to put some separating pressure on it. This is when TedCat stopped by, complained the hammer I was using was too small, pushed me out of the way, got under there, and swung/hit the bracket so hard that I thought he cracked it in half. In 2 hits, both rods jumped out. He flipped over, and beat on the opposing lower bracket of which I had zero separation force on yet, hit that one twice, and both of those rods were laying on the ground as well.

So, answer is, take the heaviest hand hammer you can find, and swing it with both hands like you would a ball bat, twisting your shoulders, and attempt to crack the bracket in half.

Or Fly TedCat in, that dude dropped 4 rod ends in 4 swings, and makes/sells stainless fuel tank dip tubes with easy to find JIC male flare ends!
 

gstirling

Member
Steel Soldiers Supporter
137
13
18
Location
knoxville tn
simp5782-you da man - just broke the front upper rod free - and was just going to ask if I had to remove the saddle on each axle to get the rod out... didn't see any other option, so thanks for answering that.

I put my torque multiplier on the big u-bolts around the springs just to see - and they are on tight. but that might be the easiest route as then I can hit the rod end with the sledge or even apply heat if needed. I use the mini ram to pop the front one free - easy as pie, but the back one does not want to let go. its 4 ton pump... not sure I've hit max yet but think I would rather take the spring strong back off.

simp5782 - before taking the ubolts off, don't I have to jack the truck as it looks like they transfer all the load to the springs and out to the axles?
 
Last edited:
Top
AdBlock Detected

We get it, advertisements are annoying!

Sure, ad-blocking software does a great job at blocking ads, but it also blocks useful features of our website like our supporting vendors. Their ads help keep Steel Soldiers going. Please consider disabling your ad blockers for the site. Thanks!

I've Disabled AdBlock
No Thanks