General Mcgregor
Member
- 980
- 24
- 18
- Location
- Dover, New Hampshire
Did the civy wiper conversion today.
First let me assure anyone looking to do this in the future that it is one of the easiest, cheapest and practical mods you can do to these trucks.
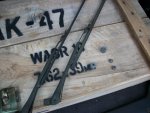
Part #'s
ARMS- ANCO # 41-01
BLADES-ANCO # 31-13
(yes these numbers have been listed before)![[thumbzup]](https://www.steelsoldiers.com/images/smilies/icon_smile_thumzup.gif "Thumbs Up [thumbzup]")
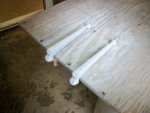
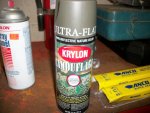
I elected to paint the arms to make them look as stock as possible.
Used a white basic primer (2 coats) and KRYLON CAMO OLIVE (2 coats)
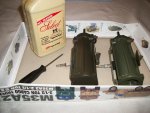
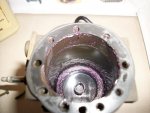
Also decided to tear apart my air pistons and clean them out. (the wipers are only as effective as the pistons!) Used some compressor oil to freshen them up. Did a side by side comparison (old/new) of the wiper arms and blades.
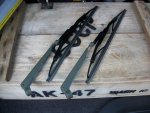
The old blades were almost completely useless and the arms were begining to rust out.
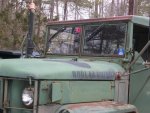
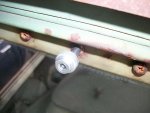
Installed the new arm using the provided hardware (NO MODIFICATIONS NEEDED!)
Looks great with the paint, in my opinion.
I guess it is becoming more difficult to find the 41-01 arm. Called NAPA and was told the part didn't exist in their system. Same story with a couple other locations, but PARTS PLUS in Rochester NH had them to me in 24 hours and apparently had no trouble locating them. Total cost including parts, frieght and paint was around $50.00
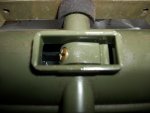
Here are some pics.
First let me assure anyone looking to do this in the future that it is one of the easiest, cheapest and practical mods you can do to these trucks.
Part #'s
ARMS- ANCO # 41-01
BLADES-ANCO # 31-13
(yes these numbers have been listed before)
I elected to paint the arms to make them look as stock as possible.
Used a white basic primer (2 coats) and KRYLON CAMO OLIVE (2 coats)
Also decided to tear apart my air pistons and clean them out. (the wipers are only as effective as the pistons!) Used some compressor oil to freshen them up. Did a side by side comparison (old/new) of the wiper arms and blades.
The old blades were almost completely useless and the arms were begining to rust out.
Installed the new arm using the provided hardware (NO MODIFICATIONS NEEDED!)
Looks great with the paint, in my opinion.
I guess it is becoming more difficult to find the 41-01 arm. Called NAPA and was told the part didn't exist in their system. Same story with a couple other locations, but PARTS PLUS in Rochester NH had them to me in 24 hours and apparently had no trouble locating them. Total cost including parts, frieght and paint was around $50.00
Here are some pics.