• Steel Soldiers now has a few new forums, read more about it at: New Munitions Forums!

  • Microsoft MSN, Live, Hotmail, Outlook email users may not be receiving emails. We are working to resolve this issue. Please add support@steelsoldiers.com to your trusted contacts.


M51A2 hydraulic power steering problem ross hydrapower

Robo McDuff

In memorial Ron - 73M819
Steel Soldiers Supporter
2,863
1,407
113
Location
Czech Republic
Starting again to get my steering in order. In short, left turn is without problem, right turn needs two persons to haul the steering wheel around. Hydraulic oil according TMs and recommendations here replaced and should be without air. Adjusting nut tightened to get rid of free play; worked also. Left turn right turn problem still exists.

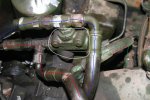
Pics below: power steering assembly of my 1973 M51A2 multifuel
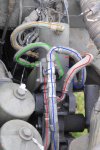
Power steering 03c-ps.jpg M51A2 hydraulics 07-ps.jpg

Pic left is an overview, pic right detail.

Red line: from pump
Blue line: return to reservoir
green - orange: action lines (or whatever you call them).

This set-up has some kind of link-valve above the power steering house; circled in white on the right pic. My guess is that this is a relieve valve.

There are similar threads, unfortunately without happy end or at least without a lot of pics of the actual repair.

Let's start with the dumber questions:
1) selector valve or spool valve or control valve probably all refer to the same thing, that is, part of what the TM calls the Hydraulic Control Valve Assembly?

2) this connector thingy seeming to directly link the inlet and outlet hoses is the relief or over-pressure valve?

And the key questions:
3) Could this be anything else than a problem in the Hydraulic Control Valve Assembly?

4) Is it possible to take off and repair the Hydraulic Control Valve Assembly without taking out the entire power steering assembly? Any pics or suggestions?

Unfortunately the M51A2 does not have removable lower side panels as described in the TM, so I either have to more or less take the whole fender part out or try find somebody with very small hands to work inside the engine compartment.
 

73m819

Rock = older than dirt , GA. MAFIA , Dirty
Steel Soldiers Supporter
In Memorial
12,196
314
0
Location
gainesville, ga.
Yes, the shuttle valve can be removed without pulling the gear box, the box should beable to be pulled without dropping the the fender or pulling the motor, the slector shaft cannot come out unless the box is pulled.

that relief valve looks like a add on, maybe the OM equipment died
 

Robo McDuff

In memorial Ron - 73M819
Steel Soldiers Supporter
2,863
1,407
113
Location
Czech Republic
Thanks Ron, I was hoping you would chime in.

Just went trough the TMs again with a magnifying glass to figure out the steps. TM ...35 page 151 actually has a schedule showing this relieve valve installed similar to mine. Reading a bit further, it might be indeed installed later (by the military, see fig 129) when changing the pump or some other parts.

What is the selector shaft? Could not find that term in the TM.

Off to some work now, more later today.
 
Last edited:

73m819

Rock = older than dirt , GA. MAFIA , Dirty
Steel Soldiers Supporter
In Memorial
12,196
314
0
Location
gainesville, ga.
Thanks Ron, I was hoping you would chime in.

Just went trough the TMs again with a magnifying glass to figure out the steps. TM ...35 page 151 actually has a schedule showing this relieve valve installed similar to mine. Reading a bit further, it might be indeed installed later (by the military, see fig 129) when changing the pump or some other parts. I hope I am not violating rules but this is the image from the TM:

View attachment 458266

What is the selector shaft? Could not find that term in the TM.Off to some work now, more later today.
The shaft that comes out of the gear box that connects to the pitmen arm.
 

Robo McDuff

In memorial Ron - 73M819
Steel Soldiers Supporter
2,863
1,407
113
Location
Czech Republic
Part of the problem is the sometimes intimidating size of the parts and being alone here without quick solutions if something breaks or needs replacement. Taking a deep breath, let's do it.

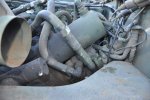
Taking the air hose for the arctic heater away helped a lot for getting as better look. Taking pictures also helps focusing on essential points.

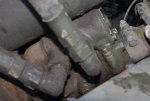
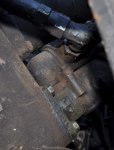
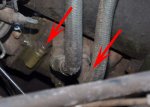
power steering valve details 01_resize.jpg power steering valve details 08c_resize.jpg power steering valve details 09c_resize.jpg

pic left: overview
middle: close-up from above driver side. To the right of the hydraulic lines you can see one inbus bolt and the clamp securing the steering tube assembly.
right: close-up from below driver side. Visible are the two bolts securing the control house to the steering gear box. to the right of them, facing upwards one inbus bolt securing the hydraulic control valve assembly to the control house.

power steering valve details 11c-ps.jpg

This pic from the left shows an chafed hydraulic line; did not see it at the truck, only just now on the picture. No signs of leaking fluid so I assume this cannot be the main problem although I should look at it closer next time.

Tomorrow I will raise the front of the truck and try once more the air bleeding and check the chafed line. If no success, I will start pulling the stuff apart.
 

Robo McDuff

In memorial Ron - 73M819
Steel Soldiers Supporter
2,863
1,407
113
Location
Czech Republic
The mentioned TM...35 is digitized by google and is now in the public domain, that is, free of copyright restrictions for personal use. You can download it for free without restrictions or having to have a google account.

So if you desperately need the additional info from the pics, this might be helpful. I did not try for other manuals yet, maybe there are more.
 

Robo McDuff

In memorial Ron - 73M819
Steel Soldiers Supporter
2,863
1,407
113
Location
Czech Republic
Removed Hydraulic Control Valve Assembly

I think I found at least where part of the problem is.

Had to buy a fitting hex key in the big town. Even with the proper tool it is still an awkward position to loosen the four bolts that hold the control valve assembly onto the control housing. Biggest problem is that the power cylinder is shielding it so you have to work around a corner from the sides.

power steering valve details 11c2-ps.jpg power steering valve details 05c-ps_resize.jpg

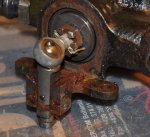
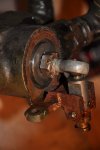
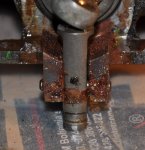
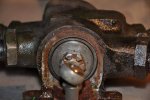
I tried to pry off the actuating lever cover per TM but while doing that and turning the control valve assembly, the whole thing more or less fell from the control housing including cover but without the actuating lever plain washer and rubber washer, which stayed in the control housing. Oops or normal real-life event?

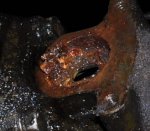
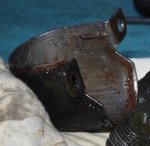
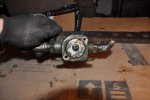
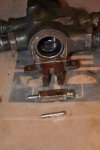
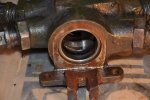
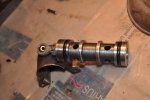
control valve assembly 008c_resize.jpg control valve assembly 008c2.jpg control valve assembly 004-c.jpg control valve assembly 021c_resize.jpg

What was left in the actuating lever space was not nice to see. I first thought some leaf rests or stuff had fallen down from above but when looking better and feeling it, it was this crusty rust stuff. I had been generous with WD-40, also after the bolts had been loosened a bit, so part of the wet image comes from that. But as far as I can see, the stuff itself was inside the actuating lever cover. The seal looked ok but probably was leaky. I should have kept the material for further inspection but threw it away.

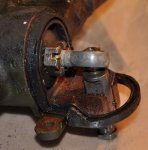
control valve assembly 024c_resize.jpg control valve assembly 029_resize.JPG control valve assembly 027c_resize.jpg control valve assembly 028_resize.JPG
 

swiss

Well-known member
Steel Soldiers Supporter
2,702
730
113
Location
Oakwood, Ga
Robo keep going, the piston comes out. I have a thread somewhere in here where I did the rebuild. I need to find it.
 

Robo McDuff

In memorial Ron - 73M819
Steel Soldiers Supporter
2,863
1,407
113
Location
Czech Republic
Taking apart the control valve assembly

Might as well find out how the inside of the control valve assembly looks. Took me 20 minutes to get the pin out on which the actuating lever rotates. Not only stuck, but also quite strong rust edges in the spaces between lever and valve house.

control valve assembly 030_resize.JPG

Read the TM (I had to go back and check). You start at the back end, taking off the back cover and then push the spool out. Took me quite some power to do; the rubbers still seem to fit tightly.


control valve assembly 032_resize.JPG control valve assembly 034_resize.JPG

Details of the actuating lever assembly and after the spool is out. The inside of the sleeve feels perfectly smooth to bare fingers although you can see (black gleam) where the rubber seals have been sitting. Since you cannot do anything with it anyway, I just left it where it was.


control valve assembly 031_resize.JPG

The spool itself looks ok also although there were a few specks of muck (max 1 mm).

Swiss, looking at your exploded image of the valve, I have a lot less rings and packing's then you do. I only have two rubber rings-seals on the spool itself and one at the end cover.

The TM says that the spool should "move smoothly and freely in the sleeve". That sounds strange to me. If you do not need a bit of power, it means the seals do not fit tightly, which would result in internal oil leaks or am I wrong here.

What I think happened is when the previous owner repaired the steering gear, they maybe had the cover off also and replaced it wrong or somehow damaged there something.

What I am still looking for is a good drawing of how the steering shaft actually moves the actuating lever, did not find it, am I blind?
 

swiss

Well-known member
Steel Soldiers Supporter
2,702
730
113
Location
Oakwood, Ga
Nice, do not reuse the seals they are bad no matter what they look like. I bought some hydraulic O rings that were the right size. The picture looks right. The other seal is on on the end cap in picture number 1. I had the same amount of seals that you have. I need to look at the TM picture again but this looks right and I remember it confused me also.

Reading this thread again to familarize myself with your problem the amount of movement in the actuator is tiny, maybe 1/4 of an inch. If you have rust looking at the pictures then when you turned right, the actuator never really moved over to the right to engage the fluid to provide the steering assist. So in essense you had power steering to the left and not the right. Once you get this cleaned up I believe you will have power steering both sides or at least know you need to looks somewhere else.

I remember that the shaft did not move that easily, I had greased up the shaft when I installed the new seals and it moved but was not a loose feeling.
 

Robo McDuff

In memorial Ron - 73M819
Steel Soldiers Supporter
2,863
1,407
113
Location
Czech Republic
Swiss, what kind of grease do you use? Doesn't that give problems with the oil?

Do you have the Napa number for those rings? I can try to get something fitting here, but I am not sure if I can trust these "no problem, they will fit and are ok" stories here.

Cleaning it up probably means taking the control house below it apart as well to get the rust and other stuff out of that. Some of the rust definitely fell in once the actuating lever was out. Did you do that as well or you just placed the valve assembly back on top?

btw, thanks for the help[thumbzup]
 

swiss

Well-known member
Steel Soldiers Supporter
2,702
730
113
Location
Oakwood, Ga
1.) Grease Type: No big deal on the grease, oil and grease are petroleum products, same family different point on the distiller. They play nice together
2.) Napa Part Number? Ouchy that would be in a big pile of receipts at best. The Napa guy gave me the hydraulic seal box and I started matching up. I think I used the same seals on the shaft as the hoses.
3.) Rust: Pick everything out and try and vacuum up all the mess while you are picking. Taking apart the control housing is a new story but if you put everything together and still have a problem then you need to move to the next step.

The operation of the whole steering I believe is as follows: The steering wheel turns, there is a cam of sort on the steering column that actuates (moves the small actuator left or right) The movement of the actuator is transmitted to the shaft which the movement opens and closes the fluid valves allowing the oil pressure to be distributed to the right or left to assist in the steering.

Sorry for the short answer, I am trying to bill clients and help at the same time :)
 

Robo McDuff

In memorial Ron - 73M819
Steel Soldiers Supporter
2,863
1,407
113
Location
Czech Republic
I will clean it and try to get things out, then try turning the wheel (without starting the engine, that would be a nice mess). If the wheel turns smoothly or at least acceptable, I will leave it at that and rebuild the stuff. Now it is loose and clean, taking it apart again is not much of a problem.

We have two companies around the corner here, one is repairing trucks and farming equipment and the other specializes in hydraulics. I will visit them tomorrow and ask if they have hydraulic rings.
 

Robo McDuff

In memorial Ron - 73M819
Steel Soldiers Supporter
2,863
1,407
113
Location
Czech Republic
Thanks, now you mention it, almost did something very stupid here. Turning it would change the positions and the lever would not fit good anymore or be in the wrong position. Is that the problem?

A small magnet might help clean the stuff out also.
 

Robo McDuff

In memorial Ron - 73M819
Steel Soldiers Supporter
2,863
1,407
113
Location
Czech Republic
That is what I miss here, somebody to work together with, including the shouting. I used to discuss these things with my brother but he passed away 3 years ago.

Let's take this stupid thing one step further. The steering got worse and worse quickly, that is, only a few miles driving but months and then over a year of standing still in between. The last few times I drove the truck, I had the feeling that till straight ahead is was still possible but than it got very hard and often with a feeling that teeth jump over the cam. That is why I thought the steering gear box was kaput.

Look at the position of the spool and the lever. The lever actually is at 90 degree angle here with the spool and the cylinder is already coming out of the sleeve. This is my straight ahead position. That means that when turning, the spool comes out even further. Maybe this thing was bad adjusted to begin with. Have to look at the TMs for that but its getting too late here (now 00:56 AM Thursday morning).

control valve assembly 029_resize.JPG

Then again, found this in public domain about a Ross HP-70 valve system. Seeing that pic, the "coming out of the sleeve" seems normal.

ross-hp70 valve-c.jpg

I don't have ring E, which you have, but my spool only has one grove where yours has two. My assembly house does not have a grove either where this e-ring could fit, so it seems ok. Probably you have an earlier type.
 

73m819

Rock = older than dirt , GA. MAFIA , Dirty
Steel Soldiers Supporter
In Memorial
12,196
314
0
Location
gainesville, ga.
Since you are this far, drain the gearbox, there is just a seal where the shaft goes into the box, you need to check that NO water got past the seal, DO NOT over tighten the adjusting screw in the center of the box cover, if you do, one side will steer fine, the other side will not steer, just make a new box gasket out of a cereal box, also might as well replace the four hyd. connection to the slector valve o-rings
 

swiss

Well-known member
Steel Soldiers Supporter
2,702
730
113
Location
Oakwood, Ga
The actuator rides on a cam and moves the spool in and out. Look at the shaft and then the fluid lines and you will see what I mean.

sorry for the loss of your brother. I lost mine in 2005
 
Top
AdBlock Detected

We get it, advertisements are annoying!

Sure, ad-blocking software does a great job at blocking ads, but it also blocks useful features of our website like our supporting vendors. Their ads help keep Steel Soldiers going. Please consider disabling your ad blockers for the site. Thanks!

I've Disabled AdBlock
No Thanks