• Steel Soldiers now has a few new forums, read more about it at: New Munitions Forums!

  • Microsoft MSN, Live, Hotmail, Outlook email users may not be receiving emails. We are working to resolve this issue. Please add support@steelsoldiers.com to your trusted contacts.


Bonedoc's M35A2 modification thread

Ford Mechanic

Active member
1,805
6
38
Location
Edenton, NC
I plan on using either contact cement or heavy duty spray adhesive. Good question on the hardtop...I took the word of the seller that is was the correct top. The top had a metal tag in the roof with a build date and what it fit. The roof looks very different when disassembled. Once I get it painted and foam installed all the straps you see in the 2nd picture checker board the top. I don't think they offer any support to me they look more like what holds the foam up there if it was to sag. There are all to pieces of a press board about 1/8" thick that were 2 feet wide and the length from front to back that fits over the foam in the 2 center most sections of the cab hard top. I didn't take pics of those but I will. Actually you can just see them leaning against the house behind the hardtop.
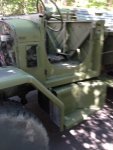
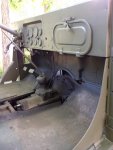
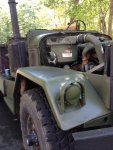
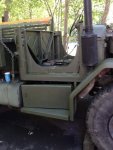
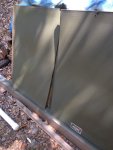
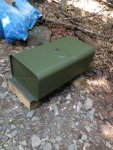
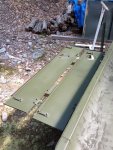
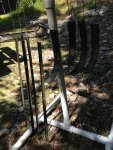
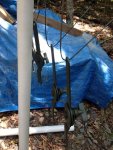
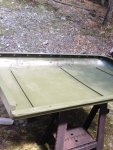
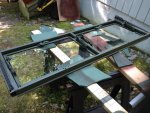
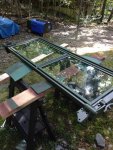
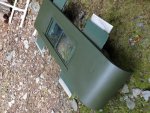
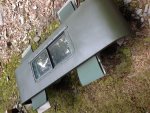
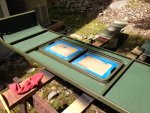
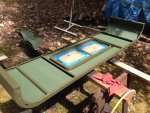
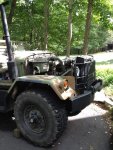
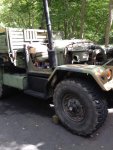
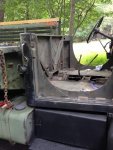
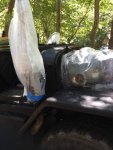
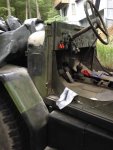
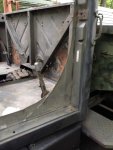
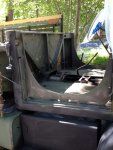
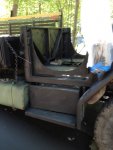
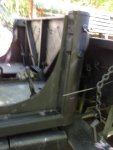
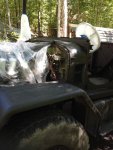
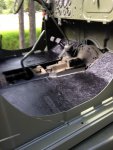
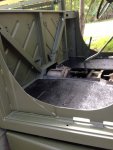
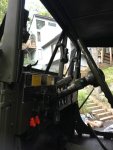
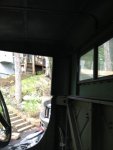
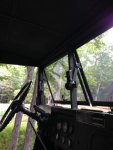
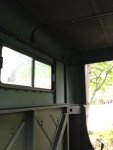
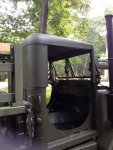
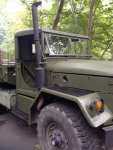
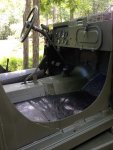
Yeah that's what I was told it fits, and the tag I took to be correct. It seems to me I measured it prior to selling the truck and found that it would only fit the M35 and the older 5 ton trucks. Which was a bummer for me cause my 5 ton needs a new hard top. I had a parts depot quote me $800 for one the other day!
 

bonedoc

New member
502
1
0
Location
Bangor, PA
You are correct Mike, the tag said 2.5 ton and 5 ton so I'd assume they meant the early 5 tons that used the same cab. I know it will fit mine, not sure if they made different styles of hardtop or not. Curious to know. I'll grab a pic of the tag....it is cool to know the build date and such.
 

bonedoc

New member
502
1
0
Location
Bangor, PA
Well the day is finally here. I am finally spraying some green. Got a bunch of parts I had recently prepared and primed recoated with 2-3 coats of Rapco 34079 green. Love how it is coming out so far. Only thinning it approx. 10-15% with xylene and it sprays really nice. I also have some Rapco primer in black that I used on the fuel tank. That thinned and sprayed very nicely as well.
The hardtop is only sprayed on the inside, this weekend I'll put the hardtop back together with new foam insulation, trim boards and trim strips. It looks a little rough from the old foam insulation and residual adhesive. I didn't bother grinding it all off as it was getting covered back up again. Then I'll flip it over and spray the outside of it. Also need to spray the outside face of the windshield and top of the fuel tank. Figured a good day or two of curing will be good before I flip them around. Also sprayed my jerry can holder, new engine side panels, intake cover, and windshield arms....not sure of their real name...?
After this stuff is done I'll clean up and paint the back half of the hardtop. Once all these pieces are done then the deuce cab will get dismantled, cleaned up, primed and painted.
 

Attachments

bonedoc

New member
502
1
0
Location
Bangor, PA
Good for you. Glad to see you spending the time for the little details.

Thanks, I'm trying to take my time and do a decent job. I try to replace all hardware as well with stainless steel. Just got my order from Fastenal today, these are the bolts and toothed washers that hold the windshields to the windshield frame and the screws that hold the window arms to the windshield frame and windows. Couldn't find them locally with the correct thread so spent some time searching Fastenal's website and ordered them.
 

Attachments

bonedoc

New member
502
1
0
Location
Bangor, PA
I got the inside of my hardtop roof finished today as well as the outside of the hardtop, windshield, engine side covers, a few other pieces, and the top of my fuel tankImageUploadedByTapatalk1407718871.551800.jpgImageUploadedByTapatalk1407718882.629581.jpgImageUploadedByTapatalk1407718893.906141.jpgImageUploadedByTapatalk1407718908.687850.jpgImageUploadedByTapatalk1407718917.931274.jpgImageUploadedByTapatalk1407718926.548630.jpgImageUploadedByTapatalk1407718935.217768.jpg
 

bonedoc

New member
502
1
0
Location
Bangor, PA
Got my windshield back together today. New windows and hardware. The new windows were a slight shade off on the green but close enough that it wasn't worth tearing them down to repaint them. Still waiting on the rest of my new seals for the whole cab plus still need to finish the back of the hardtop. Then the cab teardown will begin.
 

Attachments

bonedoc

New member
502
1
0
Location
Bangor, PA
Started to strip my cab down yesterday. Here are some pics. I have the hood all sanded and wire wheeled ready for primer and paint. Will get that painted tomorrow and probably gets seats and console out. Doors are off and have to disassemble them, sand, paint and reassemble with new weatherstripping, seals, and channel slides. One of the nice things is the cowl on the truck is solid and has no rot.
Once everything is ready, cab will be reassemble with hardtop, all new seals, paint, NOS west coast mirrors, etc.
 

Attachments

bonedoc

New member
502
1
0
Location
Bangor, PA
In spite of a rain delay and my compressor crapping out on me Saturday afternoon/evening I was able to finish prepping, priming, and painting my cab Sunday. Came out nice. I'm very happy with the color. Tomorrow am I will be bedlining the floor, side steps, and top of fenders. The center tunnel sections have also been painted green and will be reinstalled after the bedliner. I don't have any pics of it but the dash is all back together, data plates, switches back on. Tape and plastic off.
Hopefully be the end of this next weekend the truck will have the cab completely re-assembled. Have lees than 2 weeks to get it back drivable to go to the Gilbert show.
 

Attachments

bonedoc

New member
502
1
0
Location
Bangor, PA
Thanks Mike!! She is coming along. There will be a lot of changes happening in the next week or so. Hopefully the cab will be all back together and fuel tank swapped out by the end of next weekend.
 

bonedoc

New member
502
1
0
Location
Bangor, PA
Hey Dan, I'm working on it....lol, talk about taking a big bite!! I just left a message with the place I ordered my canvas and foam from for my seats hopefully I'll have that by wend of the week. If all goes well by end of the weekend all I'll be waiting on will be my seats....kind of important...lol!! But as long as I get the parts I can put them together and install them next week and be ready for Gilbert. The bed won't be done but it should be together and drivable.
 

bonedoc

New member
502
1
0
Location
Bangor, PA
Got the cab bedlined with Herculiner today. What do you guys think? It was pretty easy to apply, just need to take your time because it can be messy to work with. Will be doing the entire bed with it once I get that painted. Will let it cure till probably Thursday and then reinstall the center tunnel sections and start re-assembling the cab.
 

Attachments

bonedoc

New member
502
1
0
Location
Bangor, PA
Alright....update time. Got quite a bit done this weekend on Sunday after everything dried out from Saturday's rain. Got my tunnel sections, hood, and engine sides on then was able to get my windshield, hardtop, and doors installed. I have to say the windshield was a pain to install. Took quite a bit of pushing, pulling, and prying to align the mounting holes and bolt it down. Have to finish adjusting/aligning my doors, install the door/hardtop weather stripping and mirrors yet. Plan on doing that tomorrow morning before work. I used all new seals on the hardtop. I had purchased my seals for my hardtop from Eastern surplus and unfortunately one was the wrong one, it was to big and appeared to be for a 5 ton hardtop. So I had to use the old one temporarily. Called and spoke to Bill at Eastern and he was very accommodating and said he would bring a replacement to Gilbert this weekend. Fortunately I put the old seal in the upper position between the rear section and roof so once I get the new one I can remove upper bolts and lift roof a 1/2" or so to swap the seals and re-bolt it.
 

Attachments

Top
AdBlock Detected

We get it, advertisements are annoying!

Sure, ad-blocking software does a great job at blocking ads, but it also blocks useful features of our website like our supporting vendors. Their ads help keep Steel Soldiers going. Please consider disabling your ad blockers for the site. Thanks!

I've Disabled AdBlock
No Thanks