• Steel Soldiers now has a few new forums, read more about it at: New Munitions Forums!

  • Microsoft MSN, Live, Hotmail, Outlook email users may not be receiving emails. We are working to resolve this issue. Please add support@steelsoldiers.com to your trusted contacts.


wsucougarx's M923 acquisition

wsucougarx

Well-known member
6,951
65
48
Location
Washington State
VIC-1 Intall (Cont.)

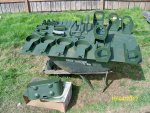
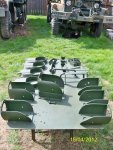
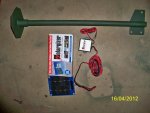
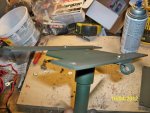
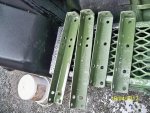
Today I made some headway. Got the brackets all painted up and stuck them in front of the heater to expedite the drying process. I tend to get impatient when it comes to these green machines;-) I got most everything mounted in the cab. If you'll notice I put 4 control boxes in the cab. I used a total of three stations in the cab (AM-2780 has 4 total stations). I just tacked on another control box in the series so I can hook up and LS-454 Loudspeaker (green one). I did this just in case I didn't have my headset on and can still hear if somethings going on in the bed.
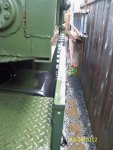
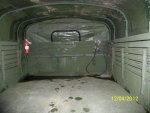
In the bed I did the same thing. The C-10456 on the headache rack is just a dummy box to provide sound to the LS-454. From there I have a 20 ft CX-4723 running back to the rear C-10456.
I still need to hook up the MX-7777 to power the AM-1780 but ran out of time. The rainstorm just hit so it was time to pack everything up;-)
After driving this truck home, I was surprised how quiet it actually is. Did I really need to install the VIC-1? Probably not, but I have 8 VIC-1 systems in the garage so might as well;-). Plus it adds to the cool factor

So to run down the VIC-1 System
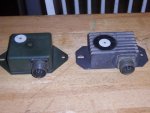
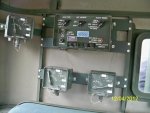
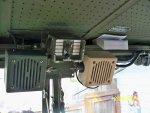
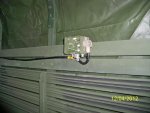
The heart of the system is the AM-1780 (green box with all the switches on it). Each station has the C-10456 Control Box (little green boxes). You can use the C-2298 in place of the C-10456's. I have the H-161 headsets hooked upto the C-10456. I chose the H-161 because it has a boom micophone. If you are unable to track down the H-161 headset you can use the M-80 microphone with the H-251 headset. The control boxes are connected to the AM-1780 via CX-4723 cables.

I still need to work on cable management. I've got some of those insulated wire loops for mounting on the bulkheads. Once I get everything where it needs to go then I'll make it more permanent. I still have no idea where I'm going to put the green radios. Thought about maybe putting an RT-246a/VRC in the bed. In pic #5, that green box is a C-2742 remote control box for the RT-246a/VRC specifically. It allows you to choose preset channels and to actually turn the radio on/off. Still pondering the M939 Battery Relocation Kit. I could use the battery space to mount my radios;-)

Pics:
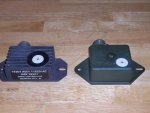
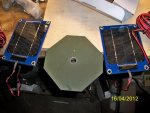
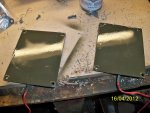
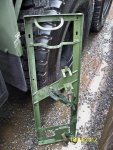
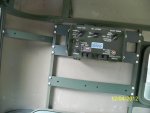
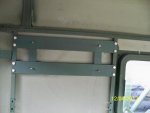
1- My overbuilt AM-1780 Mounting Bracket (use star washers to ground it correctly)
2- Whew, it fits
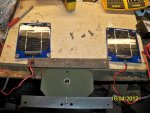
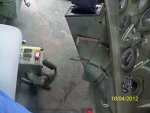
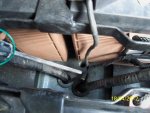
3- Added the C-10456 Control boxes
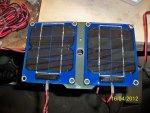
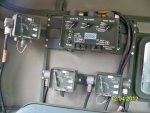
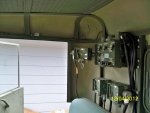
4- CX-4723 Cables added to the system
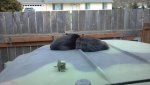
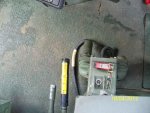
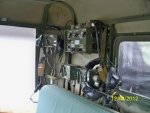
5- My standard windshield console I have on ALL of my trucks. The Green LS-454 is tied into the VIC-1 System specifically. The tan LS-454 is there for looks right now. Missing is the rear view mirror. I still need to fabricate a bracket for it. Plus the most important item is stashed on the hardtop...The BIBLE adorned with anACU cover.
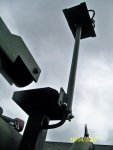
6- The passenger side VIC-1.
7- The rat nest just got worse with the addition of the H-161 Headsets
8- The Headache rack C-10456 married to a LS-454 Loudspeaker to provide in bed listening to comms
9- Rearmost VIC-1 station for parade/emergency/backing detail. I have not mounted the H-161 Headset just yet.
 

Attachments

Last edited:

wsucougarx

Well-known member
6,951
65
48
Location
Washington State
Next project will be PMCS type stuff. Still need to change out the fluids etc. Went down and bought a gallon of Lucas Oil Stabilizer. I also have ATF to change out the Allison with. I also secured some GAA from Spruce Mountain.
Something I have noticed about the M939 is the lack of a pioneer tool tack. I realize they probably just utilized the large tool box for that. Just ordered a NOS Pioneer Tool Rack from TNJ Murray. Now I need to figure out where to put this thing. Was going to put it on top of the large tool box like the M809 series trucks. We'll see.

Upcoming Projects:

Mouting Jerry Can Holders on the mudflaps
Mounting Armor back up lights
Fixing washer fluid motor and air horn
Mounting Medium Towbar
Seal the lower windshield gasket...leaks way too much
Mount Solargizers
Install bedside antenna mounts
Remove Driver Door Freeplay
Complete the in cab rifle mounts
Mount the overhead windshield brackets
Mount my DS2 M11 Decontamination Apparatus
Mount Pioneer Tool Rack
Window Tinting...still not sure about this one;-)
 
Last edited:

wsucougarx

Well-known member
6,951
65
48
Location
Washington State
Got around to doing some PMCS'ing today. The first thing on my list was to rotate my steer tires. Not sure what the deal is, but they are cupping really bad. I noticed the steer tires are the only ones with counter balance welded to the inside of the wheels. Also there is more wear on the weighted sides. I rotated tires with the rears.
I also tackled an issue I and others have been having with flappers on our stacks. Due to the inherit angle of the M939 stack, the flapper does not want to close all the way. My solution was drilling a 3/8" hold on the flapper itself and bolted on a 3/8" bolt. It helps to provide a counter balance. Seems to work as planned. The flapper does exactly what it should now.
Changed out the oil as well. Makes me wonder about the design of that oil filter location on the NHC-250. I got oil all over the steer axle. Once I got the oil canister removed I noticed the oil canister drain plug:oops:. Oh well, live and learn. It looks like the oil has never been changed out since this truck got it's rebuilt motor. It was pretty sooty. I added 7 gallons of Rotella T 15/40 with 1 gallon Lucas Oil Stabilizer. I was taken back as to how thick that Lucas is. Looked like I was pouring honey into my engine.
Got the horn issue figured out. Then found my in cab alarm wouldn't shut off. Didn't see any dash lights flashing. Got frustrated and went inside. Then it dawned on me. I put red LED lights into the dash warning light sockets. Went outside and turned the truck on. Didn't notice any of the lights coming on during the initial start up. Then I decided to put the old incandescent light bulbs back in there. Viola it worked! Now I noticed the parking brake light was blinking and wouldn't shut off. Probably just a simple ground or switch issue...haha. That's project for Monday. Hmm, I guess my truck doesn't like LED dash lights. Hopefully she won't reject her LED headlamps.:shock:

Glad to see the 923 is good for something. Darn cats...LOL

Projects Completed:

Rotated Steer tires ( badly cupped)
Sprayed in Bedliner stuff into toolboxes
Fixed Exhaust stack Flapper with counter balance
Changed Oil/Filter (Rotella T 15/40 and Lucas Oil Stabilizer)
 

Attachments

Last edited:

juanprado

Well-known member
Steel Soldiers Supporter
5,507
2,707
113
Location
Metairie/La (N'awlins)
parking brake alalrm

Try working the hand brake several times repeatedly as there is a switch in the assembly to loosen it up so it is not sticking.

There is also a fail safe module box to the left of the brake pedal close to the air vent door (not the flasher next to dimmer) . If it is green plastic it is probably the old type. The new ones are black metal and grooved. There are problematic. I had the same problem.

My front tires were also slightly cupped. Could you send me a picture as I would like to see if your wear pattern matches mine as i was concerned I had some issues to look at on that axle/hub/bearings/steering?
 

Attachments

wsucougarx

Well-known member
6,951
65
48
Location
Washington State
Got out yesterday in between church services to shoot some Behr on little parts. I used my mobile paint station. I knew there was a reason why I held onto that broken wheelbarrel. The weather was 65 degrees and beautiful. Had to take advantage of it while I could. I initially just had 923 stuff out there and figured I might as well make it worth while. I went back into the garage and just started grabbing misc parts here and there. So no, I don't plan on putting all those antenna mounts on the truck...LOL
There are some pics of the cupping of the steer tires. The driver's side was much worse as it was ground down about an 1/8"-1/4" more than the rear tires. And about 1/8" more than the passenger tire. Is this a toe in/out issue? Like I said previous, there are counter balance steel plates welded inside the wheel. Was this to counter balance the wheel itself or the wheel/tire combo? I'm thinking it was just the wheel. Then wondered why only the steer tires have these weights?

Pics:
1,2- Misc after being painted with my Behr 383 CARC Subst. The hint of shine will go away when you rinse it down
3- Counter balance weight on the driver steer wheel
4- Both steer tires rotated to the rear. Tire closest is the driver's side steer.
5,6 - Driver's side steer tire cupping
 

Attachments

Last edited:

wsucougarx

Well-known member
6,951
65
48
Location
Washington State
State Farm Insurance '83 M923

Just got off the phone with my State Farm agent with outstanding news. My '83 M923 was just approved for Classical/Antique insurance.:) They only valued my truck at $15,000:shock:. Oh well, that's $10k more than what I paid for it. My rate is a whomping $22.07 for 6 months or $44.14 per year;-).
I don't plan to get her licensed until Jan 2013 as this will be the year she turns 30 years old. I need to wait until then to get Collector Plates on her. In the meantime, I can buy a 3 day trip permit for $30 for the big rally in July/August.
 

Attachments

Last edited:

wsucougarx

Well-known member
6,951
65
48
Location
Washington State
Solargizer Bracket and Solargizers

Today was a nice story rainy day. Spent the half the day in the garage brainstorming my solargizer mount. I had to plan my solargizer mount due to where she will be parked most of the time. The issue I have is my truck is going to be located on the northern side of my house. The house roof blocks most of the sun to keep the solargizers going. So I had to devise something that will be high enough to capture sunlight yet low enough to drive. To me solargizers are one of the most important add-ons to any MV's. Mostly due to how long they will sit and the fact I don't want to fork out $$$ for new batteries. Plus dead batteries can eat up your nice $300 alternator.
Looking around the garage I saw a mount I bought off ebay for $29 w/free shipping. I had no plans for it but seemed to fit the bill. I bought the solargizers off ebay as well for $30 each. They do have blue faces but I don't see much sense in paying an add'l $20-30 for a green face. Plus you'll never see the solargizers way up there;-)
Yah, kind of looks goofy sitting up so much higher than the truck. I went out and measured the heigth. She measure at 11 ft 2 inches. She is about 11 inches above the top of the exhaust stack. The pics really make it looks like a 10 story building. I don't plan on taking her off road so I think it'll be safe up there for now. I would have mounted it directly on the behind the cab platform but I have other plans at the moment for it (stay tuned). I was going to mount it to the side or back of the hardtop but didn't want to drill anymore holes in her than necessary.

I still need to mount the solargizer tranformer thing inside the battery box. I'll tackle that project tomorrow along with mounting my MX-7777 in the battery box as well.

Projects Completed:
-Fabricated my dual Solargizer mount
-Mounted the solargizer mount on the Behind the Cab Platform

Pics:

1- The solargizer mount and two 24v solargizers (ebay purchases)
2- Drilled a hole on the platform to hide the solargizer wires and protect them from the elements
3- Preliminary fitting. Didn't like how they just hung over the mounting face
4- Grabbed a couple pieces of steel stock and made another over-built bracket.
5- Painted the underside of the solargizers. The white undersides were not going to cut it
6- Brackets are coming along
7- Everything mounted up and ready to go.
8- Mounted the solargizer mount to the behind the cab platform. Man that looks high;-0
9- A view from the rear of the truck showing how high she sits
10- Measures in at 11' 2" from ground to the top of solargizers.
 

Attachments

Last edited:

wsucougarx

Well-known member
6,951
65
48
Location
Washington State
Today I secured a couple items I've been looking for. I have a towbar, tow safety chain, and a set of slave cables in each truck. My mission was to find a slave cable for the 923. I have a unique issue with my trucks. I have 4 truck and 4 trailers on less than a 1/4 acre lot. So I have two trucks parked in the backyard and two trucks parked bumper to bumper along the side of my house in the RV spot. It is inevitable, the lead truck always seems to have dead batteries. Which basically blocks all my trucks in. My solution was to find a set of slave cables at least 30 feet long. Today I found a set. But these are 50 ft long!! I assume they're for tanks? Picked it up for $150 w/a pair of brand new slave cable ends and four adapters. I also secured a brand new spare chain hoist for the spare tire davit.
Today my order from TNJ Murray came in. Now I need to figure out where to mount the NOS pioneer tool rack. I think this about does it for the add ons.....for now anyways;-).
 
Last edited:

dodgedougak

New member
Steel Soldiers Supporter
419
0
0
Location
Joseph, OR
Agreed, nice score. Is yours a one prong or two prong slave cable? My '74 M35 has a two prong (as does my M37). I have been watching for 2 prong slave cables, or even just the plugs, but GL only seems to have the one prong ones. What is with that and is there a source for the 2 prong ones?
 

wsucougarx

Well-known member
6,951
65
48
Location
Washington State
My newest slave cable is a NATO one prong. Boy that sucker is HEAVY. The ends on them are not that good so the seller was gracious to include two brand new ends with the set. The two prong slave cables are few and far between. I see them pop up every once in awhile.
 

wsucougarx

Well-known member
6,951
65
48
Location
Washington State
Solargizer Install and VIC-1 Completed

Today I was able to complete my solargizer install and get my VIC-1 up and going. I snaked the solargizer wires up underneath the cab and on up into the battery box. Got everything hooked and saw the red status light. All is good.
Next I sat in the cab brainstorming where to put the MX-7777. I thought about putting it inside the battery box, but decided not to. I like the ability to shut off the MX-7777 directly. Plus, something about having a circuit breaker inside the battery box didn't sit well with me. Once I got everything hooked up, I flipped on the system and she works...whew!
I also got around to mounting my rearview mirror a couple days ago

Project Complete:
-Completed wiring for solargizers
-Mounted the MX-7777 and wired it in
-VIC-1 System up and going
-Mounted Pioneer Tool Rack

Pics:
1- Solargizer wires snaked to the underside of the cab up into the battery box
2- Solargizer wire in battery box...what a pain that was
3- Wires all hooked up and ready to go. Any idea why they criss-crossed everything w/100MPH tape?
4- Solargizer status light. Whew! It works
5- MX-7777 mounted on the ext of battery box.
6- MX-7777 doesn't interfere with the transfer case handle
7- MX-7777 kind of sticks out farther than I wanted
8- Rearview mirror on my custom Radiac Mount
 

Attachments

Last edited:

wsucougarx

Well-known member
6,951
65
48
Location
Washington State
Pioneer Tool Rack Install

Today I was also able to get my Pioneer Tool Rack installed. I picked this one up from TNJ Murray for $50. The kit came with all the brackets and bolts for doing various trucks. I was unable to mount my rack on the toolbox because I have a dual jerry can mount on top. Plus I didn't want to drill anymore holes than necessary on the top of the box. The only place I figured where I could mount it is where it sits. The only real issue if any is it may interfere with the dropside side panels. Then again, I've never dropped any of my bedsides on any of my trucks. So a non-issue here. The rack is about flush with the rear duals and doesn't stick out too far. Also, it's not too far forward to interfere with the spare tire pathway. Nor too far back to get close to 14.00's or 16.00 tires.

I think that about does it for external bolt-ons. I have a Medium Tow Bar Mounting Bracket that I need to find a home for. Hmmm, where to put that.

Projects Completed:
-Mounted Pioneer Tool Rack

Pics:
1- Brackets that came with the kit
2- Rack with NOS straps included
3- Mountion point on mudflap
4- Mounted pic
5,6- Doesn't stick out too far
 

Attachments

Last edited:

Danger Ranger

New member
2,253
23
0
Location
Roland, IA
I don't know anything. What is the point of having the solarizer so high? Yes, so the sun can get at it, but it just seems silly with it mounted like that, a platform on a platform...
 

wsucougarx

Well-known member
6,951
65
48
Location
Washington State
Well, as stated my roofline blocks the sunlight. She sits in the shade most of the day. In order to get the sunlight I had to mount it 11 ft off the ground.
I don't care if it looks silly. Function over Fashion!
 
Last edited:

Danger Ranger

New member
2,253
23
0
Location
Roland, IA
No, no, no....I'm sorry, I have that poorly written. It is not meant to be bashing or negative. I just wondered why, and like normal, have missed reading the detail about the roofline. Function over fashion is 100% true, no arguments there. Relax, it was a question! lol.:grin::lol:
 
Top
AdBlock Detected

We get it, advertisements are annoying!

Sure, ad-blocking software does a great job at blocking ads, but it also blocks useful features of our website like our supporting vendors. Their ads help keep Steel Soldiers going. Please consider disabling your ad blockers for the site. Thanks!

I've Disabled AdBlock
No Thanks