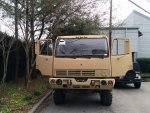
The truck is finally home! Yesterday me and a buddy drove out to the yard where I did the swap, got her ready to drive, and drove it about 25 miles into downtown Houston in rush hour traffic. It was hot and the fan scared the **** out of me the first time it turned on, but it made it without any issues! Just in case, I purchased a one-trip permit which serves as temporary registration for 15 days. You can buy these online (if you're in Texas) and they're only $10. IMO it's cheap insurance if you get pulled over. Towing and impound for one of these would be stupid expensive.
I spent today working to get it ready for it's safety inspection. Found a gotcha and some other information I'd like to share:
Turn Signals:
If you have your dash half assembled cause you're working on stuff and your turn signals don't work, it's because the hazard light switch isn't connected. I was surprised to learn this needs to be plugged in for your turn signals to work.
Keys:
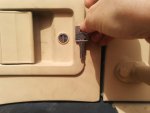
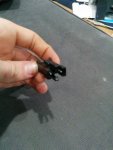
My nice new cab has the upgraded door handles, but didn't come with keys. I did some research and saw that people were taking the handle/lock assembly out of the door and taking it to their locksmith. I found a better way...
Look at the lock cylinder from outside and note the letters/numbers on the cylinder. This is the code for the key you need. I found a place online where I could order the keys.
https://www.easykeys.com/753_TriMark_TM201-TM250_Lock_Keys.aspx
They came in the mail in a few days and work great!
 Clearance Lights:
The A1 cab uses a rectangular 2 pin connector for the clearance lights which is marked P312.

On the A0 cab the clearance lights are hooked up to TB1 using quick connects. I ended up cutting off the P312 connector and crimping quick connects onto the wires. Plugged it in just like it was before and it worked like a charm.
 Reflectors:
Some of my reflectors were cracked and all of them were showing their age, so I decided to replace them. I looked at some of the military surplus dealers, but eventually found their source muahahaha. The reflectors can be bought unfinished or pre-painted. You can find part numbers here:
http://www.grote.com/family/steel-two-hole-mounting-reflector/?prodcat=reflectors
I ended up ordering mine from finditparts.com for about $3 a piece!