- 131
- 309
- 63
- Location
- Charlottesville, VA
Hello all,
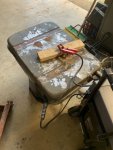
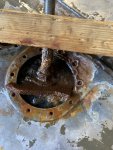
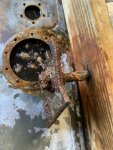
Today, I dropped the fuel tank for my M37, The tank has at least two baffles dividing the tank into approximately 1/4--1/2--1/4 sections. It appears that there is no direct access for maintenance or cleaning for the two outside baffled areas.
After removing the fuel sending unit and the fuel filter assemblies, I discovered a large amount of loose rust in the tank.
So, now, I'm at a bit of a standstill. While I have the usual tank cleaning, etching and sealing kits ready to use, I'm concerned about their effectiveness for the baffled areas which do not appear to be directly accessible. Has anyone encountered this situation? I appreciate your suggestions and advice.
Thank you,