
- 5,277
- 4,140
- 113
- Location
- Charleston, WV
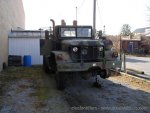
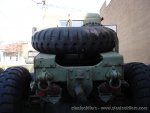
I had the pleasure of tearing the left front down to replace the wheel cylinder last week and thought you guys might enjoy some pics and info.
The first PITA was getting the lug nuts off. I think the last technician used a 1" impact set on permanent to put the nuts on. I had to go to the hardware store to buy a cheater pipe for my 3/4" socket wrench since my usual tactic of jumping up and down on the handle wasn't working") Once I got the cheater, my 230 lbs was enough to break them all loose with minimal jumping. I made sure to re-install them with a little anti-seize.
Once I got the cheater, my 230 lbs was enough to break them all loose with minimal jumping. I made sure to re-install them with a little anti-seize.
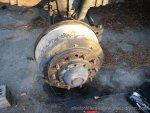
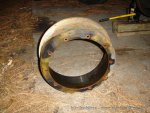
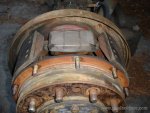
The next PITA was getting the drum broken loose from the hub. It was solidly painted in place. I used a utility knife to scrape all the way around the drum, but that sucker was on there tight. Some research on SS described 2 different techniques for getting it to break loose. The first I tried was hitting the drum with glancing blows all the way around with a BFH. That slightly nudged it in the right direction, but nothing else. The second technique was putting 6x6" blocks under the drum and letting the jack down. I did this about 8 times all the way around the drum and it finally slid off the studs. Phew!!
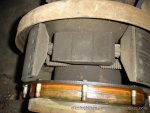
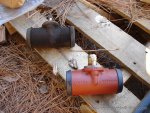
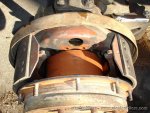
After that, the disassembly was pretty easy. Pop the return spring off, take the brake hose off, unbolt the cylinder and remove it from the backing plate. It went back together smoothly until I got to the part of putting the return spring back on. I had to fight with that for about 20 minutes before I had a good technique for getting it back in place. It would have been much easier without that big hub flange in the way, but I didn't feel like taking the hub off. Finally, I got it back on. After that, I cleaned everything thoroughly and popped the drum back on with a hunk of 6x6. Then, I bled the new cylinder and put the wheel back on.
It worked out great. No more dripping wheel cylinder and with the shoes adjusted I think it stops better too.
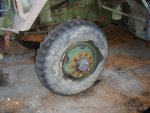
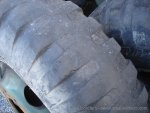
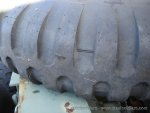
I went to put on a new 11.00x20 tire and rim that I picked up from John Winslow, but it turns out that the tip was broken off of the valve stem. It's going to the shop today for a new tube.
Enjoy the pics!
The first PITA was getting the lug nuts off. I think the last technician used a 1" impact set on permanent to put the nuts on. I had to go to the hardware store to buy a cheater pipe for my 3/4" socket wrench since my usual tactic of jumping up and down on the handle wasn't working
Once I got the cheater, my 230 lbs was enough to break them all loose with minimal jumping. I made sure to re-install them with a little anti-seize. The next PITA was getting the drum broken loose from the hub. It was solidly painted in place. I used a utility knife to scrape all the way around the drum, but that sucker was on there tight. Some research on SS described 2 different techniques for getting it to break loose. The first I tried was hitting the drum with glancing blows all the way around with a BFH. That slightly nudged it in the right direction, but nothing else. The second technique was putting 6x6" blocks under the drum and letting the jack down. I did this about 8 times all the way around the drum and it finally slid off the studs. Phew!!
After that, the disassembly was pretty easy. Pop the return spring off, take the brake hose off, unbolt the cylinder and remove it from the backing plate. It went back together smoothly until I got to the part of putting the return spring back on. I had to fight with that for about 20 minutes before I had a good technique for getting it back in place. It would have been much easier without that big hub flange in the way, but I didn't feel like taking the hub off. Finally, I got it back on. After that, I cleaned everything thoroughly and popped the drum back on with a hunk of 6x6. Then, I bled the new cylinder and put the wheel back on.
It worked out great. No more dripping wheel cylinder and with the shoes adjusted I think it stops better too.
I went to put on a new 11.00x20 tire and rim that I picked up from John Winslow, but it turns out that the tip was broken off of the valve stem. It's going to the shop today for a new tube.
Enjoy the pics!
Attachments
-
 167.3 KB Views: 386
 -
 182.7 KB Views: 383
 -
 173.5 KB Views: 382
 -
 173 KB Views: 382
 -
 183.1 KB Views: 388
 -
 199.5 KB Views: 386
 -
 179.2 KB Views: 385
 -
 158.8 KB Views: 379
 -
 163.3 KB Views: 373
 -
 191.7 KB Views: 372
 -
 217.3 KB Views: 377