
MikeM934
Member
- 12
- 43
- 13
- Location
- Rainier, WA
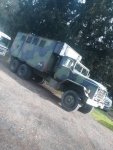
Thanks for the add! Tons of helpful info here! Here is my new to me M934 that I've been working on converting to motorhome. I've already gutted all interior walls, repaired some cancer on wall framing, and started mocking up appliance/cabinet locations. I'll be using closed cell foam, and vynal walls/ceiling, red oxide paint on all steel framing. Lots of work ahead of me! I am struggling to find a couple new windows and expansible sides gasket kits. Or is everyone just buying a suitable gasket material and cutting to fit?
Attachments
-
 115.3 KB Views: 50
 -
 49.9 KB Views: 50


