The Marines used all the types in the M715 series. M725s were used as ambulances and as radio trucks (without the red crosses, of course!). I saw them all on Camp Pendleton c.1979-1981, and in Norway in 1980.
The Seabees were still using a few M726s then too, and I saw one M715 used by USN Beach Masters.
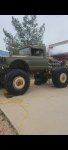
One of my own M715s has faint USMC markings visible on it, as well as painted out USN markings on the tailgate. Unfortunately, the data plate is not the one that should be on the truck! I grew suspicious because the plate says W/W and my truck obviously doesn't have one. I looked at the VIN on the frame, it doesn't match the data plate. Or the title... (which does match the data plate)

Pictures of USMC M715s are like hens teeth, it seems. I took some in Norway in 1980, but they are in an album, in a box, which is ??? after I moved house. Most of the ones on the interwebs are of restored vehicles.
If anyone has in-service pictures of M715s in Marine markings, please feel free -nay, encouraged! - to add them to this thread.
I also took some pictures at Jack's yard outside Tucson a few years ago to document the markings (I collect as much information about Marine vehicle markings as I can).
There were numerous USMC M715s there (Jack seems to have a LOT of old USMC vehicles), but most were pretty picked over. My notes say that the hood on the bed of the M715 with the white hood is the one that actually belongs to it, the data plate said USMC and had the same serial number. The other hood doesn't look like it belongs to the truck it's sitting on, I don't recall if I checked that data plate.
In the b/w photo, you can see the nose of one, and the back of another M715 between the A-4s. The visible hood has Marine markings, the tailgate of the other looks like it does too, from what little of it that can be seen. Picture taken in Japan in the early 1970s, most likely at Iwakuni.
Cheers
View attachment 899210 View attachment 899211 View attachment 899212 View attachment 899213 View attachment 899214


 1.1 MB Views: 12


