• Steel Soldiers now has a few new forums, read more about it at: New Munitions Forums!

  • Microsoft MSN, Live, Hotmail, Outlook email users may not be receiving emails. We are working to resolve this issue. Please add support@steelsoldiers.com to your trusted contacts.

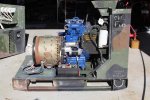
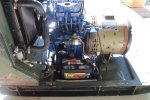
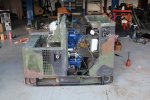
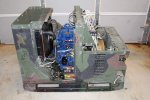
Picked up 6 MEP-802A gensets and will be documenting making them all runners here

pclausen

Well-known member
Steel Soldiers Supporter
452
281
63
Location
Afton, VA
Yeah, I've always liked Ford Blue. Got a small utility tractor I fixed up. It only has 400 hours on it still!

http://www.cstone.net/~dk/f1700hood-11.jpg

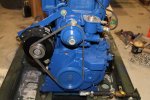
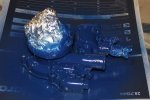
Anyway, back to the project at hand. I let the little pipe piece that connects the block to the water pump plate soak in that rust remover stuff overnight. It looks a lot better now that it did before. Slipped 2 new o-rings on it.

MEP802-11-11-2015-01.jpg


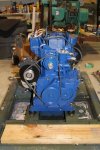
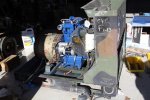
Got the water pump plate and the water pump mounted:

MEP802-11-11-2015-02.jpg
http://www.cstone.net/~dk/MEP802-11-11-2015-02.JPG

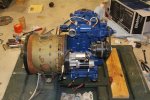
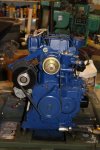
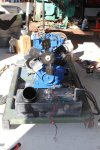
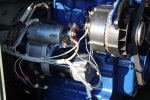
Alternator, starter and intake manifold back on:

MEP802-11-11-2015-03.jpg
http://www.cstone.net/~dk/MEP802-11-11-2015-03.JPG

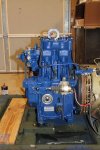
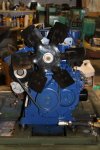
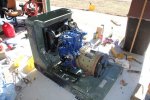
Fuel lines installed along with the fuel shut off solenoid:

MEP802-11-11-2015-04.jpg
http://www.cstone.net/~dk/MEP802-11-11-2015-04.JPG

Making decent progress again finally!
 

pclausen

Well-known member
Steel Soldiers Supporter
452
281
63
Location
Afton, VA
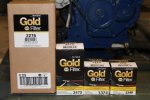
Picked up my filters from Napa today.

MEP802-11-12-2015-01.jpg
http://www.cstone.net/~dk/MEP802-11-12-2015-01.JPG

Everything was going well until I used the impact to tighten the fan bolt... Snapped the threads off the end of the water pump pulley. I only gave it a quick "buzz" but I guess that was too much. I know spec is 24 ft. lb. So I guess I went way over. I'm kind of surprised as I figured the pulley would just slip on the belt, but I guess it grasped on pretty good.

MEP802-11-12-2015-02.jpg
http://www.cstone.net/~dk/MEP802-11-12-2015-02.JPG

So I had to clean up another one (good thing I got 5 MEP802's to steal parts from). :D

MEP802-11-12-2015-03.jpg
http://www.cstone.net/~dk/MEP802-11-12-2015-03.JPG

This one was actually a lot tighter and had not been painted originally. Since I now I have one unit with a drilled tank, another with a cracked bell on the generator and open stator wires based on what my ohm meter is telling me, I kinda knew one would end up as a parts units. I'll put the impact wrench away for everything but loosening going forward...
 
Last edited:

pclausen

Well-known member
Steel Soldiers Supporter
452
281
63
Location
Afton, VA
Got the new water pump on:

MEP802-11-14-2015-01.jpg
http://www.cstone.net/~dk/MEP802-11-14-2015-01.JPG

And this time I managed to get the fan on without snapping off the shaft. :D

MEP802-11-14-2015-02.jpg
http://www.cstone.net/~dk/MEP802-11-14-2015-02.JPG

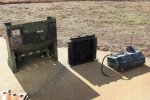
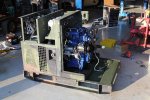
Got the front housing, radiator and fuel tank all cleaned up.

MEP802-11-14-2015-03.jpg
http://www.cstone.net/~dk/MEP802-11-14-2015-03.JPG

Radiator has a 2009 stamp on in, which matched the plate on the enclosure, which is a good thing. :)

MEP802-11-14-2015-04.jpg

Fuel tank dropped in place.

MEP802-11-14-2015-05.jpg
http://www.cstone.net/~dk/MEP802-11-14-2015-05.JPG

Coolant system all connected.

MEP802-11-14-2015-06.jpg
http://www.cstone.net/~dk/MEP802-11-14-2015-06.JPG

MEP802-11-14-2015-07.jpg
http://www.cstone.net/~dk/MEP802-11-14-2015-07.JPG

Hopefully tomorrow I'll get the rear section with the control electronics connected and get it fired up!
 

pclausen

Well-known member
Steel Soldiers Supporter
452
281
63
Location
Afton, VA
Made pretty good progress today, but had a major setback in the end.

I added the coolant and got the battery cables and batteries installed.

MEP802-11-15-2015-01.jpg
http://www.cstone.net/~dk/MEP802-11-15-2015-01.JPG

MEP802-11-15-2015-02.jpg
http://www.cstone.net/~dk/MEP802-11-15-2015-02.JPG

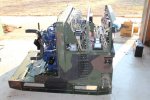
Next I slid on the rear enclosure.

MEP802-11-15-2015-03.jpg
http://www.cstone.net/~dk/MEP802-11-15-2015-03.JPG

MEP802-11-15-2015-04.jpg
http://www.cstone.net/~dk/MEP802-11-15-2015-04.JPG

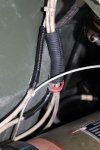
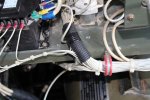
Next I added a couple of gallons of diesel to the fuel tank and then started working in the wiring. 1st I added some wire-loom in the areas where the chafing was evident.

MEP802-11-15-2015-05.jpg
http://www.cstone.net/~dk/MEP802-11-15-2015-05.JPG

MEP802-11-15-2015-06.jpg
http://www.cstone.net/~dk/MEP802-11-15-2015-06.JPG

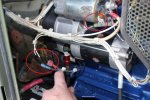
Next I worked on the wires on the starter side. Got everything connected except for one wire to the starter solenoid and the 2 wires that goes to the flywheel sensor. I need to pick up some fittings to complete.

MEP802-11-15-2015-07.jpg
http://www.cstone.net/~dk/MEP802-11-15-2015-07.JPG

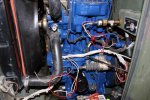
On the other side, I need connectors for the coolant and oil sensors.

MEP802-11-15-2015-08.jpg
http://www.cstone.net/~dk/MEP802-11-15-2015-08.JPG

So at this point, I'm stating to notice diesel all over the floor under the unit. After looking around for the source, I believe the leak is coming from the drain fitting in the fuel tank. So I went ahead and siphoned out the rest of the fuel. This is a real bummer. Now I have to drain the coolant and disassemble the front again, to pull the fuel tank.

I don't really care for a fuel tank drain feature. Does anyone know if a plug is available to insert in the drain opening to bypass this feature? Alternatively, I guess I need to look around for a new groomer or whatever that flexible rubber thing is called that the drain fuel fitting goes into.
 

pclausen

Well-known member
Steel Soldiers Supporter
452
281
63
Location
Afton, VA
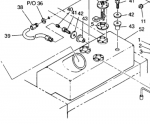
Looks like the piece I need is called a Fuel Tank Well Nut. Part number A3816.

Item 43 in the schematic below.

Fueltankdrainparts1.PNG

Found one on eBay for $14.50 with shipping, so I got one on order.
 

pclausen

Well-known member
Steel Soldiers Supporter
452
281
63
Location
Afton, VA
Finally got a notification yesterday that the Well Nut shipped from Green Mountain. (didn't realize at the time that's who I ordered from on eBay)

I got everything else that I could done until the fuel tank goes back in. The controller box has been re-attached.

MEP802-11-22-15-01.jpg
http://www.cstone.net/~dk/MEP802-11-22-15-01.JPG

And the electrical wires on the starter side it all done. I'll look for the proper connectors for the flywheel sensor, but for now, this should work.

MEP802-11-22-15-02.jpg
http://www.cstone.net/~dk/MEP802-11-22-15-02.JPG

The other side. I had a small oil leak. Turns out the oil drain hose had a crack in it. So I pulled off the one from the "spare" unit, the one with the drilled fuel tank. Had to heat the hose pretty good before it would pull off. I captured the drained oil, filtered it, and put it back in.

MEP802-11-22-15-03.jpg
http://www.cstone.net/~dk/MEP802-11-22-15-03.JPG

And a closeup of the electrical on this side. I stole an oil pressure sender from the spare unit and decided to solder and heat shrink the oil pressure switch wires. Note how the whole oil plumbing is titled out. I did this because in the original position the hose going down to the block was getting chafed pretty bad by the secondary fuel filter base.

MEP802-11-22-15-04.jpg
http://www.cstone.net/~dk/MEP802-11-22-15-04.JPG

Finally, I got the well nut out of the old tank. I was a royal pain as the hollow bolt threads were seized onto the well nut. Looking at it after I got it out, I think I could have gotten away with applying new thread sealer and torque it back in tighter than it was before. But figured I'd rather not chance it and will just wait for the new well nut at this point.

MEP802-11-22-15-05.jpg
http://www.cstone.net/~dk/MEP802-11-22-15-05.JPG

With a bit of luck, I'll have this unit up and running by Thanksgiving!
 

CT-Mike

New member
238
2
0
Location
CT
With all the work you've done to this point, why take a chance on an iffy repair to a leaky well nut. Good to hear that you're waiting for the part.

I had to replace the well nut on my -803, PITA to get the fuel tank out to do it.
 

pclausen

Well-known member
Steel Soldiers Supporter
452
281
63
Location
Afton, VA
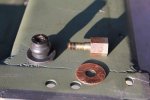
Well nut finally showed up in the mail today. Here's the new one compared to the old one. Didn't realize that "belly" isn't there by default. Sure made it a lot easier to slip in.

MEP802-11-25-2015-01.jpg
http://www.cstone.net/~dk/MEP802-11-25-2015-01.JPG

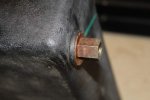
I applied some thread sealant to the threads and then tightened it down fairly snug.

MEP802-11-25-2015-02.jpg
http://www.cstone.net/~dk/MEP802-11-25-2015-02.JPG

I'll leave it like that overnight to allow the sealant to set. Then tomorrow morning I'll install the tank and connect the drain hose and pour a couple of gallons in it. Then wait a few hours to make sure it doesn't leak, then re-assemble the rest of the front end. Don't want to take it all apart a 3rd time!

In other news, I'm looking at a 803A on GL. It has 0 hours on the meter but no starter or alternator. I have what appears to be working spares of both on my "parts" 802A which I assume will work just fine on a 803A. Call me crazy. LOL
 
Last edited:

m-35tom

Well-known member
Supporting Vendor
3,021
221
63
Location
eldersburg maryland
With all the work you've done to this point, why take a chance on an iffy repair to a leaky well nut. Good to hear that you're waiting for the part.

I had to replace the well nut on my -803, PITA to get the fuel tank out to do it.
no need to remove tank, just pull nut out or cut it off and leave it in tank.
 

m-35tom

Well-known member
Supporting Vendor
3,021
221
63
Location
eldersburg maryland
the threads don't use sealer, the washer provides the seal. looks like you need a new washer, that rusty one will probably leak.
 
Last edited:

Another Ahab

Well-known member
17,841
4,198
113
Location
Alexandria, VA
Well nut finally showed up in the mail today. Here's the new one compared to the old one. Didn't realize that "belly" isn't there by default. Sure made it a lot easier to slip in.

View attachment 595988
It sounds stupid, but it makes me stupider if I don't ask what I don't know:

- Is the new one the one on the left (WITH the "belly"), or the one on the right (that actually looks a little beat-up)?
 

Another Ahab

Well-known member
17,841
4,198
113
Location
Alexandria, VA
It sounds stupid, but it makes me stupider if I don't ask what I don't know:

- Is the new one the one on the left (WITH the "belly"), or the one on the right (that actually looks a little beat-up)?
Never mind; disregard the question:

- I just went back to post #248 and answered my own question.

DOH! :cookoo:
 

m-35tom

Well-known member
Supporting Vendor
3,021
221
63
Location
eldersburg maryland
it has straight sides when new and is like a pop rivet, screwing in the fitting and tightening it shortens the length which 'crimps' it in the hole.
 

pclausen

Well-known member
Steel Soldiers Supporter
452
281
63
Location
Afton, VA
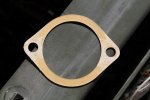
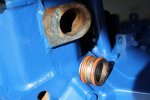
It passed the leak test. You can't tell from the photo, but the copper (or brass) washer was actually pretty smooth and nothing is leaking. So I put everything back together, filled with coolant, and it started leaking out the thermostat housing. Drained the coolant down a little and removed the housing. Turns out the area where the 2 bolts are is higher than the rest. So it was never going to seal. I checked a couple of the other thermostat housings on a piece of glass and they are all like that. So rather than waiting until next week and taking the housing to a machine shop to have them plane it flat, I opted to shave off some of the gasket instead.
MEP802-11-27-2015-01.jpg
http://www.cstone.net/~dk/MEP802-11-27-2015-01.JPG

I did both sides and kept test fitting until all the wiggle was gone. I then applied a thin bead of silicone sealant on both sides and put it back on. This time there was no leak when I added the coolant back. Of course the real test will be when its up and running at temp.

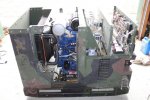
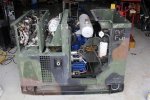
A couple of pics with the muffler and intake back on, ready for the first start up. As it turns out, the gasket kit does NOT include the exhaust gasket, so I had to use the one off the "part" unit. It was not in good shape and broke in half removing it, but its better than no gasket at all.
MEP802-11-27-2015-02.jpg
http://www.cstone.net/~dk/MEP802-11-27-2015-02.JPG
MEP802-11-27-2015-03.jpg
http://www.cstone.net/~dk/MEP802-11-27-2015-03.JPG

I then dead cranked it for a little while to build up oil pressure and topped off the oil again now that the oil filter was full. Next I let it prime fuel for about 5 minutes to let it circulate for a while. Finally, I did the bleed procedure by first letting the air out of the secondary fuel filter. What a pain it is getting to the bleeding screw. Next I did the bleeding at the injector pumps, and then tried to start it.

I was surprised that it started immediately. Frequency was just over 61 Hz, so I brought that down to 60. Then I noticed the whole unit starting walking across my shop floor so I shut it back down.

I hooked up a ground wire to the frame of my shop, and got out my crappy cell phone to take a little video of the 2nd starting. Sorry for the very poor cameraman-ship!

http://www.cstone.net/~dk/MEP802Running01.mp4

So it's not making any power and none of the gauges seem to be working. I was hoping to put it under load before letting it run a while to seat the new rings and the hone job I did. So I need to troubleshoot why its not making power. This is the 2nd of the 5 units that I now have running, neither of which is making power. I should not that I'm using the control box from the other running unit that was not making power, so maybe I'll swap control boxes first to see if that takes care of it.

Anything else obvious I should check as far as why this thing isn't making power? I will of course verify with a volt meter that I have no voltage at the terminals either in case the volt meter is bad. In a way, I hope that's all it is, but I probably won't be that lucky.
 
Last edited:

Another Ahab

Well-known member
17,841
4,198
113
Location
Alexandria, VA
So it's not making any power and none of the gauges seem to be working. I was hoping to put it under load before letting it run a while to seat the new rings and the hone job I did. So I need to troubleshoot why its not making power. This is the 2nd of the 5 units that I now have running, neither of which is making power. I should not that I'm using the control box from the other running unit that was not making power, so maybe I'll swap control boxes first to see if that takes care of it.
But other than all that, are you happy with what you got!???
 

pclausen

Well-known member
Steel Soldiers Supporter
452
281
63
Location
Afton, VA
But other than all that, are you happy with what you got!???
Absolutely! It means that I got the timing of the injectors pumps done correctly and everything else related to the engine itself. Can't wait to get the rest of the panels put on to see how quiet it will be. It's already much much quieter than my 003 monster.
 
Top
AdBlock Detected

We get it, advertisements are annoying!

Sure, ad-blocking software does a great job at blocking ads, but it also blocks useful features of our website like our supporting vendors. Their ads help keep Steel Soldiers going. Please consider disabling your ad blockers for the site. Thanks!

I've Disabled AdBlock
No Thanks