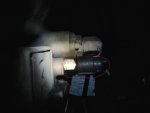
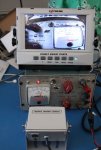
Here are the pictures I promised of the backup camera system. I ended up getting a demo unit at a discount, so it's painted in the favorite color of the customer they were trying to woo instead of the usual black. I'm tempted to repaint it 383 green, but then I'll need to re-do the button markings on the monitor.
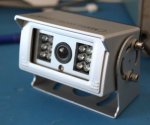
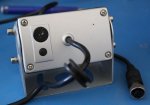
Both the camera and monitor are wrapped in die-cast metal cases. They're heavier and sturdier than they look!
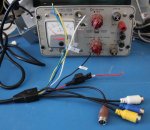
The camera has a single cable with a 4-pin connector which carries both video and power. A button on the back allows the IR light to be adjusted in some undocumented way that I'll need to experiment with. A screw-in magnetic plug on the back controls whether the camera mirrors its video output; install or remove it to get the desired mode.
The monitor has a single cable about a meter long. It ends in four 4-pin connectors for cameras, two leads (one fused) for power supply, and four trigger leads which tell the monitor to switch to the corresponding camera when the leads get powered. For example, lead 1 can connect to the reverse light switch to tell the monitor to turn on and select camera 1 for backing up; 3 and 4 can connect to the left/right turn signals if side cameras are used, and then 2 can be used for another function. The manual is in Engrish, and doesn't fully describe everything. It includes a mounting bracket, a remote control, a shock-absorbing pad to be used with the bracket, and a plastic sun shield that can be mounted on the front of the monitor. Buttons on the front of the monitor allow setup, selection of individual cameras, split view with cameras 3/4, or quad-view with all four cameras. The monitor can be left in standby mode, and then it'll only power up when trigger leads get energized.
I also got a couple of camera extension cables in different lengths. The 4-pin connectors appear to be environmentally sealed, and one end of the cable has a vinyl boot that can be slid over the finished connection. I haven't tried identifying the connector make/model yet.
The camera view is a bit fisheyed due to the wide angle. I haven't tried it on my truck yet; I'll test-fit it with a big magnet to see if I like the viewpoint before I drill any holes. My target location is under the bed, just above the trailer hitch. I haven't chosen a location in the cab for the monitor yet. I want to consider all of the various things I plan to do so everything will fit in well.
The company was a bit disorganized in dealing with me. I think they're used to dealing with Big Contracts going to Big Companies, as opposed to selling single units to individuals. The sales guy mentioned customers he visits which would sound quite familiar to most folks on this forum.
")
I think that the system is going to work out well, and I'll document the installation here and on my web page in the future.