• Steel Soldiers now has a few new forums, read more about it at: New Munitions Forums!

  • Microsoft MSN, Live, Hotmail, Outlook email users may not be receiving emails. We are working to resolve this issue. Please add support@steelsoldiers.com to your trusted contacts.


Stuck ujoints

ldmack3

Well-known member
Steel Soldiers Supporter
849
1,739
93
Location
N. Central Idaho
I heard a rattling sound last drive and discovered a ujoint on the propeller shaft connecting two real diffs was gone. Surprised I made it home. Pulled the shaft and pounded out both of the ujoints. (Tap my arse!) They were snap ring type. Decided when I get my new parts and build it up I will take to have it balanced while it's out.

Checked the next propeller shaft, transfer to forward rear axle, and ujoints were sloppy but not as bad. Pulled it to replace and have balanced.
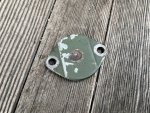
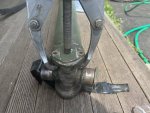
The second shaft is the bearing cap type. Pulled the bolts and keepers and broke the cap flange off trying to pry one out. Per the TM this happens, just go to the other side and pull the bearing cap then pound the other one out. It broke off too. Caps are stuck bad. Drilled hole in one, slid a small rod through the ujoint to try and drive off the other broken cap. No joy

Need some advice before I get too crazy. I have all of them soaking in kroil but need a better plan.


07E9E663-BC7D-4B0C-B798-2E5FBE57ECA1.jpegE3464306-E6AA-4DE8-814B-71B7F5310084.jpegDC0EDCDF-C97D-433D-8049-1B68A2A46D55.jpeg
 
  • Wow
Reactions: HDN

ldmack3

Well-known member
Steel Soldiers Supporter
849
1,739
93
Location
N. Central Idaho
My other shaft is the snap ring type. It’s done. I’ve had it for almost 2 years, put less than 250 miles on it and lubed it 3 times Making sure I got everything.
 

INFChief

Well-known member
721
1,343
93
Location
New York
The Tiger tool is the best option. I avoid putting heat on things like that. I used a 2 jaw puller on mine. Pushed the joint right through, removed the one exposed cap, then put the puller on the other side - lined up the opposite cap straight in the bore - and pushed the u-joint back so I could remove the drive shaft.
 

ldmack3

Well-known member
Steel Soldiers Supporter
849
1,739
93
Location
N. Central Idaho
The Tiger tool is the best option. I avoid putting heat on things like that. I used a 2 jaw puller on mine. Pushed the joint right through, removed the one exposed cap, then put the puller on the other side - lined up the opposite cap straight in the bore - and pushed the u-joint back so I could remove the drive shaft.
Did you use your Tiger on a snapring or bearing cap type? How did you get the cap off? That's the challenge. With the caps off worst case is I take it to my local shop and them press them out.
 

INFChief

Well-known member
721
1,343
93
Location
New York
Did you use your Tiger on a snapring or bearing cap type? How did you get the cap off? That's the challenge. With the caps off worst case is I take it to my local shop and them press them out.
Keep in mind that I’m throwing away this u-joint. I knocked the flat retaining strap off so I had access to the y-joint cap. I removed the 2 retaining bolts from the u-joint cap retaining strap on the opposite side.

Then, I used a 2 jaw puller to drive the u-joint. I slid the jaws under the u-joint flange and placed the threaded rod on the u-joint cap. As I tightened the puller the threaded bolt pushed the cap in towards the center of the yolk and drove the far u-joint cap (opposite side of the yolk) out the back side of the yolk. Once I removed the back side U-joint cap I put the puller on that side and drive the u-joint back out the other side until I could remove that cap.

The picture shows the cap on but I just took this photo to illustrate what I did. You can see the u-joint retaining cap that I knocked off in the other photo.
 

Attachments

Last edited:

ldmack3

Well-known member
Steel Soldiers Supporter
849
1,739
93
Location
N. Central Idaho
Keep in mind that I’m throwing away this u-joint. I knocked the flat retaining strap off so I had access to the y-joint cap. I removed the 2 retaining bolts from the u-joint cap retaining strap on the opposite side.

Then, I used a 2 jaw puller to drive the u-joint. I slid the jaws under the u-joint flange and placed the threaded rod on the u-joint cap. As I tightened the puller the threaded bolt pushed the cap in towards the center of the yolk and drove the far u-joint cap (opposite side of the yolk) out the back side of the yolk. Once I removed the back side U-joint cap I put the puller on that side and drive the u-joint back out the other side until I could remove that cap.

The picture shows the cap on but I just took this photo to illustrate what I did. You can see the u-joint retaining cap that I knocked off in the other photo.
Thanks much! Did you also use the puller to install the new caps?
The forward caps literally fell off as soon as I started prying and tapping.
 

INFChief

Well-known member
721
1,343
93
Location
New York
Thanks much! Did you also use the puller to install the new caps?
The forward caps literally fell off as soon as I started prying and tapping.
I haven’t installed new u-joints. I’m taking the drive shaft to the drive line company so it can be checked out & balanced. They will install the new joints.

I haven’t thought that far ahead - but have toyed with using a big C clamp to press the new caps in to the yolk. That, or I’ll use 2 flat bars with a hole drilled in each end and use 2 long bolts and compress the bars together to effectively drive the caps in to the yolk.

What are your thoughts on those 2 ideas?
 

ldmack3

Well-known member
Steel Soldiers Supporter
849
1,739
93
Location
N. Central Idaho
I haven’t installed new u-joints. I’m taking the drive shaft to the drive line company so it can be checked out & balanced. They will install the new joints.

I haven’t thought that far ahead - but have toyed with using a big C clamp to press the new caps in to the yolk. That, or I’ll use 2 flat bars with a hole drilled in each end and use 2 long bolts and compress the bars together to effectively drive the caps in to the yolk.

What are your thoughts on those 2 ideas?
I tried using a C clamp but not enough power and my vise doesn't have enough jaw opening.
On the one end (the easy one) used a hammer and wood block working back and forth. I think angles would be needed for strength, not sure a flat bar would work. I may take the tight end to a local shop and have them press it in. Or I may make a trip to Harbor Freight and buy a cheap press. Need to do some tranny work this summer and need one anyway.
 

ldmack3

Well-known member
Steel Soldiers Supporter
849
1,739
93
Location
N. Central Idaho
Northern tool has a 12 ton press on sale for $129+free freight. Cheap and short (48" tall) but just what I need for the few projects I have coming up. Ordered.


ldmack3

Well-known member
Steel Soldiers Supporter
849
1,739
93
Location
N. Central Idaho
All done but neglected to take a pic before removal. Does it matter which end of the driveshaft goes on the aft rear axle? Can't find a pic in parts or 209-20.
 

rustystud

Well-known member
9,071
2,388
113
Location
Woodinville, Washington
All done but neglected to take a pic before removal. Does it matter which end of the driveshaft goes on the aft rear axle? Can't find a pic in parts or 209-20.
Usually the slip joint goes "up" . That is to prevent debris and water settling in to the slip joint. So if your installing the shaft between the differentials, then point the slip joint towards the front of the truck.
 
Top
AdBlock Detected

We get it, advertisements are annoying!

Sure, ad-blocking software does a great job at blocking ads, but it also blocks useful features of our website like our supporting vendors. Their ads help keep Steel Soldiers going. Please consider disabling your ad blockers for the site. Thanks!

I've Disabled AdBlock
No Thanks