Picked up a set of used standard WARN Dana 60 30 spline hubs off ebay for $100. I also picked up a WARN 11714 Rebuild kit off Amazon for 33 bucks that includes new gaskets, lockrings, allen head bolts and stickers for both sides.
I dug through all the videos online and all the instructions I could find (including the ones that came with the rebuild kit) and still had/have a few questions.
So... I thought I would post up what I did... it seemed to all go together cleanly, in the hopes that I got it right... and if anybody has any suggestions / modifications I missed I would greatly appreciate hearing about it. But I thought this might also help others who are considering changing out their factory hubs to the WARN versions. So here goes!
Step 1: Remove the star head bolts from the m1008 factory caps. I lucked out and had one of these star bits in my Harley toolkit:
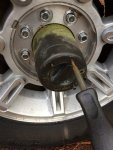
Pull the cap out, the inside looks like this:
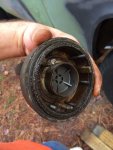
Step 2: Pull lock ring from the inside of the hub, mine was loaded with gunky brown grease... not sure if it was just age or what... but the stuff didnt look all red and purdy like I would have expected. I pulled a good bit off the inner ring to find the holes.
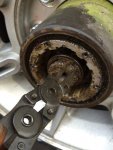
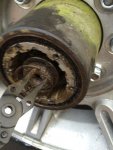
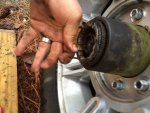
Step 3: Next you need to pull the outside lockring off the original hub. This was the least obvious part of the whole thing. I thought I would have to remove the whole hub since I couldn't see the ring... but after prodding with a pick I found the lip did in fact have a ring with an opening I could push in and pick at. I found the best way was to push the inner hub in, then push a pick down into the opening of the retainer ring while using a flathead screwdriver about an inch down from the opening to get under the ring and leverage it up. Once you get it started you just run the pick around the ring and it comes right out. (Sorry for the blur... I was getting grease on EVERYTHING
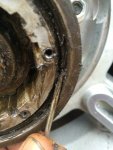
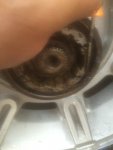
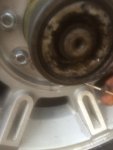
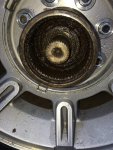
Now the internals with springs can come out... I used the original screws to thread into the hub and make it easier to shimmy out. When I pulled it all I was left with a nice clear hole:
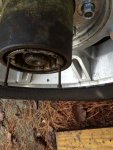
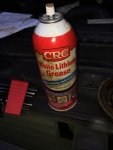
Step 3: Now to put the new WARN Standard Hub into place. It has far less pieces, The Big internal splined hub, the internal and external lockring and the external locking cover. I started by taking the internal hub piece and applying a liberal sheen of lithium grease based on a Youtube video recommendation and then installing. I found you may need to jiggle the internal splined component to get it to slide in:
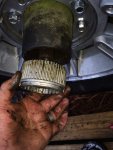
Step 4: Once you have slide the mechanism into the carrier you need to install the internal retaining ring:
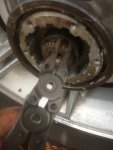
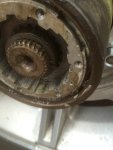
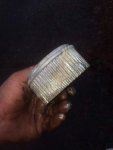
Step 5: This was one of the tricky parts. Not sure I did it right either. From the videos I saw it claimed that you have to slide the external lockring into the gap between the carrier and the hub mechanism and then slowly work it around. I messed with this for about 20 minutes until I realized I could gently use a flat head screwdriver and just angle the ring in while working around it about an inch at a time. This appeared to set in just as the other guys would after sliding it around without the madness.... I also took a tip from the videos online and bent the end of the ring up just a few degrees so I could get a needlenose pliers on the ring if I needed to pull it out in the future for service.
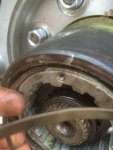
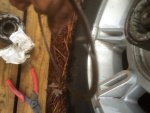

Step 6: Thats the big stuff, last I replaced the gasket on the outer locking cover, and installed the cover with the allen bolts that came with the kit. I found tightening it by hand in a star pattern brought it down slowly and seemed like it got to tight without overcranking anything. But Ill keep an eye on them for awhile too. Oh, and it only goes in where the 3 tabs are set in the hub, if you look at the inside of the locking cover and the markings on the inside of the hub the three tabs will line up and allow you to attach the cover. NOTE: make sure the cover is in the UNLOCKED position when you attach it to the hub. I have no idea what the difference is, but this is all over the documentation.
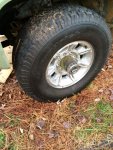
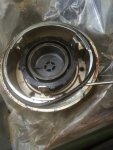
Anyway, that is it... a Dana 60 30 Spline WARN hub install. If anybody sees anything I did wrong please let me know... I had a devil of a time putting together the instructions to replace these parts and would love any insight. Hope it helps!
I dug through all the videos online and all the instructions I could find (including the ones that came with the rebuild kit) and still had/have a few questions.
So... I thought I would post up what I did... it seemed to all go together cleanly, in the hopes that I got it right... and if anybody has any suggestions / modifications I missed I would greatly appreciate hearing about it. But I thought this might also help others who are considering changing out their factory hubs to the WARN versions. So here goes!
Step 1: Remove the star head bolts from the m1008 factory caps. I lucked out and had one of these star bits in my Harley toolkit:

Pull the cap out, the inside looks like this:

Step 2: Pull lock ring from the inside of the hub, mine was loaded with gunky brown grease... not sure if it was just age or what... but the stuff didnt look all red and purdy like I would have expected. I pulled a good bit off the inner ring to find the holes.


Step 3: Next you need to pull the outside lockring off the original hub. This was the least obvious part of the whole thing. I thought I would have to remove the whole hub since I couldn't see the ring... but after prodding with a pick I found the lip did in fact have a ring with an opening I could push in and pick at. I found the best way was to push the inner hub in, then push a pick down into the opening of the retainer ring while using a flathead screwdriver about an inch down from the opening to get under the ring and leverage it up. Once you get it started you just run the pick around the ring and it comes right out. (Sorry for the blur... I was getting grease on EVERYTHING


Now the internals with springs can come out... I used the original screws to thread into the hub and make it easier to shimmy out. When I pulled it all I was left with a nice clear hole:


Step 3: Now to put the new WARN Standard Hub into place. It has far less pieces, The Big internal splined hub, the internal and external lockring and the external locking cover. I started by taking the internal hub piece and applying a liberal sheen of lithium grease based on a Youtube video recommendation and then installing. I found you may need to jiggle the internal splined component to get it to slide in:


Step 4: Once you have slide the mechanism into the carrier you need to install the internal retaining ring:


Step 5: This was one of the tricky parts. Not sure I did it right either. From the videos I saw it claimed that you have to slide the external lockring into the gap between the carrier and the hub mechanism and then slowly work it around. I messed with this for about 20 minutes until I realized I could gently use a flat head screwdriver and just angle the ring in while working around it about an inch at a time. This appeared to set in just as the other guys would after sliding it around without the madness.... I also took a tip from the videos online and bent the end of the ring up just a few degrees so I could get a needlenose pliers on the ring if I needed to pull it out in the future for service.


Step 6: Thats the big stuff, last I replaced the gasket on the outer locking cover, and installed the cover with the allen bolts that came with the kit. I found tightening it by hand in a star pattern brought it down slowly and seemed like it got to tight without overcranking anything. But Ill keep an eye on them for awhile too. Oh, and it only goes in where the 3 tabs are set in the hub, if you look at the inside of the locking cover and the markings on the inside of the hub the three tabs will line up and allow you to attach the cover. NOTE: make sure the cover is in the UNLOCKED position when you attach it to the hub. I have no idea what the difference is, but this is all over the documentation.


Anyway, that is it... a Dana 60 30 Spline WARN hub install. If anybody sees anything I did wrong please let me know... I had a devil of a time putting together the instructions to replace these parts and would love any insight. Hope it helps!


